# 使用 OAuth 授权

Node.JS Demo 源码:https://github.com/Authing/oauth-demo

# 使用授权码(Authorization Code Flow)模式

以下时序图展示了一种 OAuth2.0 授权码模式的处理方式。

授权码模式流程图

# 01 - 在控制台配置 OAuth2.0 Provider

如果你还没有创建应用,请先在控制台 > 应用 > 应用列表,点击右上角的按钮「创建应用」。

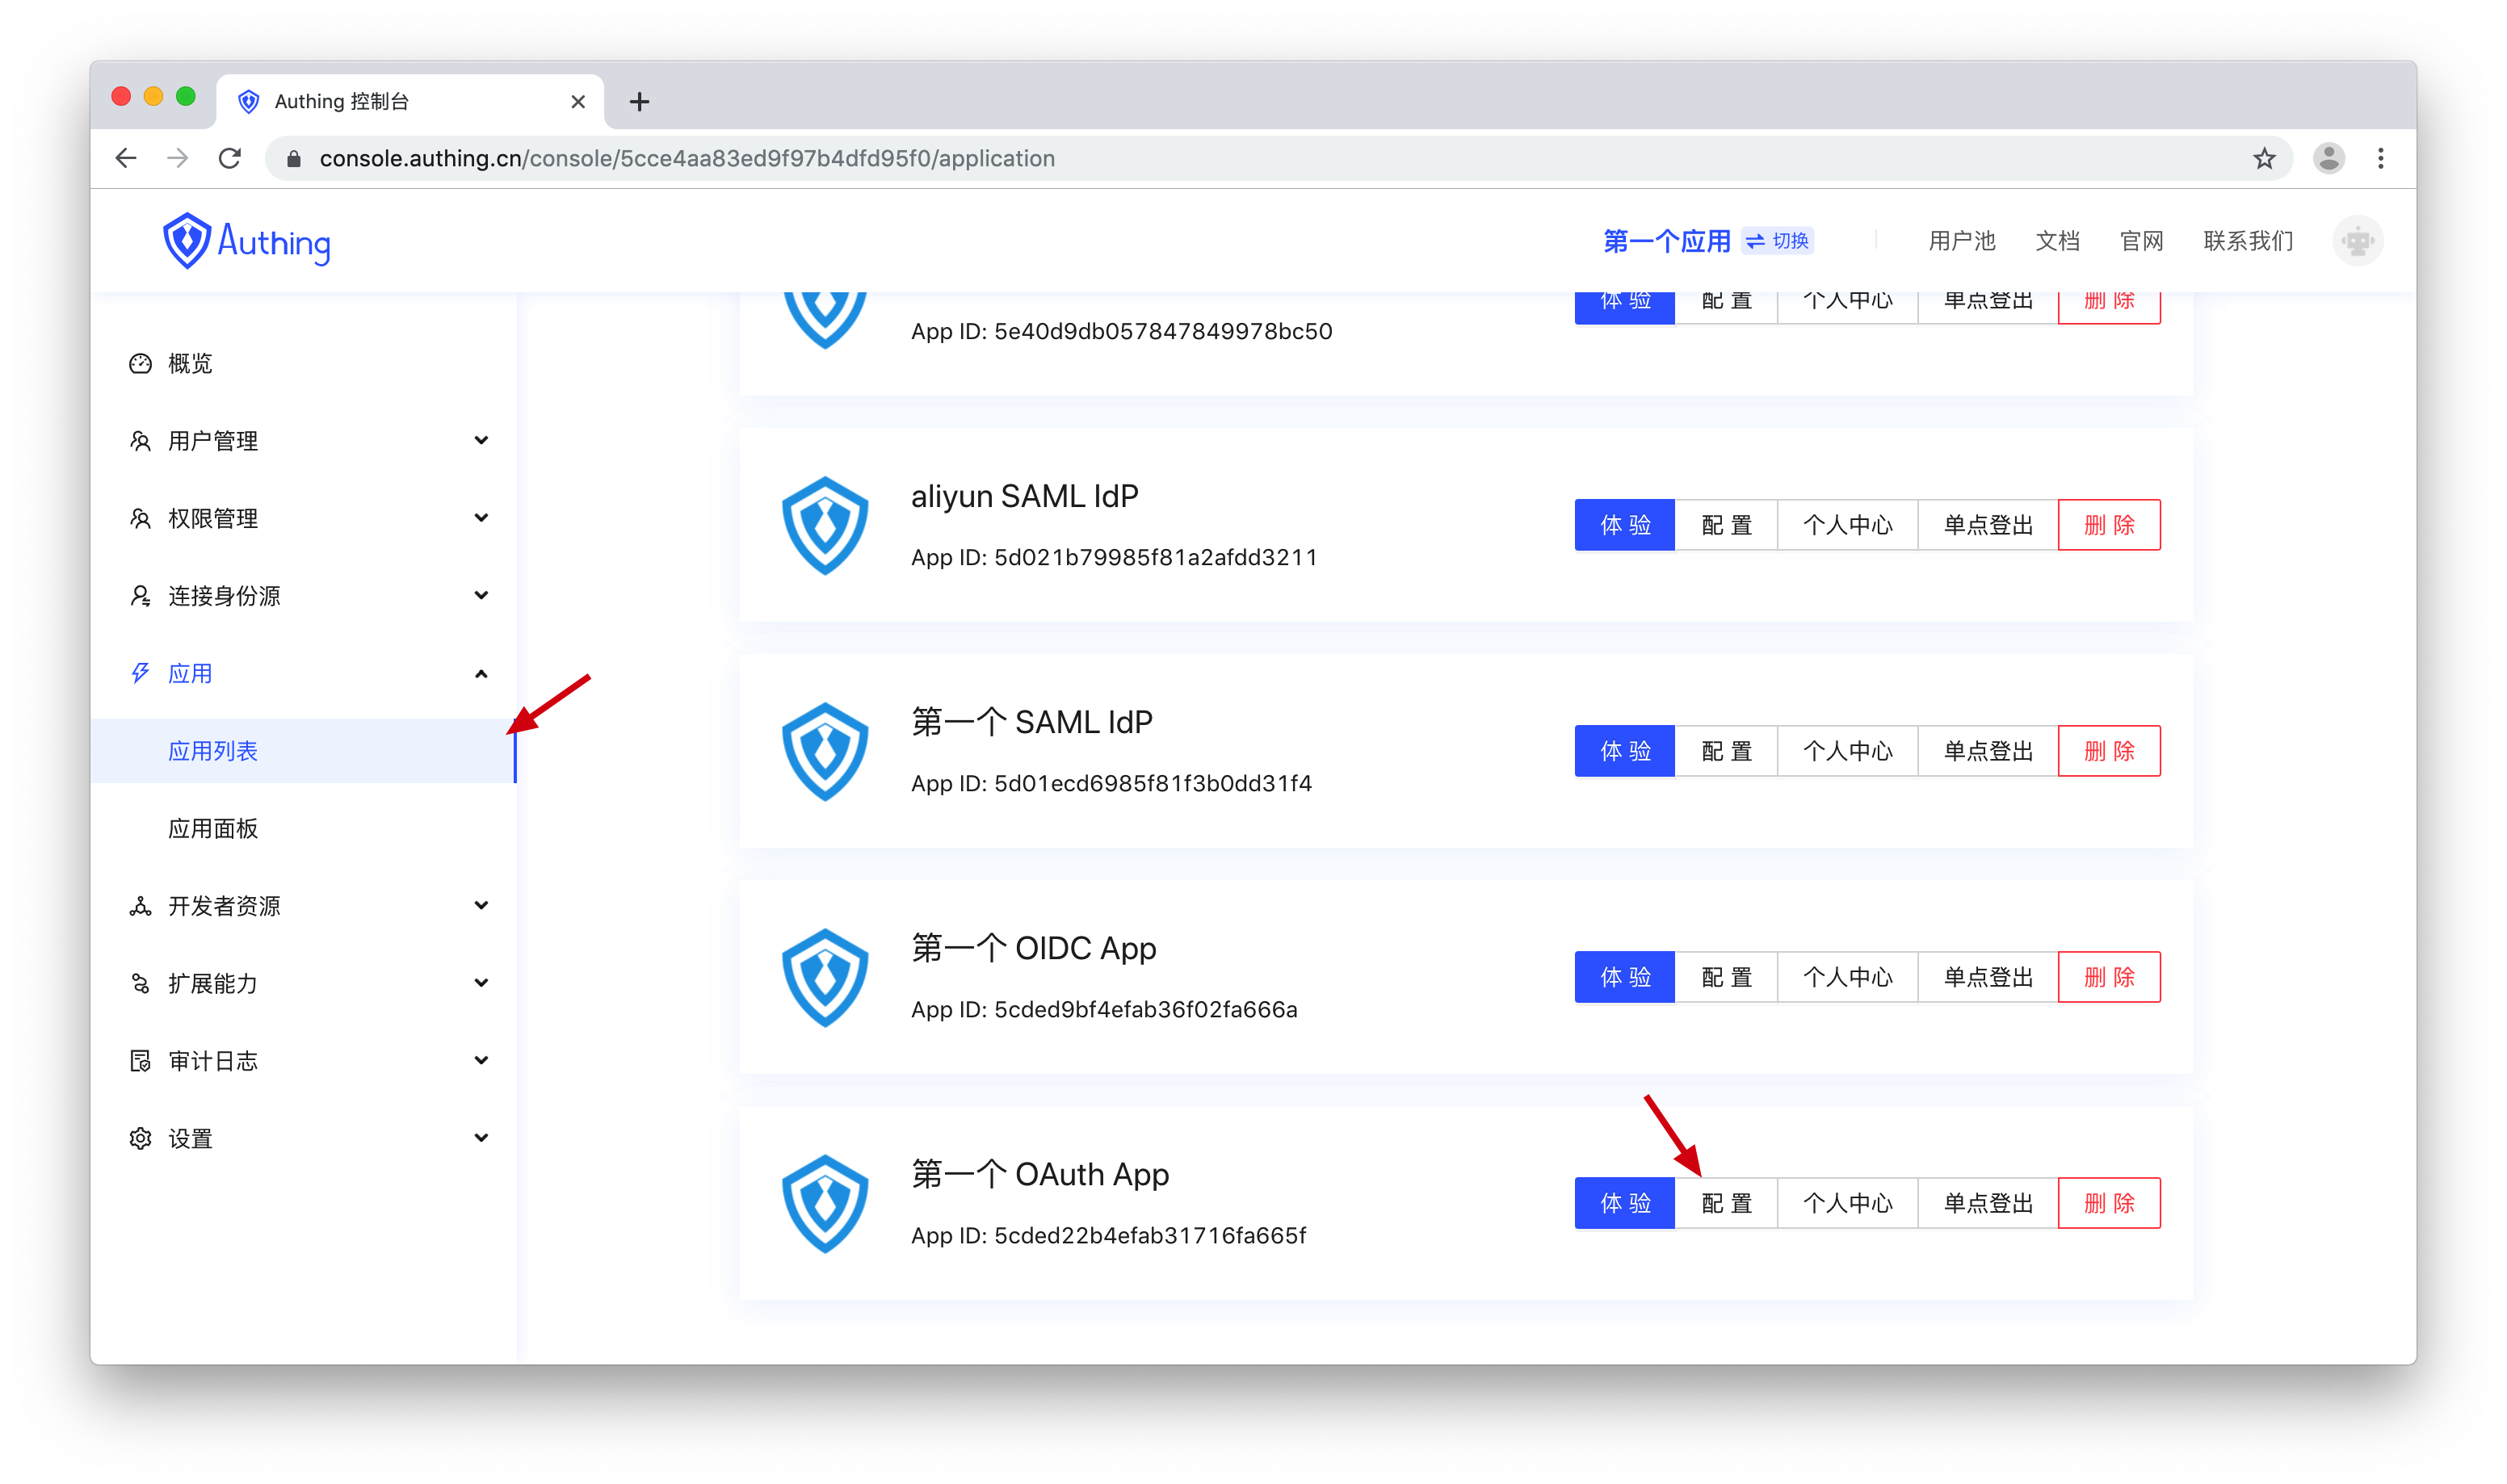
进入控制台 > 应用 > 应用列表,找到你的应用,点击「配置」。

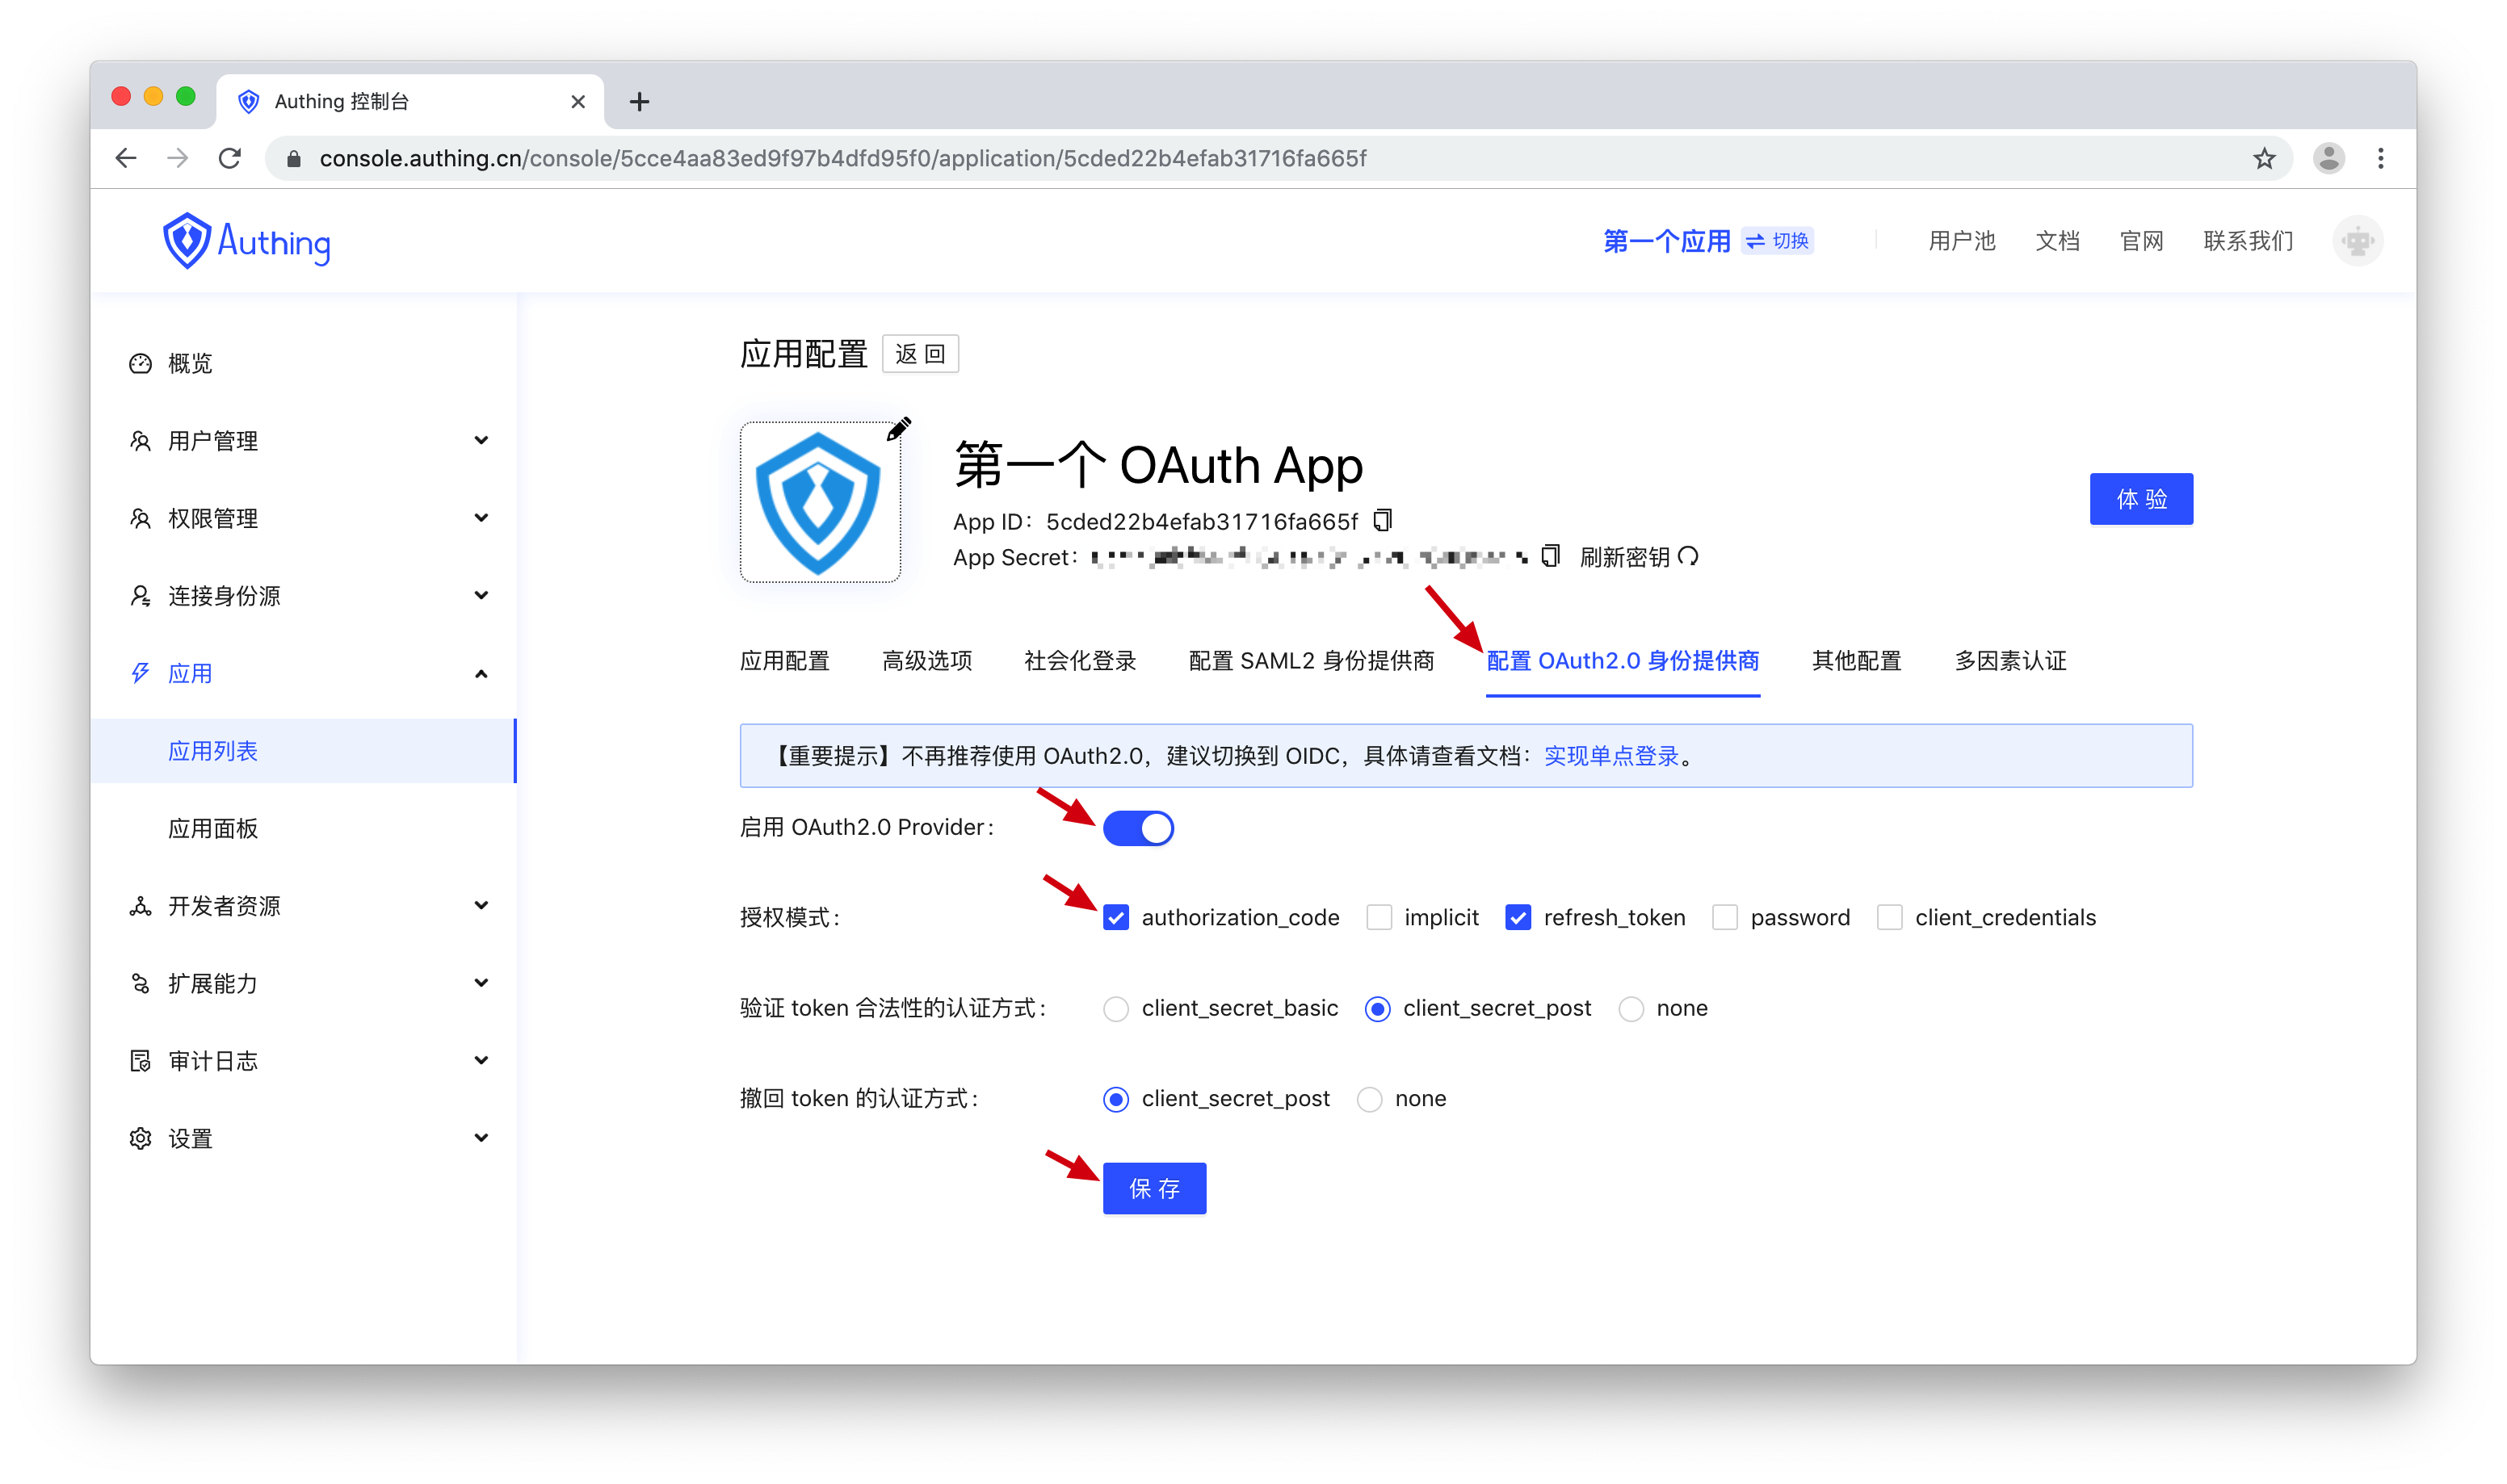
在「配置OAuth2.0 身份提供商」选项卡,打开「启用 OAuth2.0 Provider 」开关,然后在下方的授权模式中,打开 authorization_code 模式,然后点击「保存」。

# 02 - 发起登录请求

GET
https://<你的应用域名>.authing.cn/oauth/auth

拼接一个链接并让终端用户在浏览器中访问,发起 OAuth2.0 授权登录请求。

发起授权需要拼接一个用来授权的 URL,并让终端用户在浏览器中访问,具体参数如下:

Query Parameters
client_id
REQUIRED
string

应用 ID。

redirect_uri
REQUIRED
string

回调链接,用户在 OP 认证成功后,OP 会将授权码以 URL query 的形式发送到这个地址。这个值必须出现在控制台配置的回调地址中,否则 OP 不允许向该地址回调。

scope
OPTIONAL
string

需要请求的权限,暂未实现,请填写 user。

response_type
REQUIRED
string

返回类型,此处必须填 code。用于登录成功后,指定 OP 要返回哪些信息,如果指定为 code,OP 会返回授权码 code,还可以指定为 token,OP 会返回用户的 access_token,此种方式请参见下面的 implicit 模式章节。

state
REQUIRED
string

一个随机字符串,用于防范 CSRF 攻击,如果 response 中的 state 值和发送请求之前设置的 state 值不同,说明受到攻击。

请求示例:

https://<你的应用域名>.authing.cn/oauth/auth?client_id=5c9b079883e333d55a101082&redirect_uri=https://www.example.cn/example&scope=user&response_type=code&state=52378542395

# 03 - 用户登录

发起 OAuth2.0 登录之后,如果用户先前未在 OP 登录过,OP 会将用户重定向到登录页面,引导用户完成在 OP 的认证,此时用户需要选择一种方式进行登录:

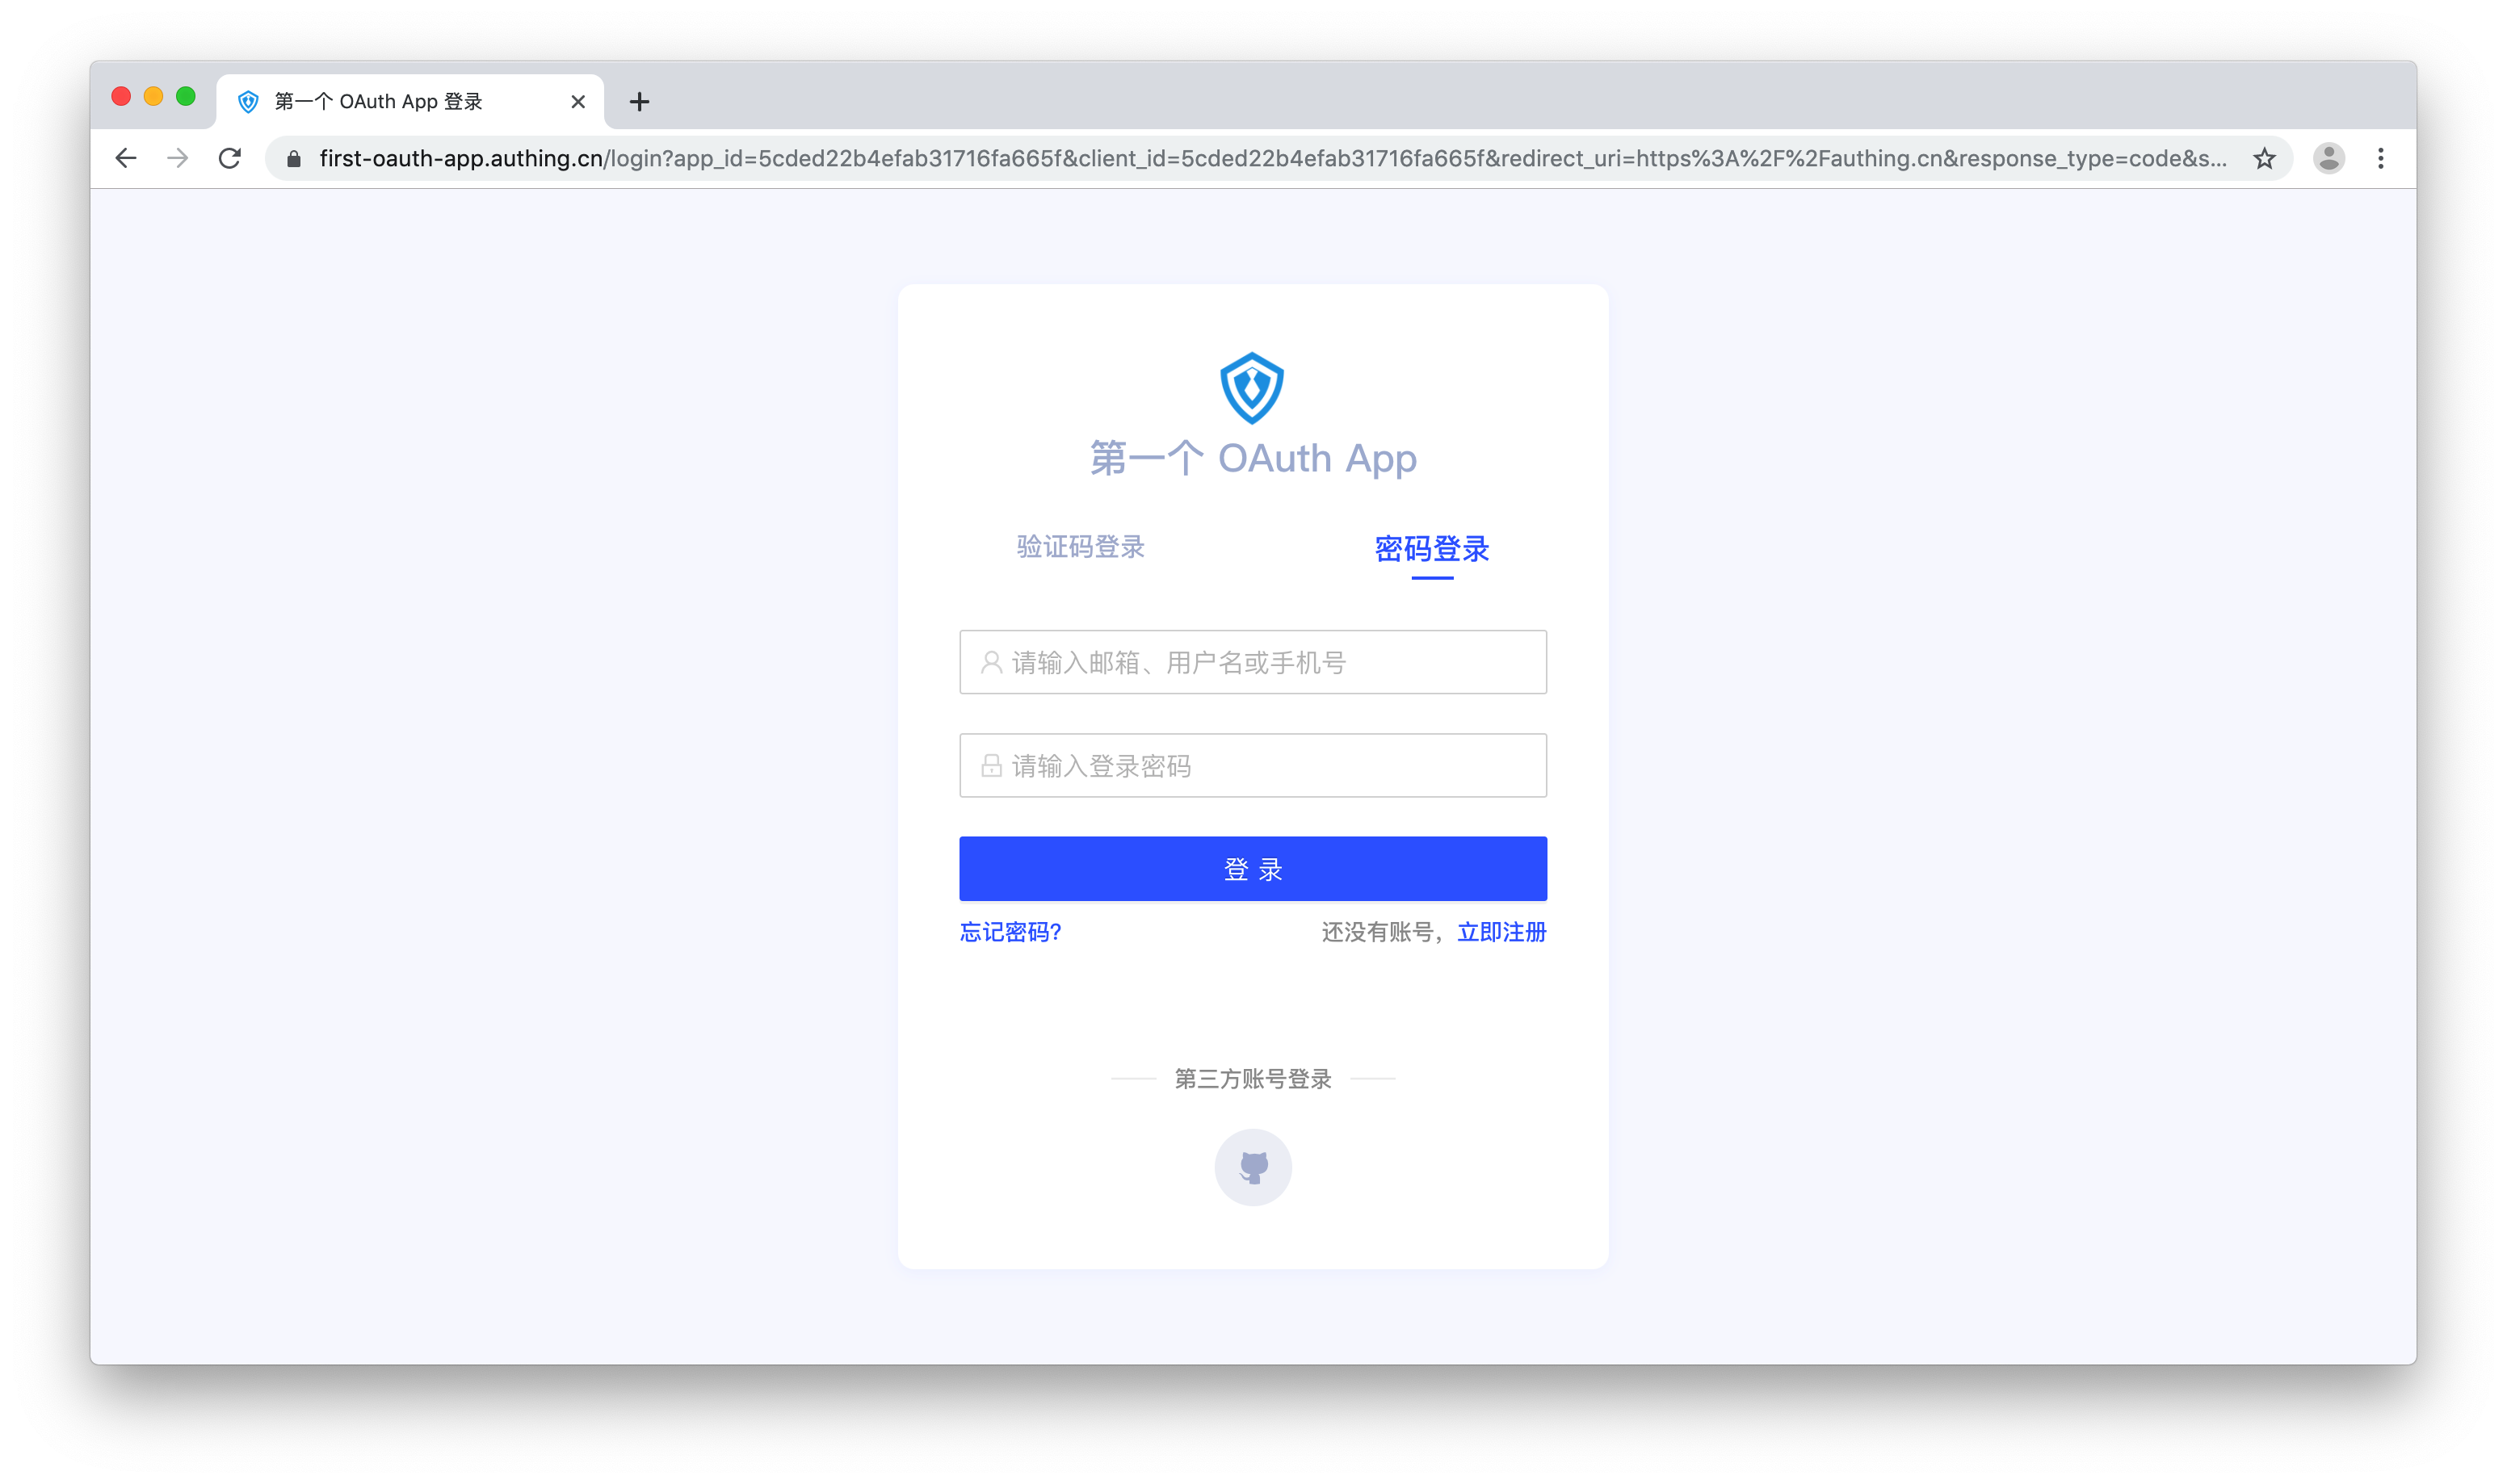
你可以前往这个网址体验:https://first-oauth-app.authing.cn/login (opens new window)

用户登录

Authing 将验证此用户是否合法,验证通过后会将浏览器重定向到发起授权登录请求时指定redirect_uri 并通过 URL query 传递授权码 code 参数。

# 04 - 使用 code 换取 token

换取 token 时需要将 OAuth2.0 Provider 的凭证信息发送给 Authing。OAuth2.0 Provider 支持两种换取 token 时的认证方式。

POST
https://<你的应用域名>.authing.cn/oauth/token

client_secret_post 方式换取 token

将应用 ID 和应用密钥通过 POST Body 发送到 OAuth2.0 token 端点。

Headers
Content-Type
REQUIRED
string

application/x-www-form-urlencoded

Form Data Parameters
client_id
REQUIRED
string

应用 ID

client_secret
REQUIRED
string

应用 Secret

grant_type
REQUIRED
string

authorization_code

redirect_uri
REQUIRED
string

发起 OAuth2.0 授权登录时的 redirect_uri 值,必须与发起登录请求时的参数一致

code
REQUIRED
string

获取到的授权码,一个 code 仅限一次性使用,用后作废,有效期 10 分钟

200: OK
{
  "access_token": "de60825d1bffd91474e9ac6a08a84bdc71f7f404",
  "token_type": "Bearer",
  "expires_in": 3599,
  "refresh_token": "c0b0b4acd686d30bb8b26dae73c2e64c1cec6698",
  "scope": "user"
}

NodeJS code 换取 token 请求示例代码:

let code2tokenResponse;
try {
  code2tokenResponse = await axios.post(
    "https://<你的应用域名>.authing.cn/oauth/token",
    qs.stringify({
      code,
      client_id: appId,
      client_secret: appSecret,
      grant_type: "authorization_code",
      redirect_uri,
    }),
    {
      headers: {
        "Content-Type": "application/x-www-form-urlencoded",
      },
    }
  );
} catch (error) {
  ctx.body = error.response.data;
  return;
}

使用 curl 发送请求示例:

curl --location --request POST 'https://<你的应用域名>.authing.cn/oauth/token' \
--header 'Content-Type: application/x-www-form-urlencoded' \
--data-urlencode 'code=61yhuOVrgyhKlFTU~bnEKA_fnnz' \
--data-urlencode 'client_id=5e37979f7b757ead14c534af' \
--data-urlencode 'client_secret=64b517f8de3648091654eb4ee9b479d3' \
--data-urlencode 'grant_type=authorization_code' \
--data-urlencode 'redirect_uri=https://baidu.com'

返回示例:

{
  "access_token": "de60825d1bffd91474e9ac6a08a84bdc71f7f404",
  "token_type": "Bearer",
  "expires_in": 3599,
  "refresh_token": "c0b0b4acd686d30bb8b26dae73c2e64c1cec6698",
  "scope": "user"
}
POST
https://<你的应用域名>.authing.cn/oauth/token

client_secret_basic 方式换取 token

client_secret_basic 是使用 HTTP Basic authentication 模式进行认证。

Headers
Authorization
REQUIRED
string

Basic NWNhNzY1ZTM5MzE5NGQ1ODxxxx

Content-Type
REQUIRED
string

application/x-www-form-urlencoded

Form Data Parameters
grant_type
REQUIRED
string

authorization_code

redirect_uri
REQUIRED
string

发起 OAuth2.0 授权登录时的 redirect_uri 值,这个参数不能随意填写,必须与发起登录请求时的参数一致。

code
REQUIRED
string

获取到的授权码,一个 code 仅限一次性使用,用后作废,有效期 10 分钟。

200: OK
{
  "access_token": "de60825d1bffd91474e9ac6a08a84bdc71f7f404",
  "token_type": "Bearer",
  "expires_in": 3599,
  "refresh_token": "c0b0b4acd686d30bb8b26dae73c2e64c1cec6698",
  "scope": "user"
}

其中 Authorization 请求头 Basic<空格> 后的值为 <client_id>:<client_secret> 的 base64 值。

# 05 - 刷新 token

POST
https://<你的应用域名>.authing.cn/oauth/token

使用 refresh_token 刷新用户的 access_token。

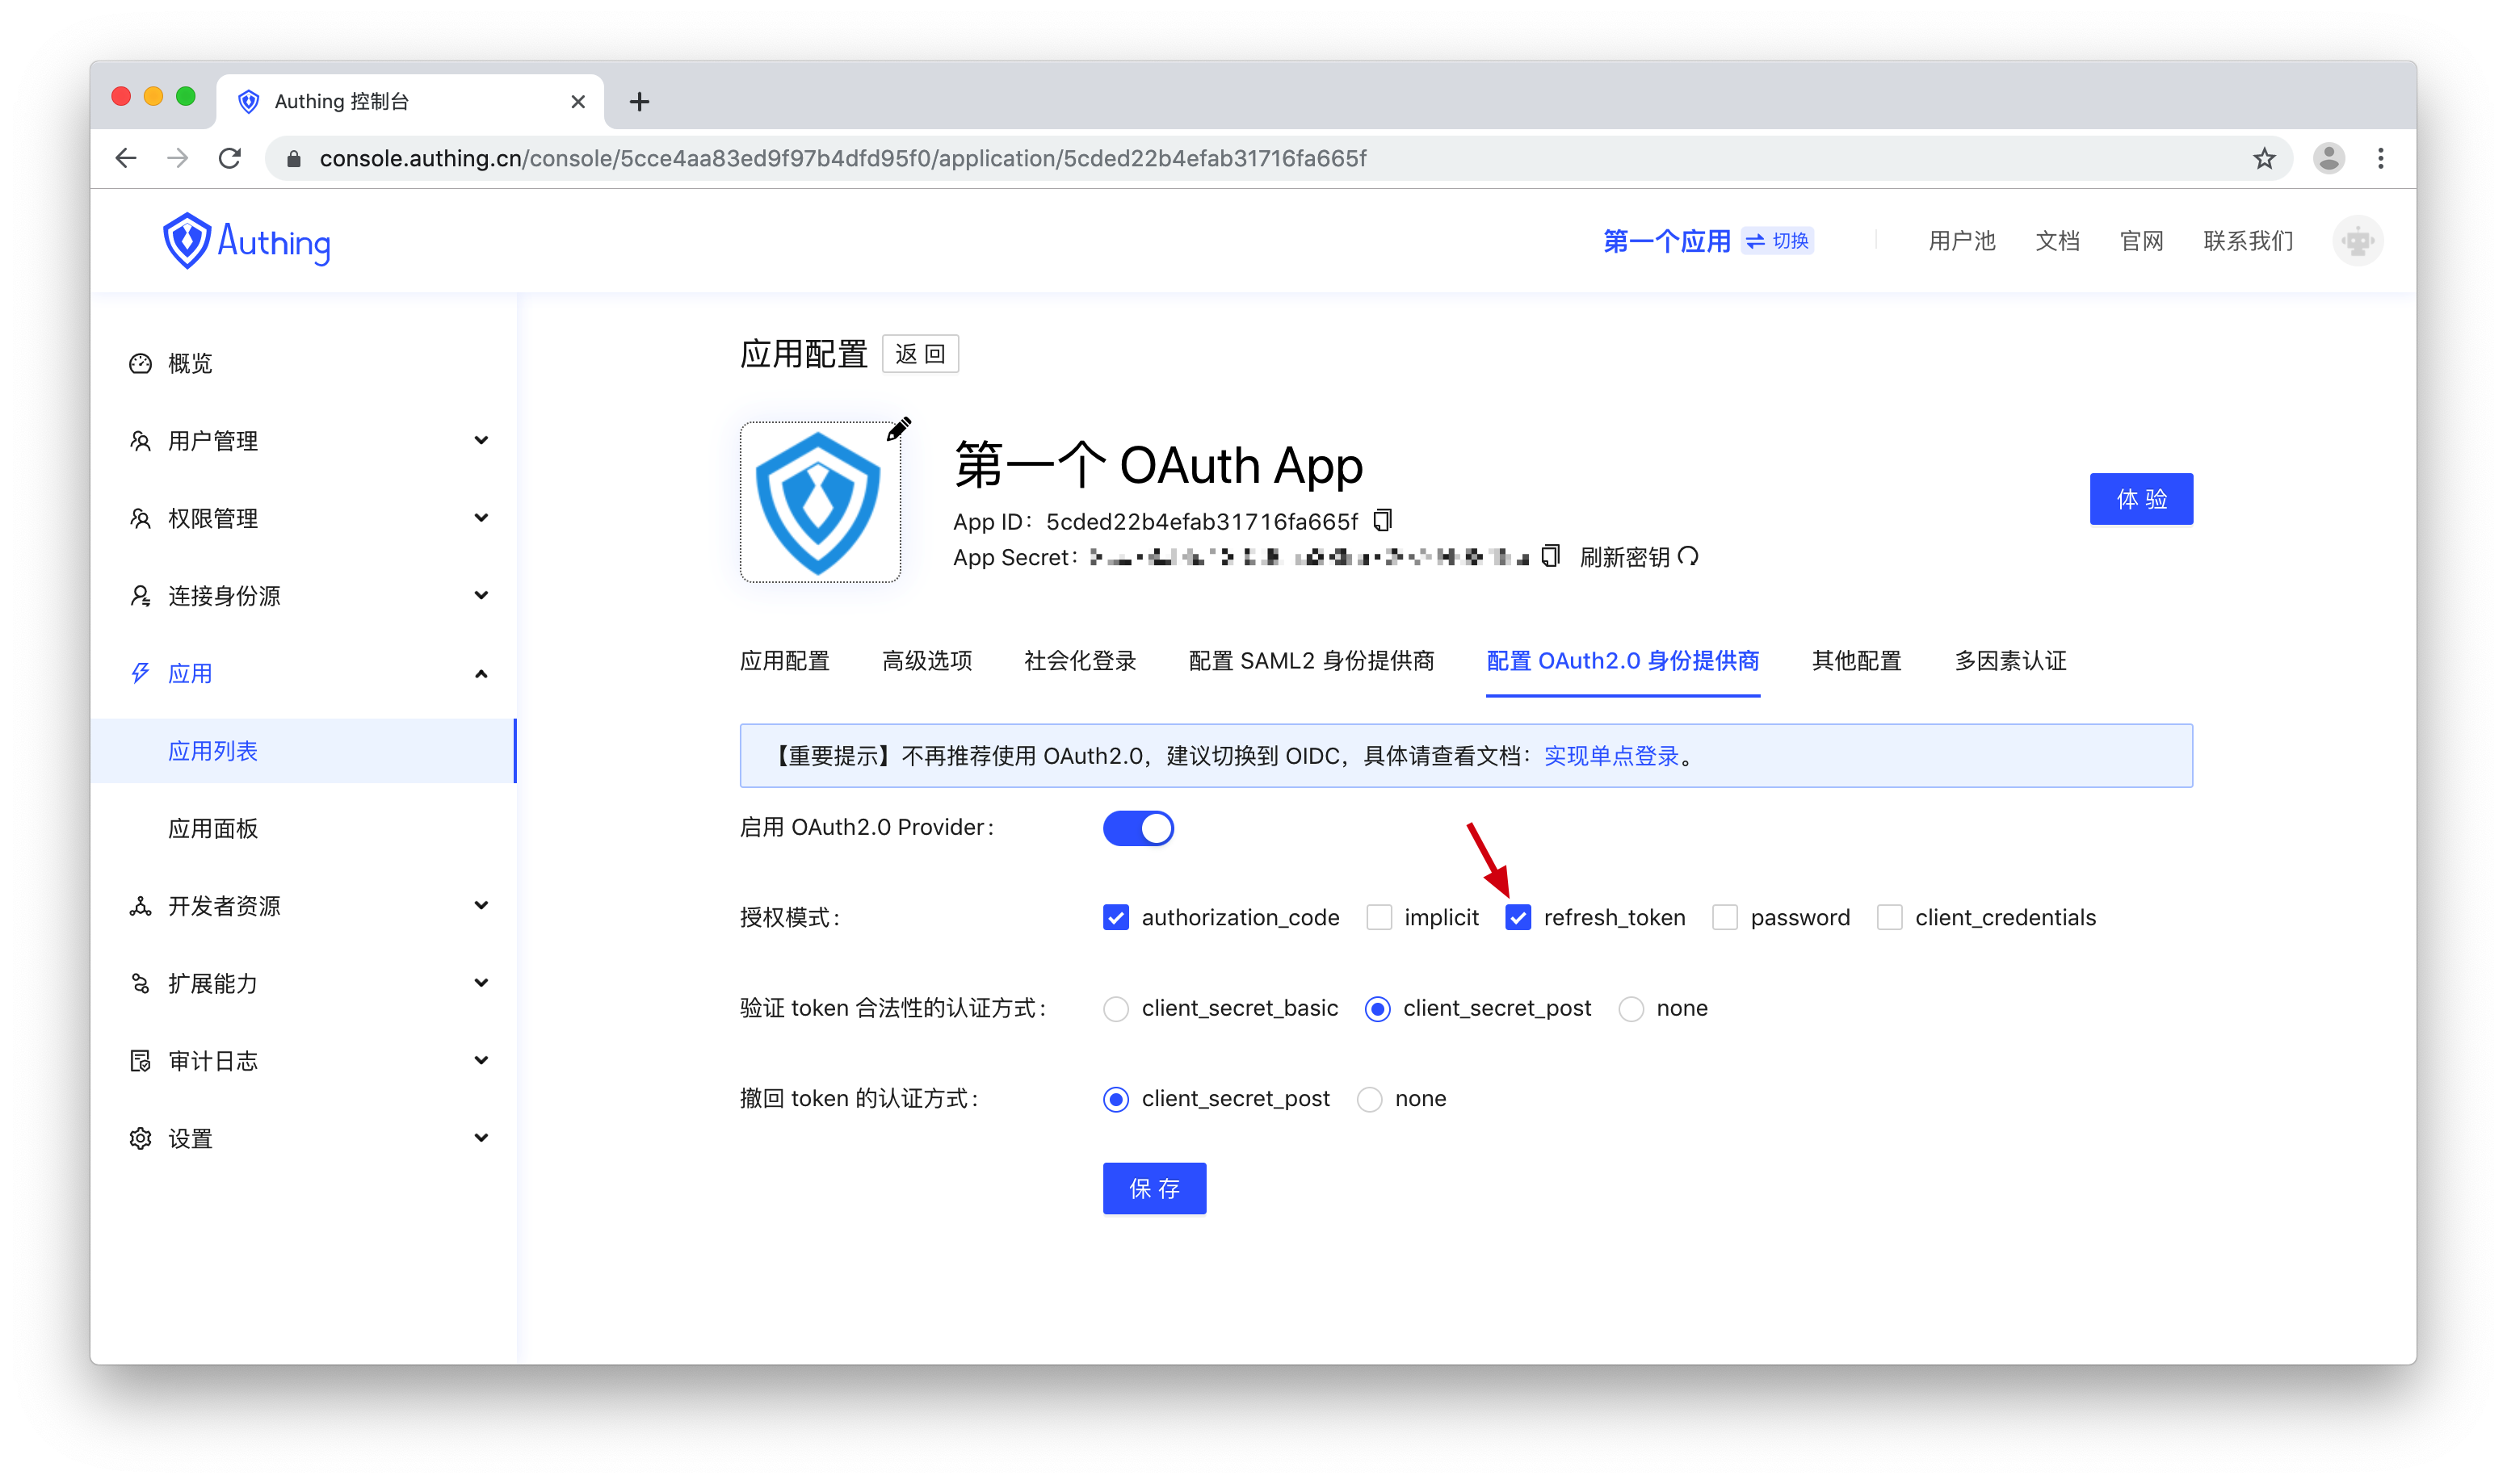
如需使用刷新 token 功能,需要进入控制台 > 应用 > 应用列表,找到你的应用,点击「配置」,在「配置 OAuth2.0 身份提供商」选项卡,授权模式中勾选 refresh_ token

refresh_token

Headers
Content-Type
REQUIRED
string

application/x-www-form-urlencoded

Form Data Parameters
client_id
REQUIRED
string

应用 ID。

client_secret
REQUIRED
string

应用 Secret。

grant_type
REQUIRED
string

refresh_token

refresh_token
REQUIRED
string

使用 code 换 token 时返回的 refresh_token。例:372c1205032a7f87d579f4db8655b17bc2422c5f

200: OK
{
  "access_token": "44c1628697b64f676ffb3f464ce47b7562b3c4df",
  "token_type": "Bearer",
  "expires_in": 3599,
  "refresh_token": "372c1205032a7f87d579f4db8655b17bc2422c5f",
  "scope": "user"
}

# 06 - 撤回 token

POST
https://<你的应用域名>.authing.cn/oauth/token/revocation

撤回 token

可以撤回 access_tokenrefresh_token

Headers
Content-Type
REQUIRED
string

application/x-www-form-urlencoded

Form Data Parameters
token
REQUIRED
string

要撤回的 token 值

token_type_hint
OPTIONAL
string

要撤回的 token 类型,可选值为 access_token、refresh_token

client_id
REQUIRED
string

应用 ID,必填

client_secret
OPTIONAL
string

应用 Secret,在控制台应用配置详情,「配置 OAuth2.0 身份提供商」选项卡中,配置撤回 token 身份验证方式为 client_secret_post 时必填

200: OK

无任何内容,HTTP 响应码为 200,代表撤回成功。

# 07 - 检验 token 状态

POST
https://<你的应用域名>.authing.cn/oauth/token/introspection

检验 token 状态

可以检测 access_token 的状态。

Headers
Content-Type
REQUIRED
string

application/x-www-form-urlencoded

Authorization
OPTIONAL
string

在控制台应用配置详情,「配置 OAuth2.0 身份提供商」选项卡中,配置检验 token 身份验证方式为 client_secret_basic 时必填,形式为:Basic base64(应用 ID + ':' + 应用 Secret)

Form Data Parameters
token
REQUIRED
string

要检验的 token 值

token_type_hint
OPTIONAL
string

要检验的 token 类型,可选值为 access_token。

client_id
OPTIONAL
string

应用 ID,在控制台应用配置详情,「配置 OAuth2.0 身份提供商」选项卡中,配置检验 token 身份验证方式为 client_secret_postnone 时必填

client_secret
OPTIONAL
string

应用 Secret,在控制台应用配置详情,「配置 OAuth2.0 身份提供商」选项卡中,配置检验 token 身份验证方式为 client_secret_post 时必填

200: OK

当 token 有效时返回以下格式内容

{
  "active": true,
  "sub": "5dc10851ebafee30ce3fd5e9",
  "client_id": "5cded22b4efab31716fa665f",
  "exp": 1602423020,
  "iat": 1602419420,
  "iss": "https://core.authing.cn/oauth",
  "jti": "SaPg48dbO66T77xkT8wy0",
  "scope": "user",
  "token_type": "Bearer"
}

当 token 无效时(过期,错误,被撤回)返回以下格式内容

{
  "active": false
}

# 使用隐式模式(Implicit Flow)

OAuth2.0 隐式模式不会返回授权码 code,而是直接将 access_token 通过 URL hash 发送到回调地址前端后端无法获取到这里返回的值,因为 URL hash 不会被直接发送到后端。

# 在控制台配置 OAuth 应用

进入控制台 > 应用 > 应用列表,找到你的应用,点击「配置」,在「配置 OAuth2.0 身份提供商」选项卡,找到授权模式,勾选 implicit 模式,最后点击「保存」。

# 发起授权

发起隐式模式的授权登录需要拼接一个 URL,并让终端用户在浏览器中访问,不能直接输入认证地址域名。具体参数如下:

参数名 意义
client_id 应用 ID。
redirect_uri 回调链接,用户在 OP 认证成功后,OP 会将 access_token 以 URL hash 的形式发送到这个地址。这个值必须出现在控制台配置的回调地址中,否则 OP 不允许向该地址回调。
scope 需要请求的权限,暂未实现,请填写 user。
response_type token
state 一个随机字符串,用于防范 CSRF 攻击,如果 response 中的 state 值和发送请求之前设置的 state 值不同,说明受到攻击。

假设你创建了一个域名为 example 的 OAuth2.0 应用,那么发起隐式模式 OAuth2.0 授权登录的网址是:

GET https://example.authing.cn/oauth/auth?client_id=5ca765e393194d5891db1927&redirect_uri=https://example.com&scope=user&response_type=token&state=6223573295

# 获取 access_token

access_token 会以 URL hash 的形式传递,跳转后链接示例:

https://authing.cn/#access_token=56d7c5649b486abfa67798d11c7e98ea741cab58&state=1234124

换取用户信息的流程和授权码模式相同。

为什么信息在 URL hash 里而不是 query 里?因为 hash 内容不会直接发送到服务器,避免 access_token 被盗用。

# 使用 Password 模式

不推荐使用此模式,尽量使用其他模式。

# 在控制台配置 OAuth2.0 应用

进入 控制台 > 应用 > 应用列表,找到你的应用,在「配置 OAuth2.0 Provider」选项卡,授权模式中勾选 password。点击「保存」。
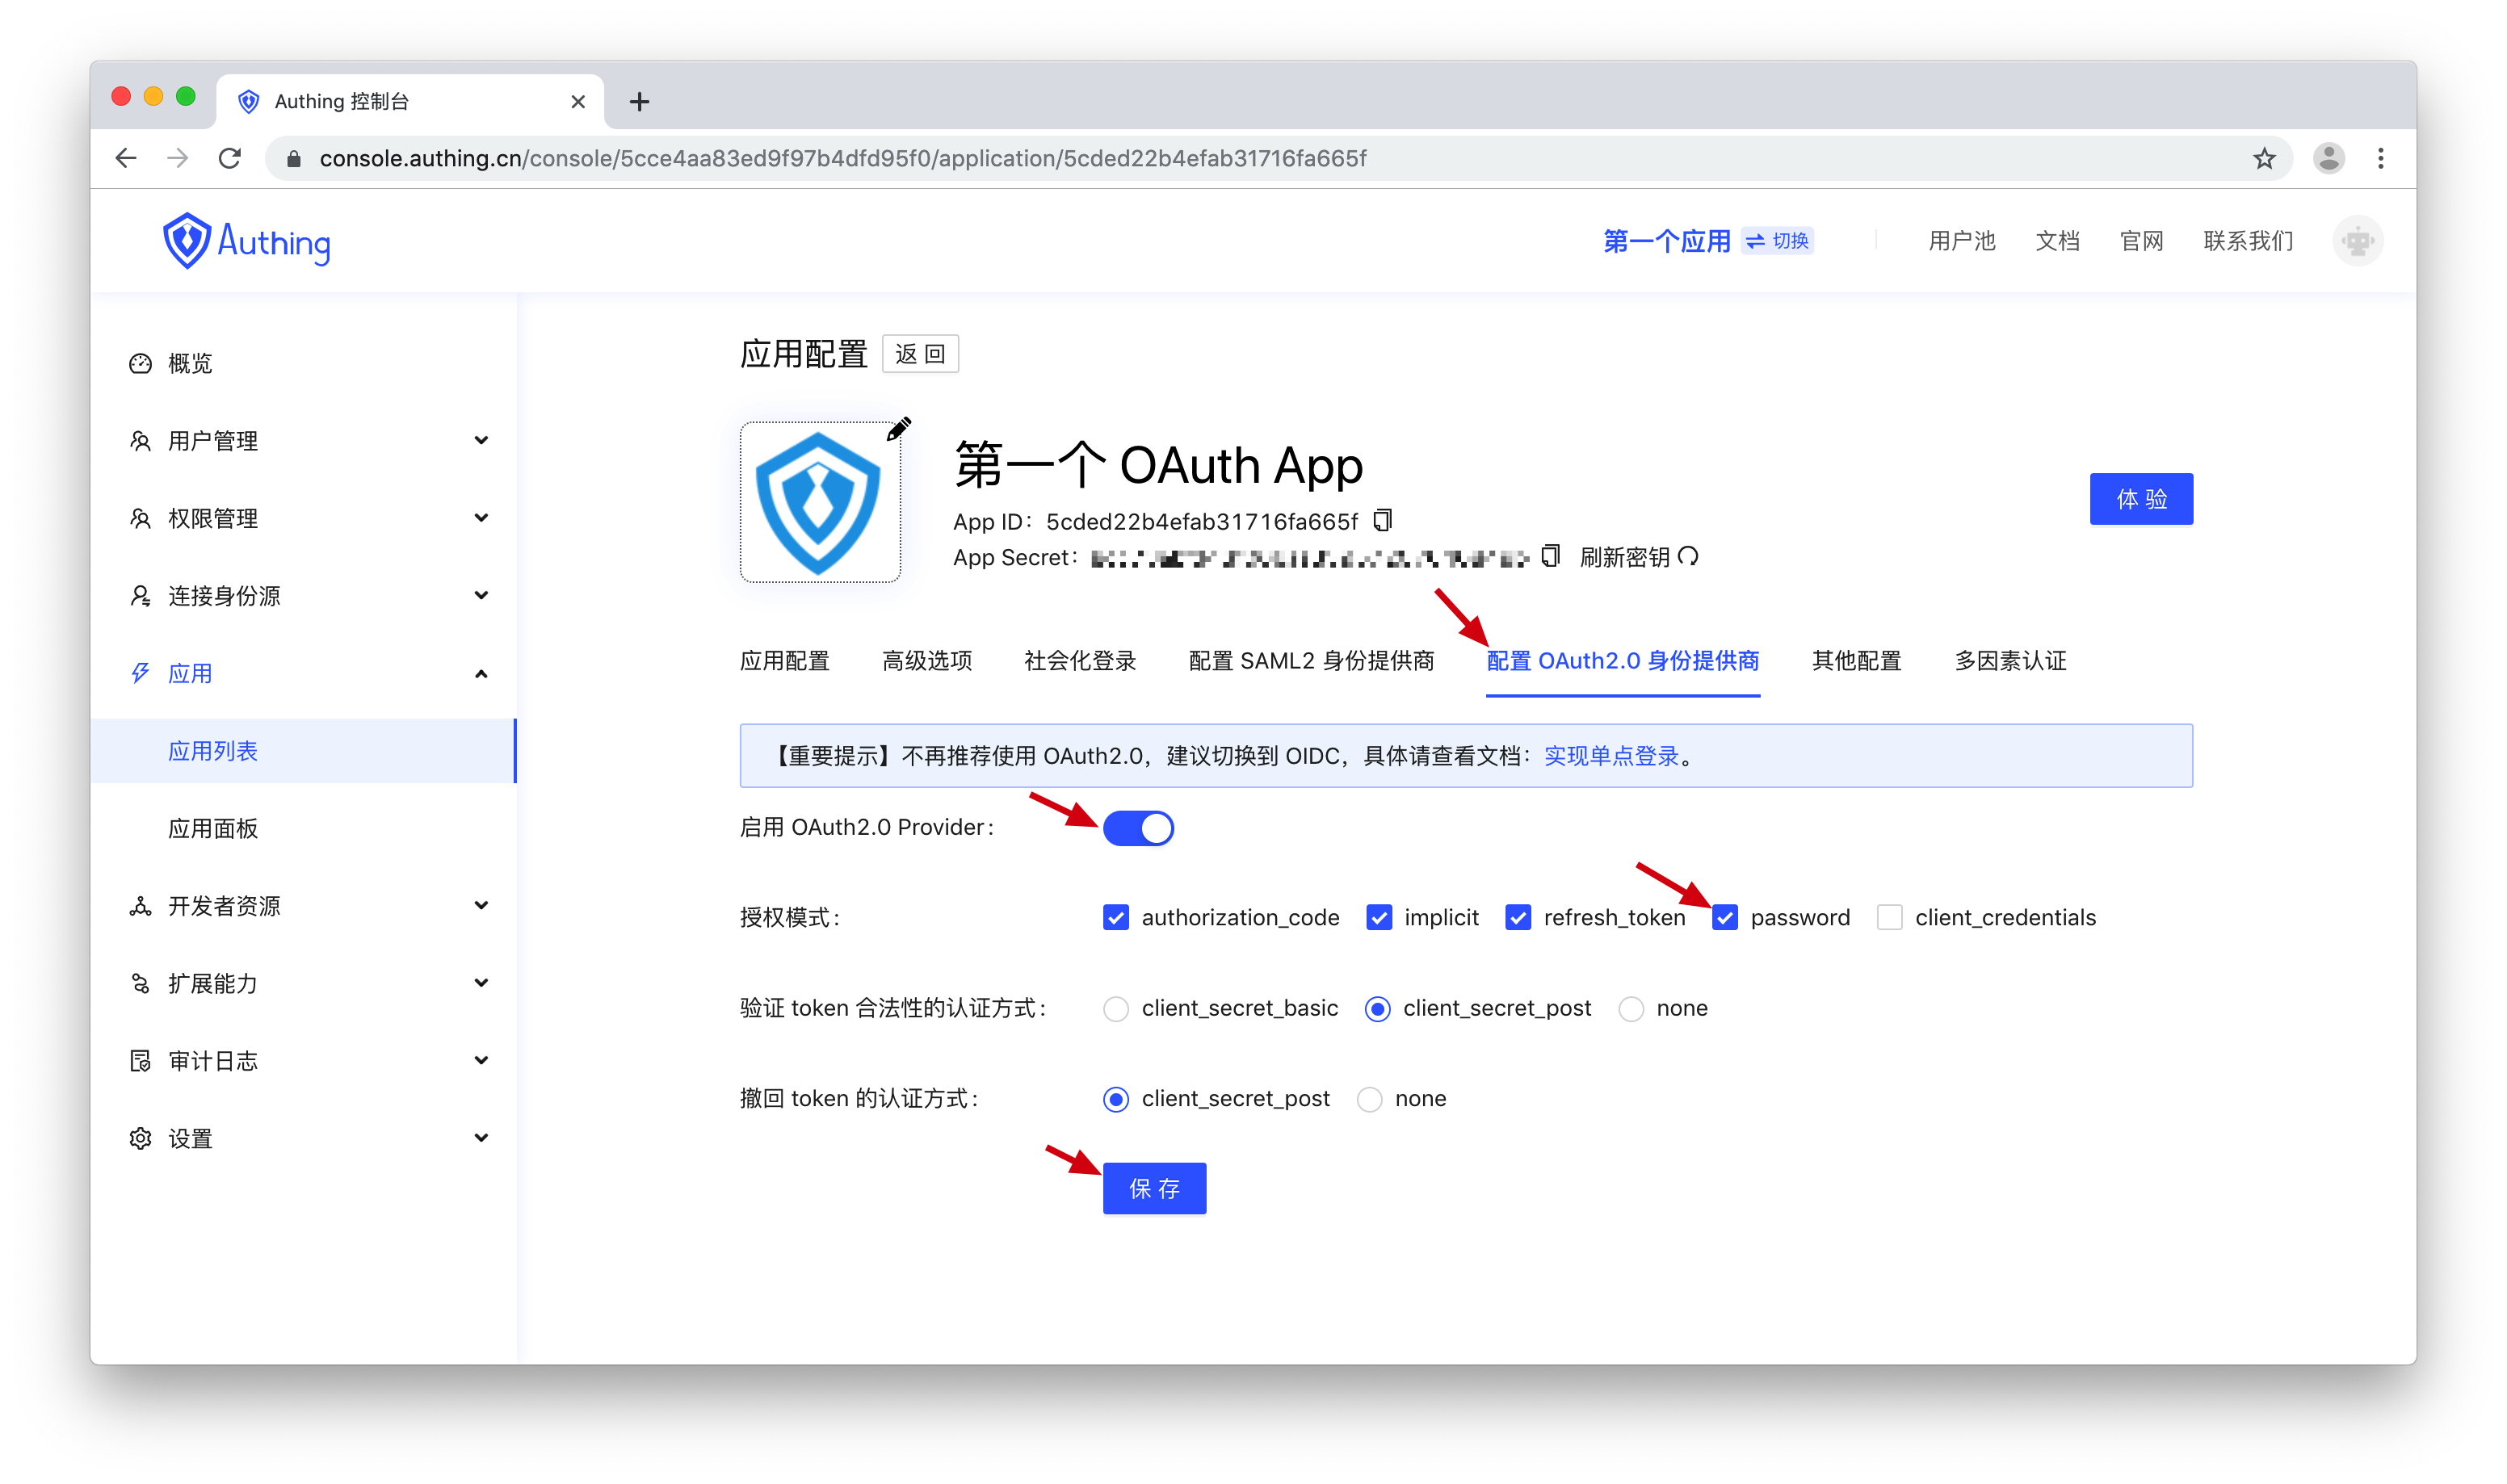
password

POST
https://<你的应用域名>.authing.cn/oauth/token

使用登录凭据换取 token

在 Password 模式中,可以直接使用用户的登录凭据(用户名 + 密码)换取 access_token

Body Paramter
scope
OPTIONAL
string

需要请求的权限,暂未实现,请填写 user。

password
REQUIRED
string

密码

username
REQUIRED
string

用户名,不能填邮箱

grant_type
REQUIRED
string

必须填 password

client_secret
REQUIRED
string

应用 Secret。

client_id
REQUIRED
string

应用 ID。

200: OK

用户登录凭证正确,返回 AccessToken。

{
  "access_token": "f73a7c75ad7d093d096e1590038848e174e29ccf",
  "token_type": "Bearer",
  "expires_in": 3599,
  "refresh_token": "e221c8a1bb6415e2db284a14567cfb70a635fb93",
  "scope": "user"
}
400: Bad Request

用户登录凭证错误,返回错误信息。

{
  "error": "invalid_grant",
  "error_description": "Invalid grant: user credentials are invalid"
}

参考资料

  1. 什么时候使用 Password 模式?「视频」 (opens new window)
  2. Password 模式仅用于向前兼容「视频」 (opens new window)

# 使用 Client Credentials 模式

此模式用于获取关于 OAuth 应用本身的 access_token,持有该 access_token 可以用于获取该 OAuth 应用本身的信息。你不能通过这个 access_token 获取任何用户相关的信息。关于 Client Credentials 模式请参考 https://oauth.net/2/grant-types/client-credentials (opens new window)

POST
https://<你的应用域名>.authing.cn/oauth/token

使用应用 ID 和应用密钥换取应用本身的 access_token

Client Credentials 模式中获取到的 access_token 的上下文是 OAuth 应用本身,持有此 token 可以证明你是该 OAuth Client 的所有者。

Body Paramter
scope
OPTIONAL
string

需要请求的权限,暂未实现,请填写 user。

grant_type
REQUIRED
string

必须填 client_credentials

client_secret
REQUIRED
string

应用 Secret。

client_id
REQUIRED
string

应用 ID。

200: OK

OAuth Client 凭证正确,返回 AccessToken。

{
  "access_token": "279188167773887e4da8921bcdb648bf8b1ad9fa",
  "token_type": "Bearer",
  "expires_in": 3599,
  "scope": "user"
}
400: Bad Request

OAuth Client 凭证错误,返回错误信息。

{
  "error": "invalid_client",
  "error_description": "Invalid client: client is invalid"
}

# 常见问题

# Token 有效时间

所有模式的 access_token 有效时间都是 1 小时,refresh_token 的有效时间为 2 周。

# 四种模式的区别

关于这四种模式的应用场景和区别,建议浏览 理解 OAuth2.0 (opens new window),一般情况下只需开启 authorization_code 模式。