# Overview of Custom Datavase Connection
Only Enterprise Edition users can use the custom database connection function. For details, please see https://authing.cn/pricing (opens new window). If you want to try it, please contact 15559944612 or sales@authing.cn.
A custom database connection (this will be referred to as Legacy Database below) can meet the needs of the following scenarios:
- Authentication: Use your custom database as the source of authentication identity. In this scenario, you can use the custom database connection as and [OIDC IdP](../../connections/ oidc-idp.md), SAML IdP, CAS IdP, Active Directory , Azure AD Equivalent Identity Provider.
- Migrating users: This mode of migrating users is called lazy migration. In simple terms, the principle is as follows: At the beginning, all the original user data is in your database. When the user first When you try to log in with Authing, Authing will find and verify the user in your database through the custom database script you configured. If successful, the user will be migrated to Authing; when the user logs in for the second time, Authing’s database will be used Verify it; when all users have logged in at least once, it means that the migration to the cloud is complete. For details, please see: Use a custom database to implement user lazy migration.
You can configure a custom database in the following way: Go to the Connect Identity Source-Custom Database page of Authing Console (opens new window) to open the custom Define the database connection, see Configure a custom database for details:

# How it Works
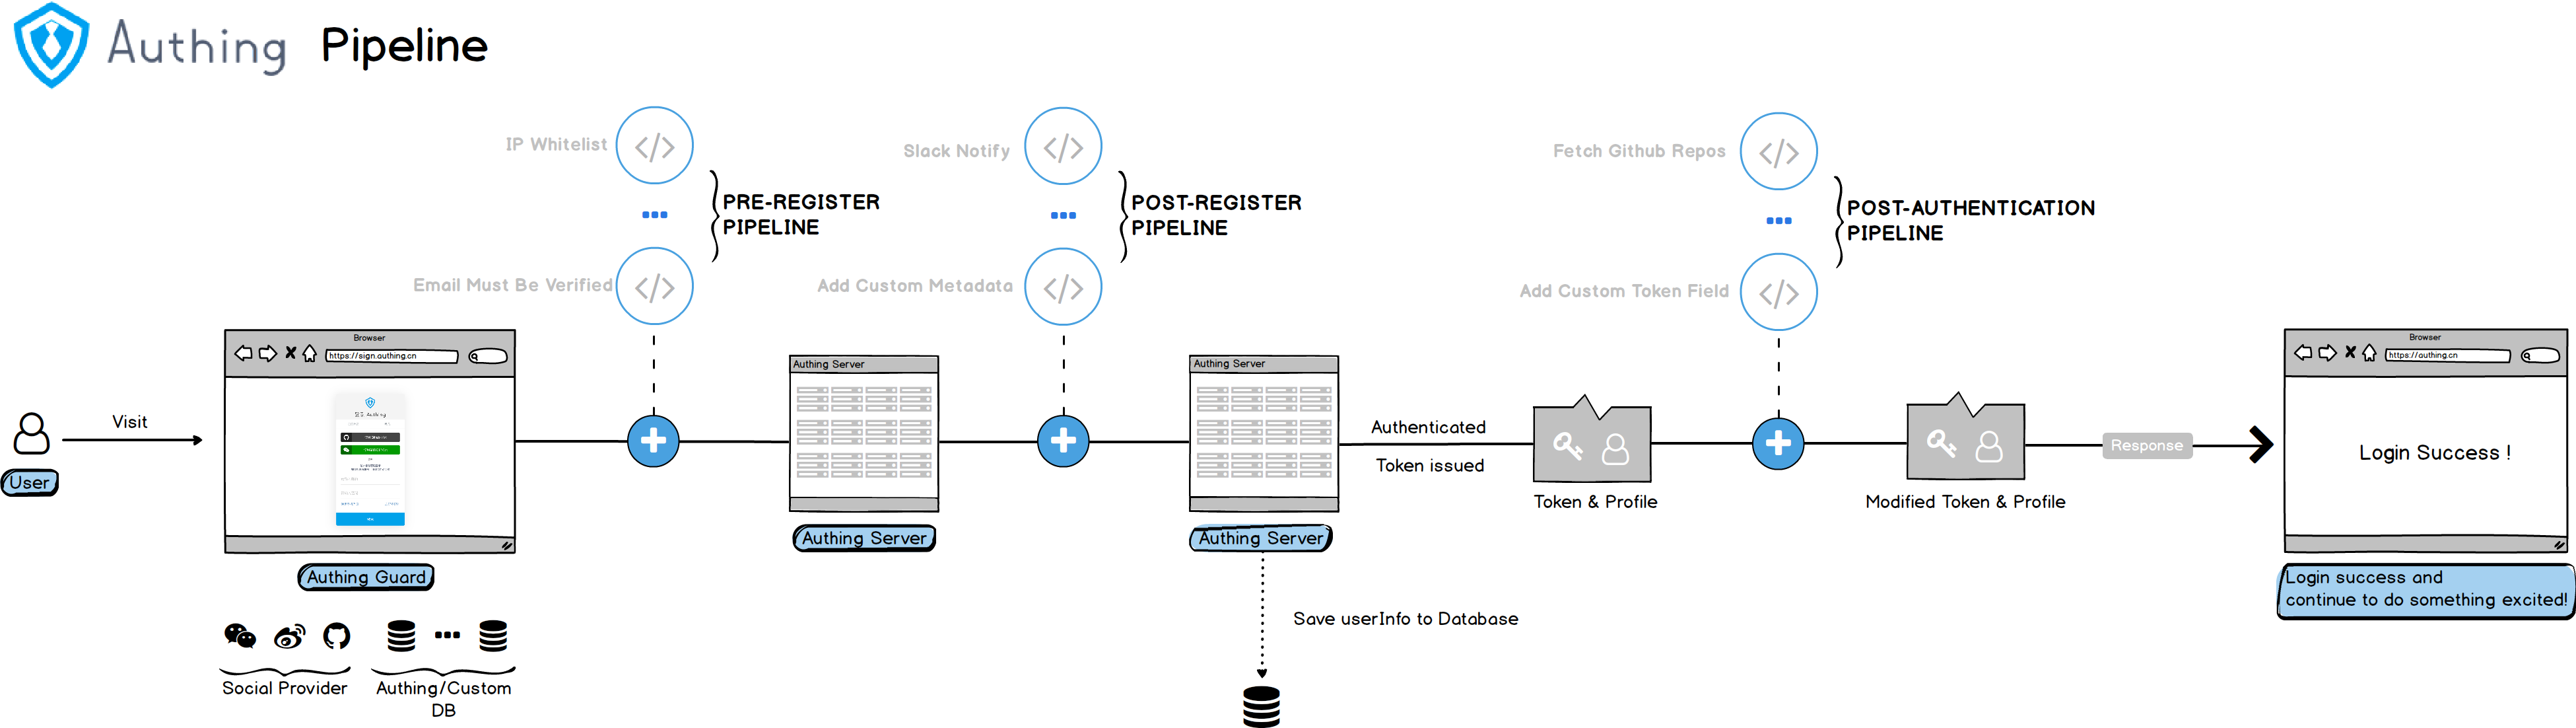
As shown in the figure below, you can customize the database in the authentication flow of Authing to obtain the user's identity information from the Legacy Database. Depending on the scenario you use, the flow principle will be slightly different.
There are two different modes for custom databases, and you can choose the appropriate mode according to your business needs:
- Lazy migration of users: This mode of migrating users is called lazy migration. In simple terms, the principle is as follows: At the beginning, all the original user data is in your database. When the user is the first When logging in with Authing for the second time, Authing will find and verify the user in your database through the custom database script you configured. If successful, the user will be migrated to Authing; when the user logs in for the second time, Authing will be used. The database verifies it; when all users log in at least once, it means that the migration to the cloud is complete. For details, please see: Use a custom database to implement lazy migration of users (opens new window).
- Fully use custom database: In this mode, user data is always stored in your database, and Authing will never save your user data. In order for the system to work properly, you need to implement a complete user add, delete, modify, and check script.
# Operating environment
Currently Authing's custom database script running environment is a completely isolated sandbox instance of the node 12 environment.
# npm module
Contains various database connections Client, axios, bcrypt, lodash, etc.:
- bcrypt (opens new window): It can be used to encrypt and verify passwords. This is also our recommended password encryption method and it is very simple to use. Example:
const isPasswordValid = await bcrypt.compare(password, user.password)
if (!isPasswordValid) {
  throw new Error('Password error')
}
- axios (opens new window): The most popular network request library for Node.JS.
- lodash (opens new window) v4.
- pg (opens new window): Node PostgresQL Driver.
- mongodb (opens new window): Node Mongodb Driver.
- mysql2 (opens new window): Node MySQL Driver.
- mssql (opens new window): Node Sql Server Driver.
# Global variables env
Authing supports the configuration of global environment variables at the user pool level. Please refer to Configure Environment Variables for adding methods. All configured environment variables can be referenced through global variables env.XXX. At the same time, in the custom database script, you can also use the following additional environment variables:
env.DB_CONNECTION_URI: database connection string, the format is generally likepostgres://postgres:postgres@localhost:5432/database-name, you can use it to create a database connection instance, as shown below:
const { Client } = require('pg')

const client = new Client({
  connectionString: env.DB_CONNECTION_URI,
})
await client.connect()

env.DB_HOST: Database Host.env.DB_PORT: database port.env.DB_USERNAME: database user name.env.DB_PASSWORD: database password.env.DB_DATABASE: database name.
You can use it to create a database connection instance as follows:
const { Client } = require('pg')
const client = new Client({
  host: env.DB_HOST,
  port: env.DB_PORT,
  user: env.DB_USERNAME,
  password: env.DB_PASSWORD,
  database: env.DB_DATABASE,
})
await client.connect()

# Add IP whitelist
If the service you access in the script is configured with a firewall, please make sure it is open to the following IP addresses: 140.179.19.50, 52.80.250.250. You can also dynamically obtain the external IP address of the Authing server through the following API: https://core. authing.cn/api/v2/system/public-ips (opens new window).