# WeChat login
This social login method provides GitHub Demo: https://github.com/authing/AuthingIOSDemo (opens new window)
Example Demo:

# Prerequisites
You need to prepare the following in total:
- Authing developer account
- Apply for WeChat Mobile Application (opens new window)
- Configure iOS Universal Links (For iOS applications, you need to open Apple Developer account (opens new window))
- Fill in the WeChat mobile application information in the Authing console
# Configure iOS Universal Links
Starting with WechatOpenSDK 1.8.6, iOS mobile apps need to fill in Universal Links information. If you are developing an Android application or have already configured it, you can skip this section. Apple's official documentation is here (opens new window).
# Configure apple-app-site-association file
Find your Team ID on the Membership page of the Apple Developer console:

Find the Bundle Identifier in Xcode Targets -> Signing & Capabilities:

Next create the apple-app-site-association file:
Assuming your Team ID is xxxxxxx, Bundle Identifier is com.example.exampleApp, and Universal Link Path is set to /native/*, then apple-app-site-association is as follows:
Assuming your Team ID is xxxxxxx, Bundle Identifier is com.example.exampleApp, and Universal Link Path is set to /native/*, then apple-app-site-association is as follows:
{
  "applinks": {
    "apps": [],
    "details": [
      {
        "appIDs": ["xxxxxxx.com.example.exampleApp"],
        "paths": ["/native/*"]
      }
    ]
  }
}
You need to deploy this file under the .well-known/apple-app-site-association link of your domain name. If your domain name is example.com, you need to pass https://example.com/.well-known /apple-app-site-association to access the file. The following points need to be noted:
- Must use https
- apple-app-site-association needs to be a valid JSON file, but without the .json suffix.
- content-type needs to be set to application/json
- paths Please use * wildcard, which is required by WeChat.
The following is an example of nginx configuration: (here, put the apple-app-site-association file under a certain .well-known folder)
server {
  listen 80;
  listen 443 ssl;

  server_name authing.cn;

  ssl_certificate /mnt/cerm/client/1_authing.cn_bundle.crt;
  ssl_certificate_key /mnt/cerm/client/2_authing.cn.key;
  ssl_session_timeout 5m;
  ssl_ciphers ECDHE-RSA-AES128-GCM-SHA256:ECDHE:ECDH:AES:HIGH:!NULL:!aNULL:!MD5:!ADH:!RC4;
  ssl_protocols TLSv1 TLSv1.1 TLSv1.2;
  ssl_prefer_server_ciphers on;


  location /.well-known {
    alias /path/to/your/.well-known/folder;
    try_files $uri $uri/ =404;
  }
}
# Configure Associated Domains in Xcode
Add it to configure Associated Domains in Xcode. On the Xcode Targets -> Signing & Capabilities page, click +Capability in the upper right corner:

Choose Associated Domains:

Assuming your domain name is example.com, fill in applinks:example.com:

# Verify that Universal Links works
Suppose your domain name is example.com and the Path is /native/*. After installing your App on your phone, use the Safari browser to visit https://example.com/native/, and drag the web page on the Internet. You should be able to see your App:

Visit https://example.com/native/xxx again, you can still see it.
# Fill in Universal Links on WeChat Open Platform

# Configure WeChat mobile application information in the Authing console
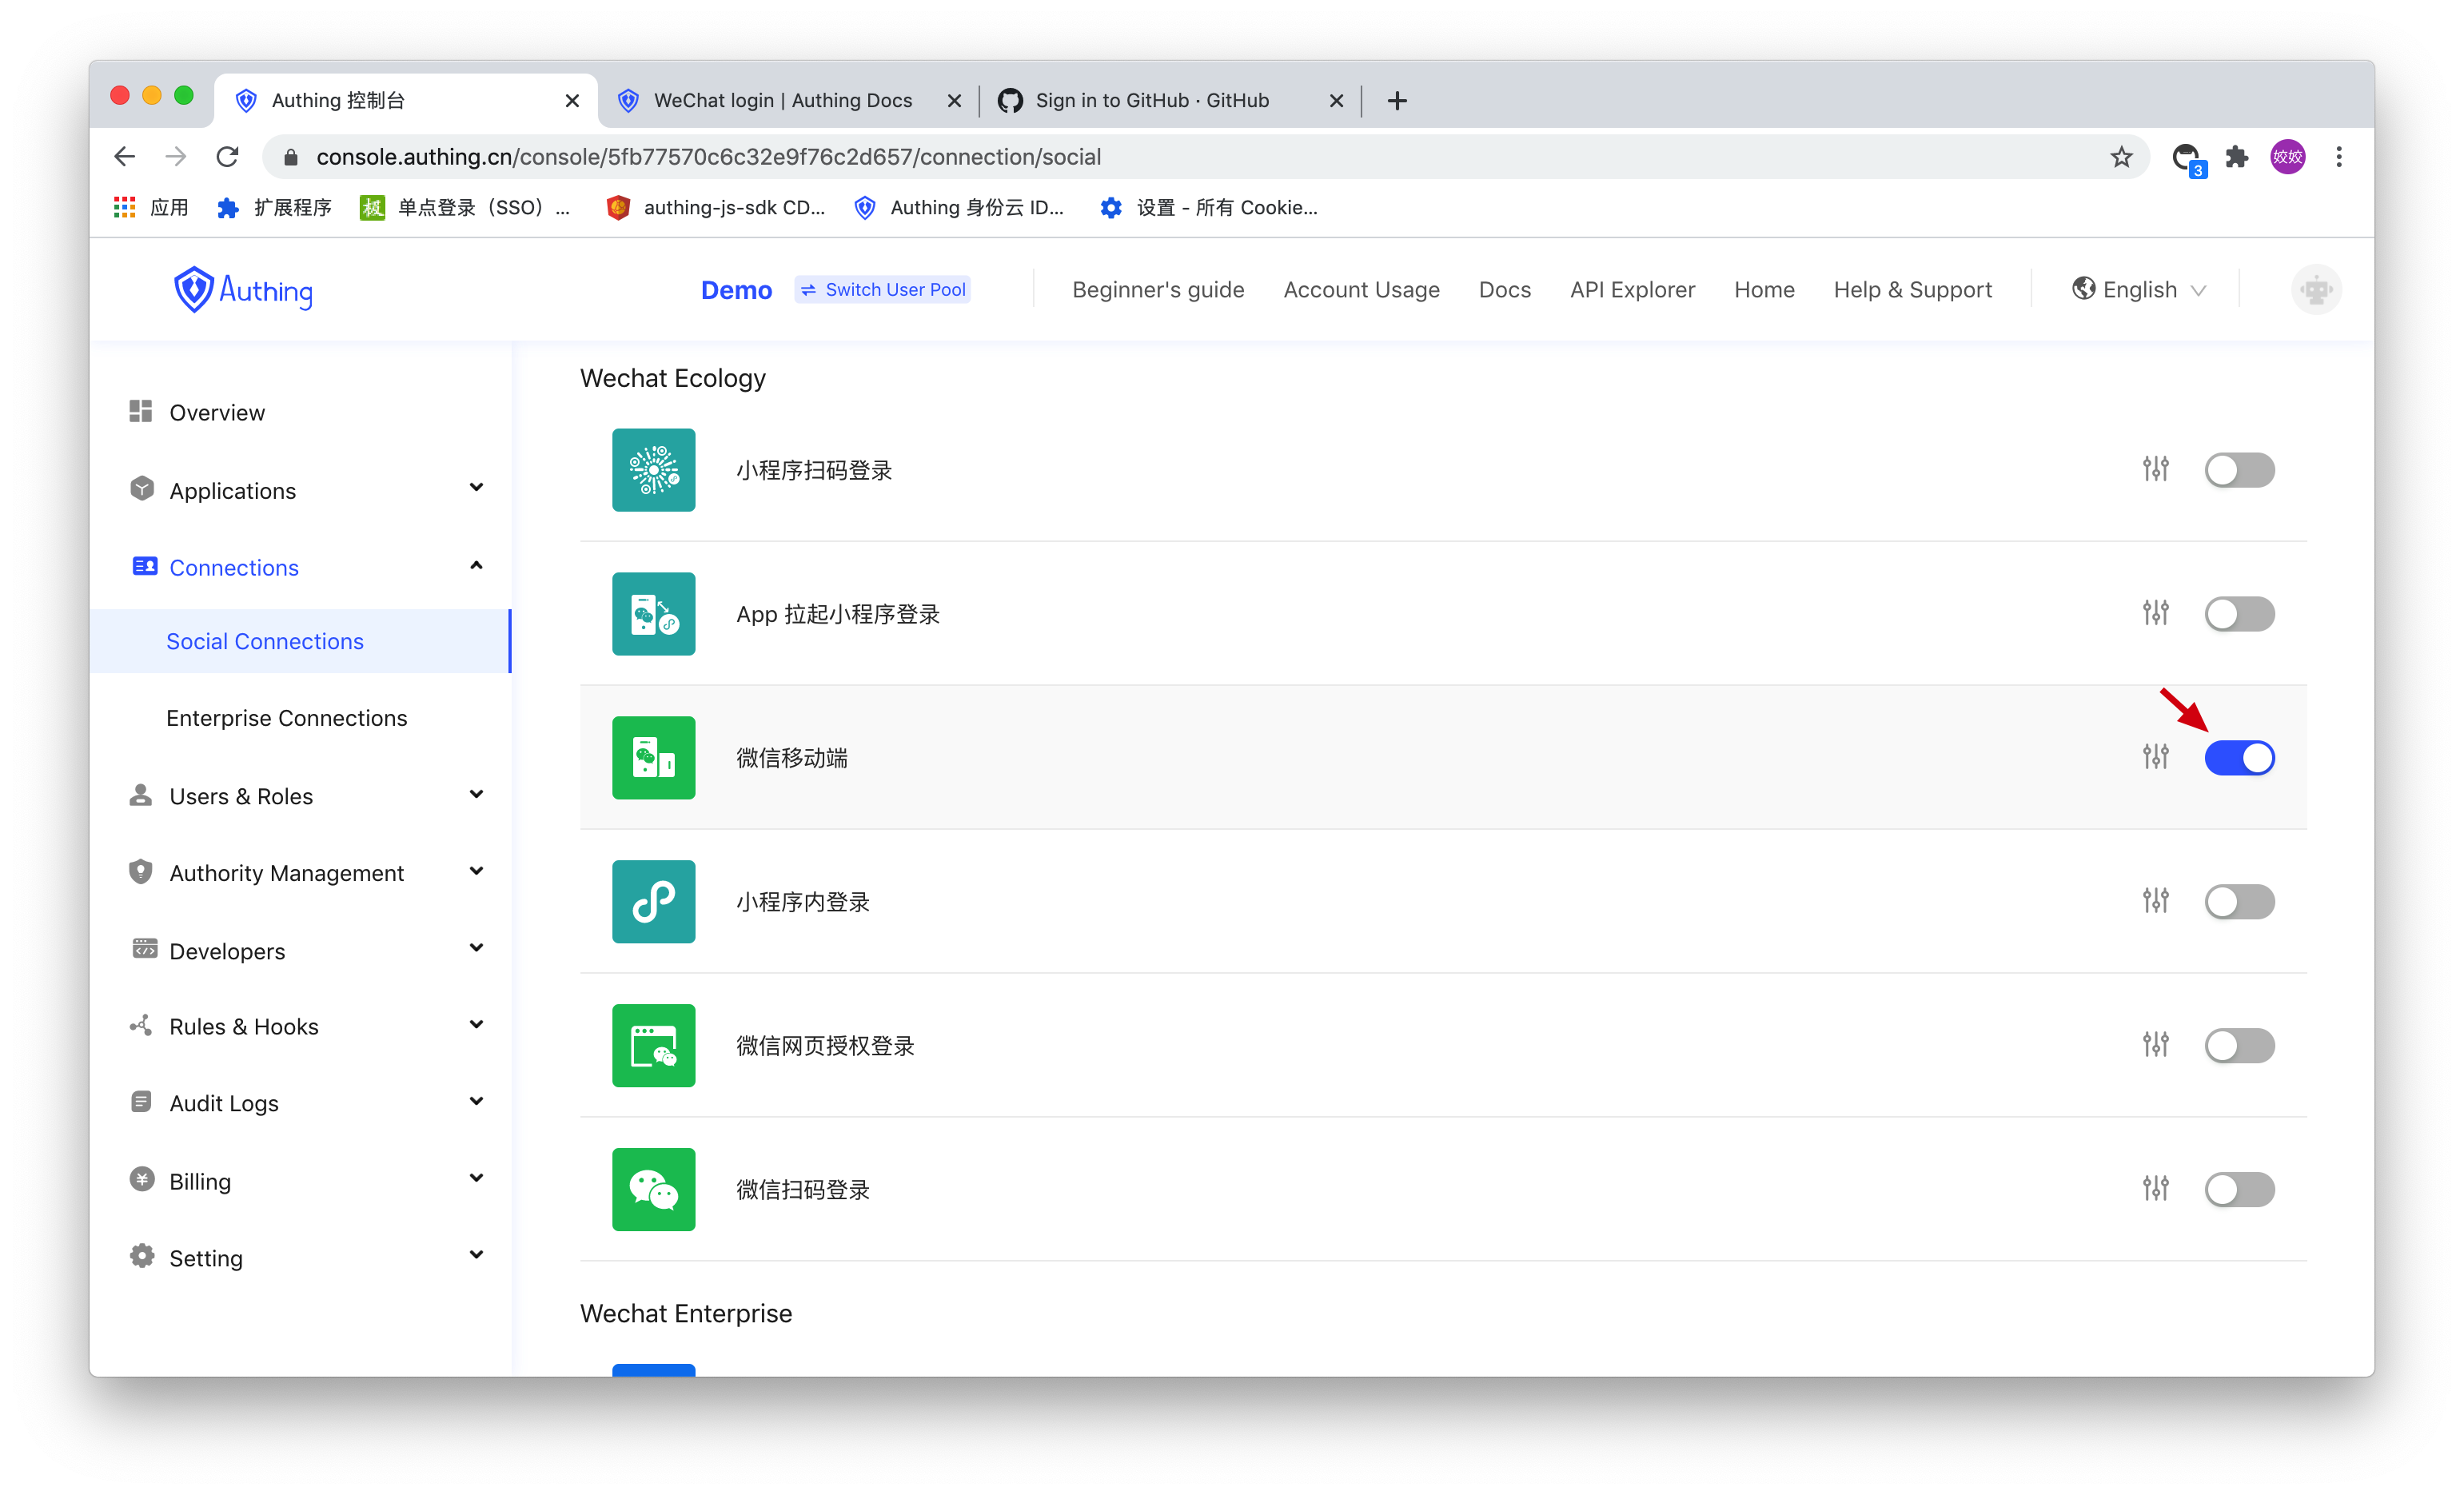
In the Authing console Connect Identity Source -> Social Login page, find "WeChat Mobile Application":
Fill in your mobile app AppID and AppSecret:

AppID and AppSecret can be seen on the WeChat Open Platform Management Center-Mobile Application-Application Details page:

# Formal access
# Access WechatOpenSDK
For this part, please follow the WeChat official document (opens new window) guide to access WechatOpenSDK. If you encounter problems, here is a Swift Demo App For developers' reference: https://github.com/authing/AuthingIOSDemo (opens new window).
# Initiate a login request
After successfully accessing the SDK, you should be able to successfully open WeChat to obtain user authorization and obtain the authorization code:
The following is an example of initiating a WeChat login request code (Swift):
func loginByWechat() {
    let req = SendAuthReq()
    req.scope = "snsapi_userinfo" //Get user information
    req.state = "123" //Random value is enough, here use timestamp
    WXApi.send(req)
}
You can get the authorization code code in the onResp method of AppDelegate or SceneDelegate, as shown below:

# Receive WeChat callback data acquisition code
Here is a sample code (Swift language):
func onResp(_ resp: BaseResp) {

    debugPrint(resp)

    // WeChat login request information
    if resp.isKind(of: SendAuthResp.self) {
        if resp.errCode == 0 && resp.type == 0{
            let response = resp as! SendAuthResp

            // WeChat authorication_code
            let code = response.code
            debugPrint("code: ",code)
        }
    }
}
# Exchange for user information
After the user agrees to receive the code, he needs to call the Authing interface to obtain user information:
Use code in exchange for user information.
Sample code (Swift):
let url = "\(AuthingServerHost)/connection/social/wechat:mobile/\(UserPoolId)/callback?code=\(code!)"
AF.request(url).responseString {response in
    let resp = convertToDictionary(text: response.value!)!

    // Authing business status code, 200 means success
    let code = resp["code"]! as! Int
    let message = resp["message"]! as! String
    if code == 200 {
        let data = resp["data"] as! [String:Any]
        debugPrint("Data: \(data)")
    } else {
        debugPrint("Message: ", message)
    }
}
# Next Step
Congratulations, you have accessed the WeChat mobile application to log in. After obtaining the user information, you can get the login credential token. You can carry this token in subsequent API requests, and then distinguish different users based on this token in the back-end interface. For details, see [Verification token](../ ../advanced/verify-jwt-token.md#yan-zheng-authing-qian-fa-de-token).