# Implement Single Sign-On
This article describes how to use Authing to achieve application account opening and single sign-on.
# What is single sign-on
Let's use an example to illustrate. Suppose there is a university with two internal systems, one is the mailbox system and the other is the timetable query system. Now I want to achieve this effect: log in to the mailbox system once, and then enter the website of the timetable system at this time, without logging in again, the timetable website system directly jumps to the personal timetable page, and vice versa. The more professional definition is as follows:
Single Sign On (Single Sign On), abbreviated as SSO, is one of the more popular solutions for enterprise business integration. The definition of SSO is that in multiple application systems, users only need to log in once to access all mutually trusted application systems.
# before the start
If you do not understand user pools and authentication and authorization, it is recommended to read Basic Concepts first.
# Preliminary knowledge
- Basic HTML and CSS knowledge.
- Intermediate JavaScript skills.
# Tools required
- Your favorite text editor.
- A web server that can be run locally (for example:
npm install http-server -g).
# Register an Authing account
Create an Authing Account# Create an authorized application
If you are registering for Authing for the first time, you can skip this step. This step is automatically completed when you first register.
Go to Control Panel > Apps > App List, and click the "Create App" button.
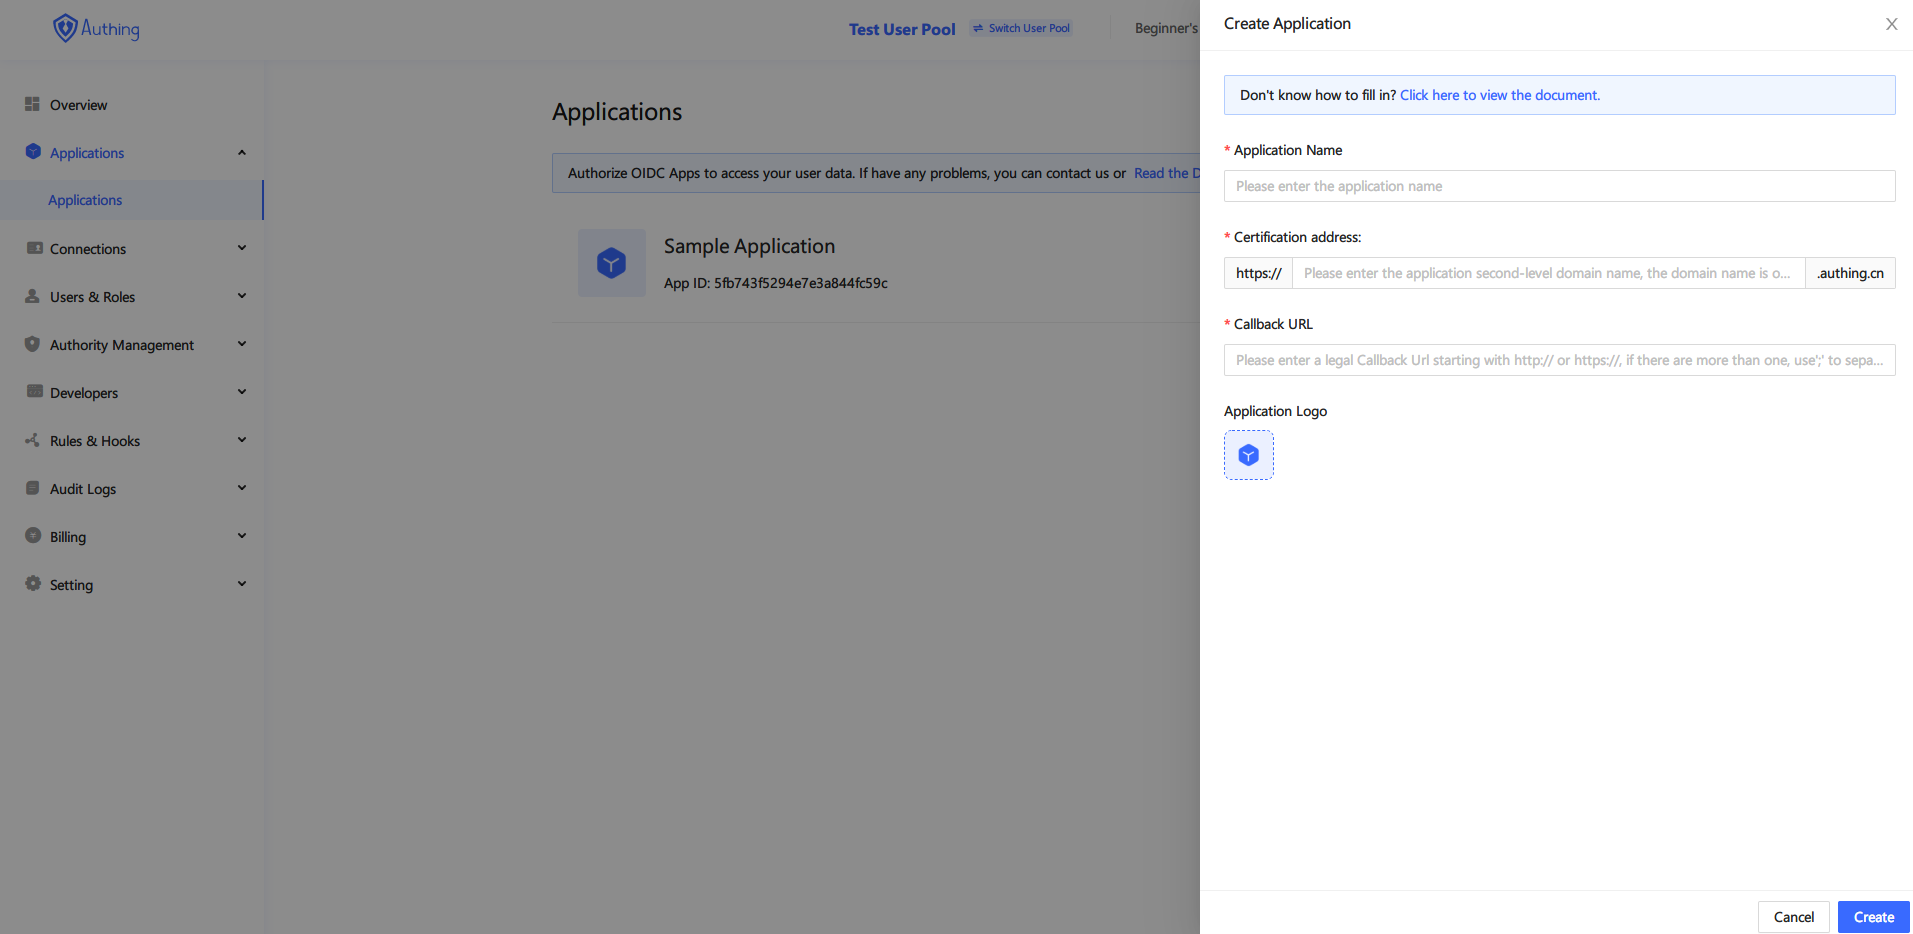
Create application
In the pop-up dialog box, just fill in the application name, authentication address, and callback address, these three parameters are enough, the other parameters remain the default, and then click "Create".
Parameter explanation
App name, please give your app a name.
Authentication address, a second-level domain name of authing.cn, where users will log in.
Callback URL, after a successful login, call back to the developer's own business address. This tutorial is a demonstration. The address to fill in is http://localhost:8080. In the actual scenario, please fill in your business address.
Click the newly created application in the application list, and record the AppID and the second-level domain name for later use.
# Quickly integrated single sign-on
When the web application is started, how to determine that it is currently logged in? The key is that When the web application starts, you need to ask Authing: Is anyone currently logged in?
Suppose our business logic is very simple: if it is not logged in, it needs to display the login button, and prompt the user to log in; if it is logged in, display the user's personal Information and logout buttons. Let's start coding implementation.
# Developing web applications
This tutorial is just for demonstration, so we did not choose an advanced framework, which allows us to focus on Authing itself. We use AuthingSSO SDK (opens new window) to quickly integrate single sign-on capabilities for applications.
# Create a new HTML file
Create an HTML file, start coding our first web application, first introduce AuthingSSO SDK (opens new window), so that we can quickly ask Authing: Is anyone logged in? ?
<!DOCTYPE html>
<html lang="en">
  <head>
    <meta charset="UTF-8" />
    <meta name="viewport" content="width=device-width, initial-scale=1.0" />
    <title>First application</title>
  </head>
  <body>
    <script src="https://cdn.jsdelivr.net/npm/@authing/sso/dist/AuthingSSO.umd.min.js"></script>
  </body>
</html>
# Initialize AuthingSSO SDK
Perform the initialization in the following way, fill in the AppId and authentication address of the OIDC application recorded earlier to complete the SDK initialization.
<body>
  <script src="https://cdn.jsdelivr.net/npm/@authing/sso/dist/AuthingSSO.umd.min.js"></script>
  <script>
    let auth = new AuthingSSO({
      // OIDC application ID
      appId: '5e7343597f905c025e99e660',
      // OIDC application authentication address
      appDomain:'first-oidc-app.authing.cn'
    });
  </script>
</body>
# Place the basic HTML controls used to implement business logic
When the web application starts, if no one is logged in, the login button is displayed; if it is already logged in, the user's personal information is displayed. Place the following controls to complete our business logic.
<body>
  <h1 id="h1-login" style="display: none;">Please log in</h1>
  <input type="button" value="login" id="btn-login" style="display: none;" />
  <h1 id="h1-user-info" style="display: none;">User information</h1>
  <input type="button" value="logout" id="btn-logout" style="display: none;" />
  <pre id="user-info"></pre>
  <script src="https://cdn.jsdelivr.net/npm/@authing/sso/dist/AuthingSSO.umd.min.js"></script>
  <script>
    let auth = new AuthingSSO({
      // OIDC application ID
      appId: '5e7343597f905c025e99e660',
      // OIDC application authentication address
      appDomain:'first-oidc-app.authing.cn'
    });
  </script>
</body>
# Query login status
In order to ask Authing for the login status every time the web application is started, so as to execute the business logic of the logged-in or unlogged-in status, add the following code:
<script>
  let auth = new AuthingSSO({
    appId: '5cded9bf4efab36f02fa666a',
    appDomain:'first-oidc-app.authing.cn',
  });
  window.onload = async function () {
    let res = await auth.trackSession();
    if (res.session !== null) {
      document.getElementById('h1-user-info').style.display ='block';
      document.getElementById('user-info').innerHTML = JSON.stringify(res.userInfo, null, 4);
      document.getElementById('btn-logout').style.display ='inline';
    } else {
      document.getElementById('h1-login').style.display ='block';
      document.getElementById('btn-login').style.display ='inline';
    }
  };
  document.getElementById('btn-login').addEventListener('click', function () {
    auth.login();
  });
  document.getElementById('btn-logout').addEventListener('click', function () {
    auth.logout().then((res) => {
      alert(JSON.stringify(res));
      location.reload();
    });
  });
</script>
# Complete code
<!DOCTYPE html>
<html lang="en">
  <head>
    <meta charset="UTF-8" />
    <meta name="viewport" content="width=device-width, initial-scale=1.0" />
    <title>First application</title>
  </head>
  <body>
    <h1 id="h1-login" style="display: none;">Please log in</h1>
    <input type="button" value="login" id="btn-login" style="display: none;" />
    <h1 id="h1-user-info" style="display: none;">User information</h1>
    <input type="button" value="logout" id="btn-logout" style="display: none;" />
    <pre id="user-info"></pre>
    <script src="https://cdn.jsdelivr.net/npm/@authing/sso/dist/AuthingSSO.umd.min.js"></script>
    <script>
      let auth = new AuthingSSO({
        appId: '5cded9bf4efab36f02fa666a',
        appDomain:'first-oidc-app.authing.cn',
      });
      window.onload = async function () {
        let res = await auth.trackSession();
        if (res.session !== null) {
          document.getElementById('h1-user-info').style.display ='block';
          document.getElementById('user-info').innerHTML = JSON.stringify(res.userInfo, null, 4);
          document.getElementById('btn-logout').style.display ='inline';
        } else {
          document.getElementById('h1-login').style.display ='block';
          document.getElementById('btn-login').style.display ='inline';
        }
      };
      document.getElementById('btn-login').addEventListener('click', function () {
        auth.login();
      });
      document.getElementById('btn-logout').addEventListener('click', function () {
        auth.logout().then((res) => {
          alert(JSON.stringify(res));
          location.reload();
        });
      });
    </script>
  </body>
</html>
The sample code can be found on Github (opens new window). It is recommended to download and run the code on Github.
AuthingSSO single sign-on SDK complete parameter list:
SDK for Single Sign-On# Run Method
Run the following command in the terminal
$ git clone https://github.com/Authing/authing-sso-demo
$ cd authing-sso-demo
$ npm install -g http-server
$ http-server
Then visit http://localhost:8080 (opens new window) in the browser.
If the local port 8080 is occupied, the application may run on subsequent ports such as 8081 and 8082.
# Running effect
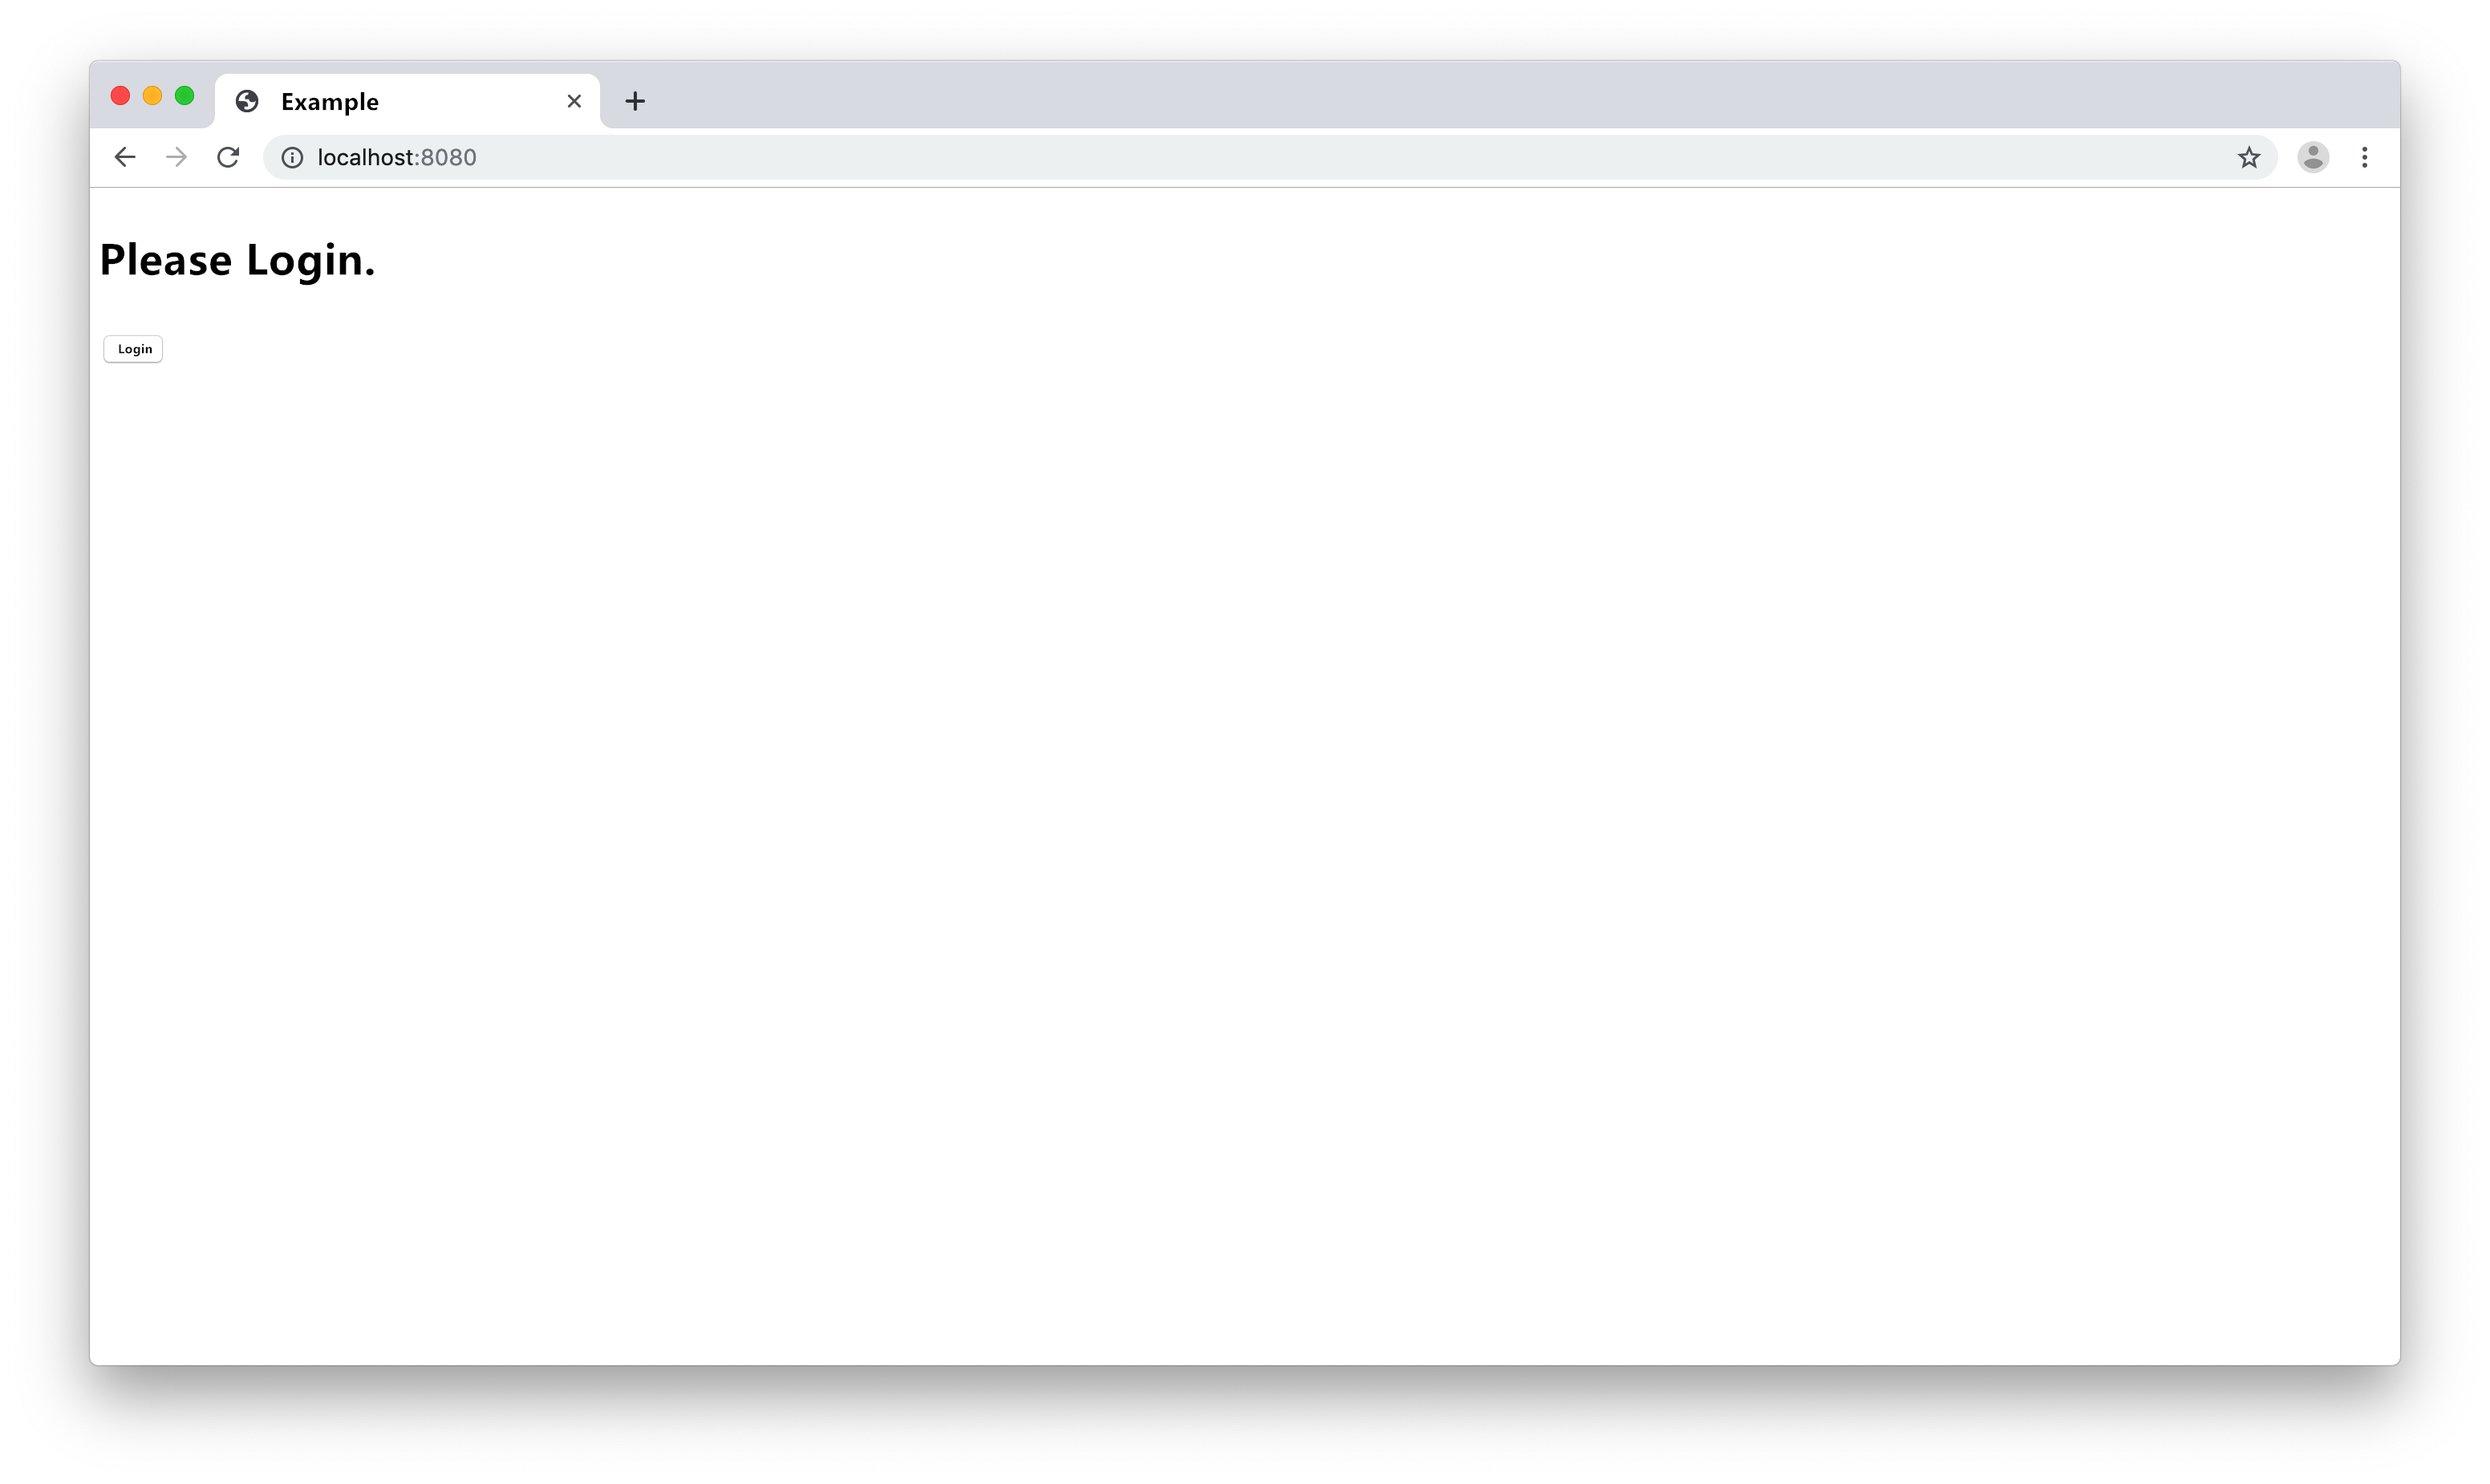
Open the web application written by us, the current is not logged in state, the page prompts the user to log in, and displays the login button. We click "Login".
Log entry
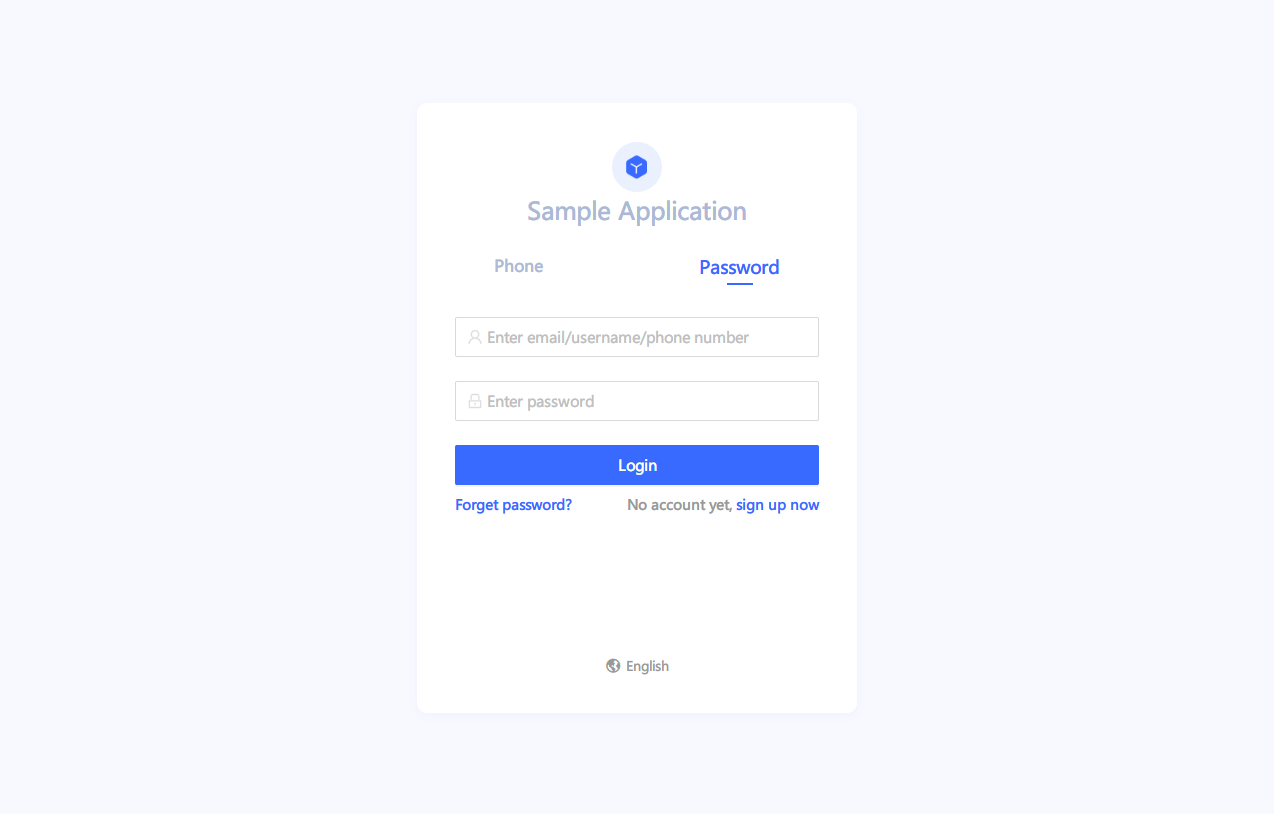
The browser will jump to the user authentication page of the OIDC application, and enter the user name and password to log in.
Sign in
The browser is redirected to the callback link we set up earlier. This example still calls back to localhost:8080.
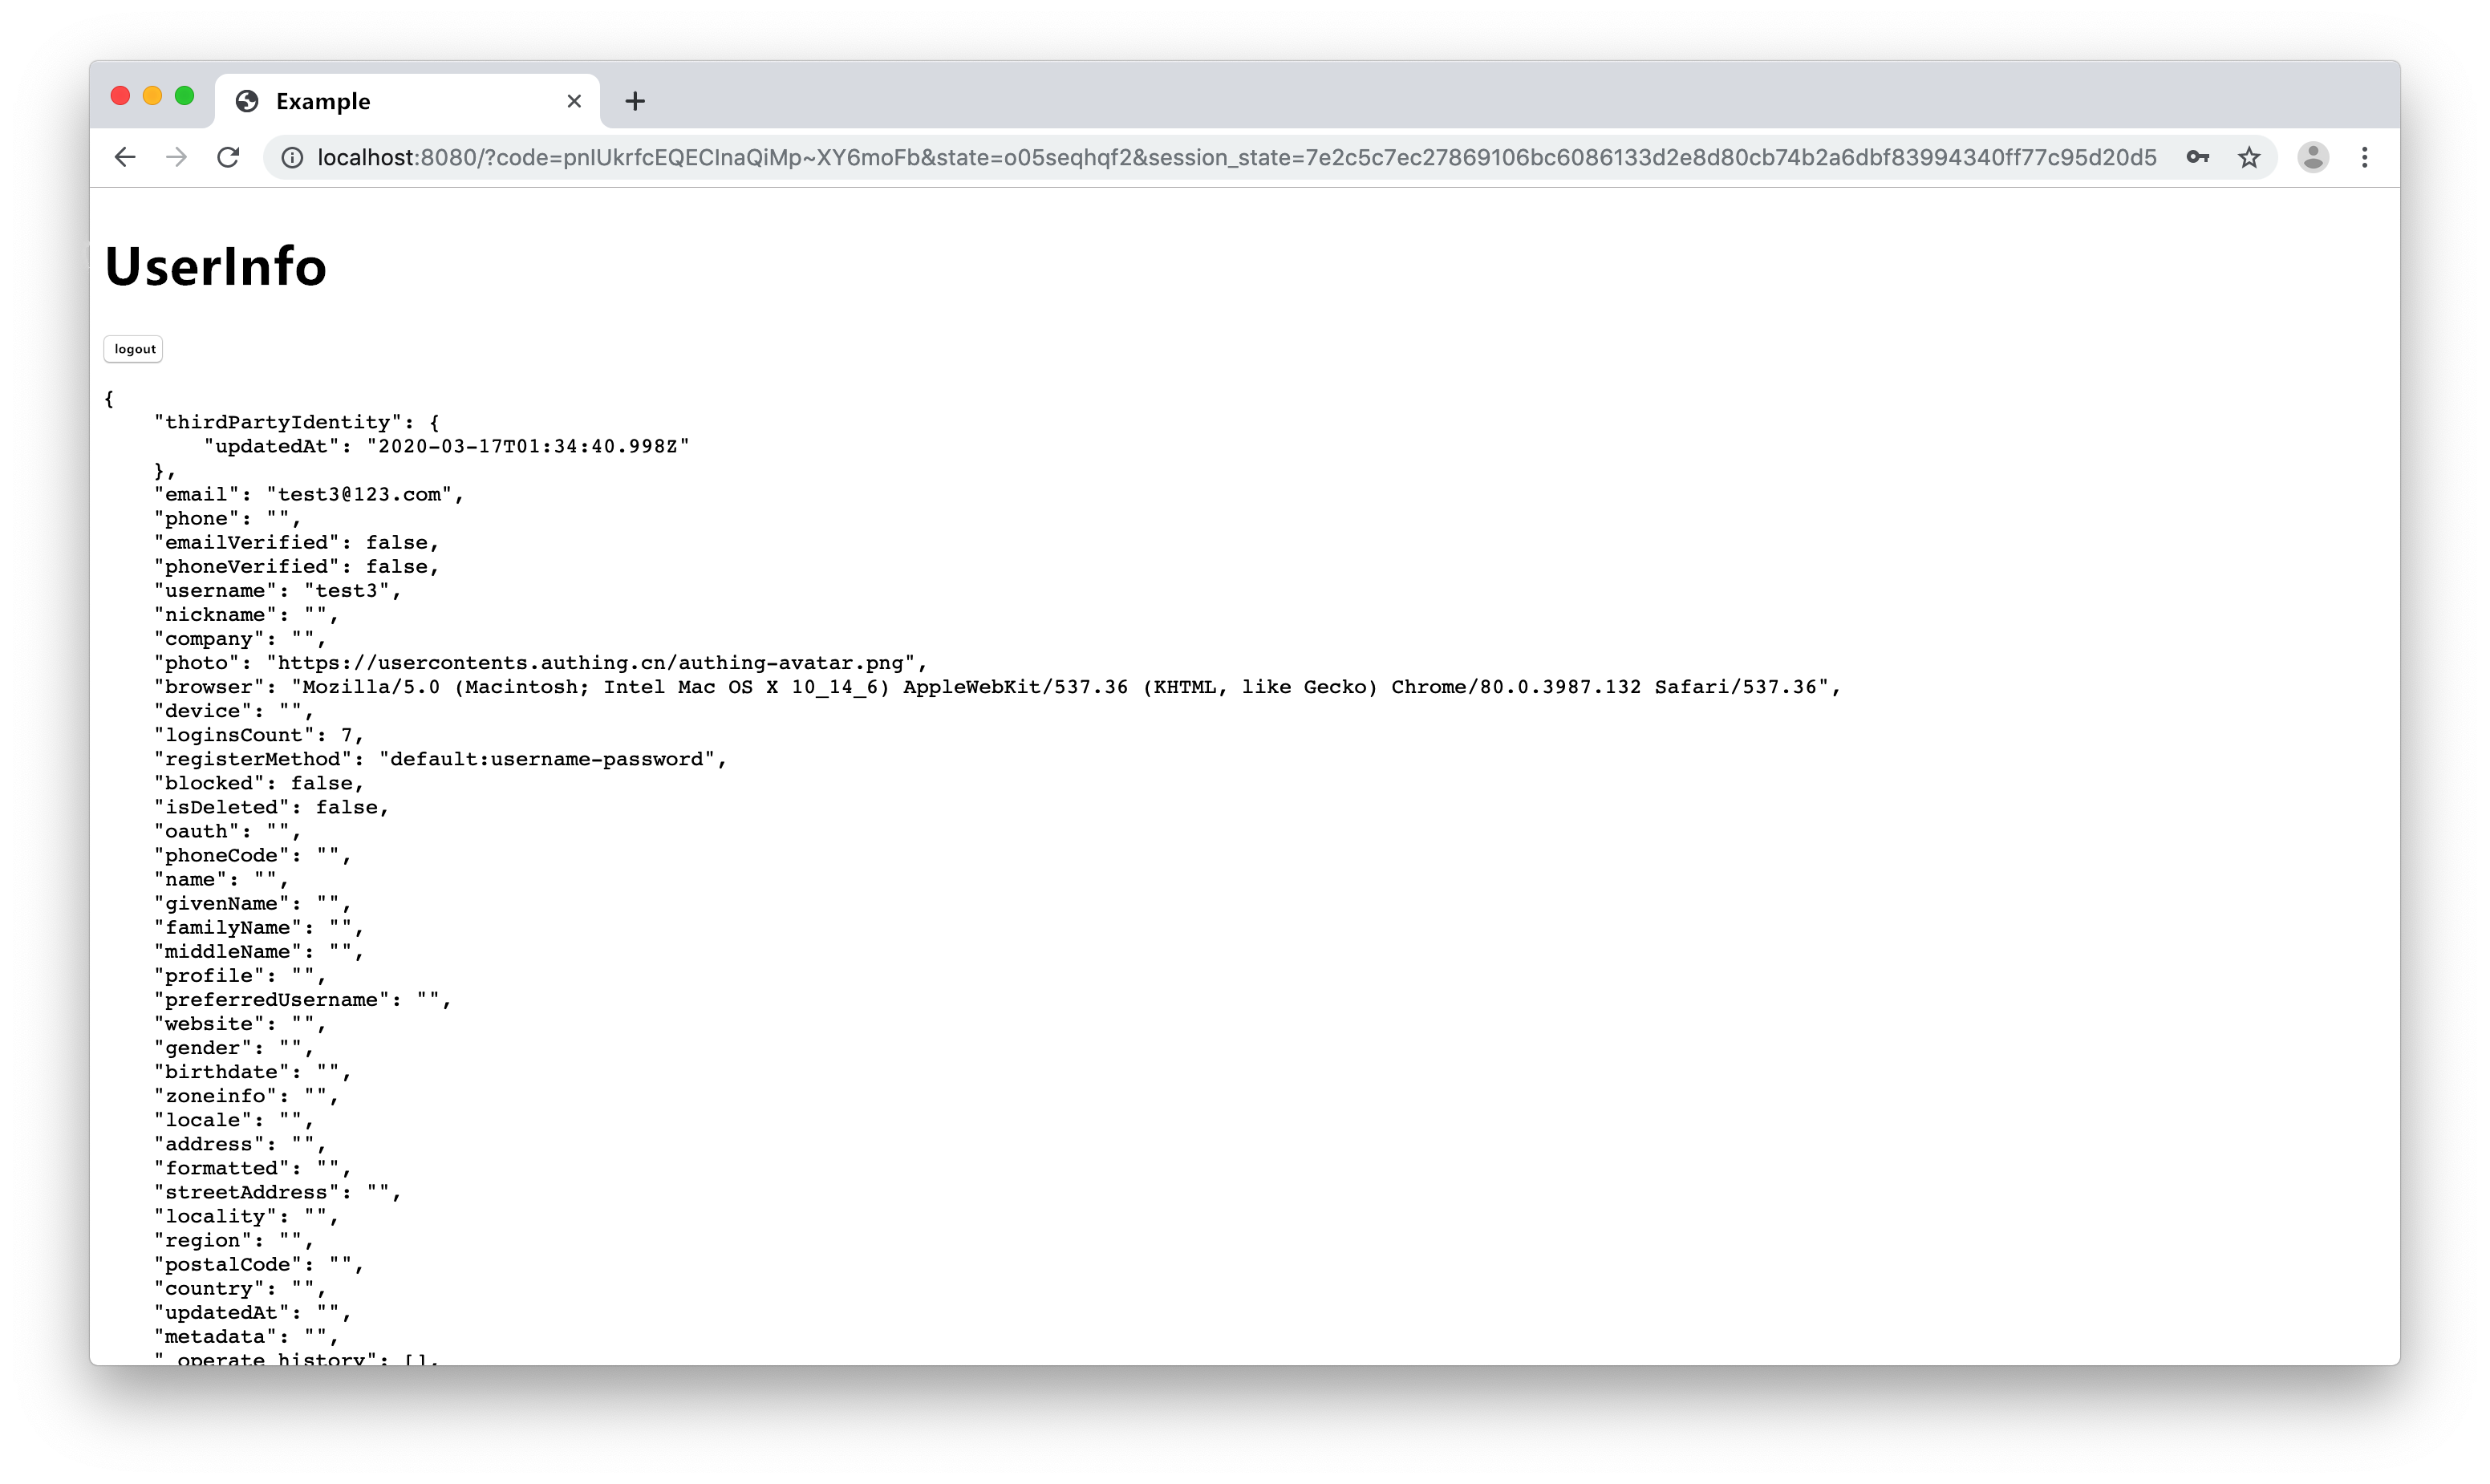
User Info
After logging in, we obtain the user information through the trackSession function of the AuthingSSO SDK and display it on the page. The format of trackSession return data is as follows:
{
    "session": {
        "_id": "mbC_oeqTz0WPaspPAxpXEGXSDqlCo5i4",
        "__v": 0,
        "appId": "5cded9bf4efab36f02fa666a",
        "cookie": {
            "originalMaxAge": 86400000,
            "expires": "2020-04-04T14:55:22.397Z",
            "secure": true,
            "httpOnly": true,
            "path": "/cas",
            "sameSite": "none"
        },
        "type": "oidc",
        "userId": "5e71a7ec3e494a56f5f4d03b"
    },
    "userInfo": {
        {
          "id": "5f702fcc913544c358cb2123",
          "arn": "arn:cn:authing:59f86b4832eb28071bdd9214:user:5f702fcc913544c358cb2123",
          "userPoolId": "59f86b4832eb28071bdd9214",
          "username": "xxx",
          "email": null,
          "emailVerified": false,
          "phone": null,
          "phoneVerified": false,
          "unionid": "35447896",
          "openid": "35447896",
          "identities": [
          ],
          "nickname": "xxxx",
          "registerSource": [
              "social:github"
          ],
          "photo": "https://avatars2.githubusercontent.com/u/35447896?v=4",
          "password": null,
          "oauth": "",
          "token": "",
          "tokenExpiredAt": "1602484037172",
          "loginsCount": 4,
          "lastLogin": "1601188037190",
          "lastIP": null,
          "signedUp": "2020-09-27T14:23:08+08:00",
          "blocked": false,
          "isDeleted": false,
          "device": null,
          "browser": null,
          "company": "Authing",
          "name": null,
          "givenName": null,
          "familyName": null,
          "middleName": null,
          "profile": "",
          "preferredUsername": null,
          "website": null,
          "gender": "U",
          "birthdate": null,
          "zoneinfo": null,
          "locale": null,
          "address": null,
          "formatted": null,
          "streetAddress": null,
          "locality": null,
          "region": null,
          "postalCode": null,
          "country": null,
          "createdAt": "2020-09-27T14:23:08+08:00",
          "updatedAt": "2020-09-27T14:27:17+08:00",
          "customData": "",
        "__Token verification method description": "https://docs.authing.cn/authing/advanced/authentication/verify-jwt-token#fa-song-token-gei-authing-fu-wu-qi-yan-zheng"
    },
    "urlParams": {
        "code": "N_J4aPRa6vIJUQyeO8NNJlozO4E",
        "__Parameter Usage Instructions": {
            "OIDC local verification access_token and id_token method": "https://docs.authing.cn/authing/advanced/authentication/verify-jwt-token#oidc-secret-token",
            "Online verification of the legality of OIDC access_token and id_token": "https://docs.authing.cn/authing/advanced/authentication/verify-jwt-token#yan-zheng-oidc-accesstoken-huo-idtoken-de-he- fa-xing",
            "OIDC code usage document": "https://docs.authing.cn/authing/authentication/oidc/oidc-authorization#shi-yong-code-huan-qu-token"
        },
        "__authing_hint": "The code token id_token field will only be retrieved from the url when you call back to the business address for the first time. Please store it yourself for future use"
    }
}
You can refresh this page a few more times, because you are currently logged in and the browser will always display user information. Next, we click the "Logout" button to log out with a single point.
Logout button
# Visit user personal center page
In SSO applications, there is an independent user center page where users can modify their own information.
Your end users can visit the following link to enter the profile modification page:
https://<appDomain>.authing.cn/u
Where <appDomain> is the second-level domain name of your SSO application.
If the user is not logged in, the user will be required to log in before entering the personal center; for the logged-in user, it will directly enter the personal center.
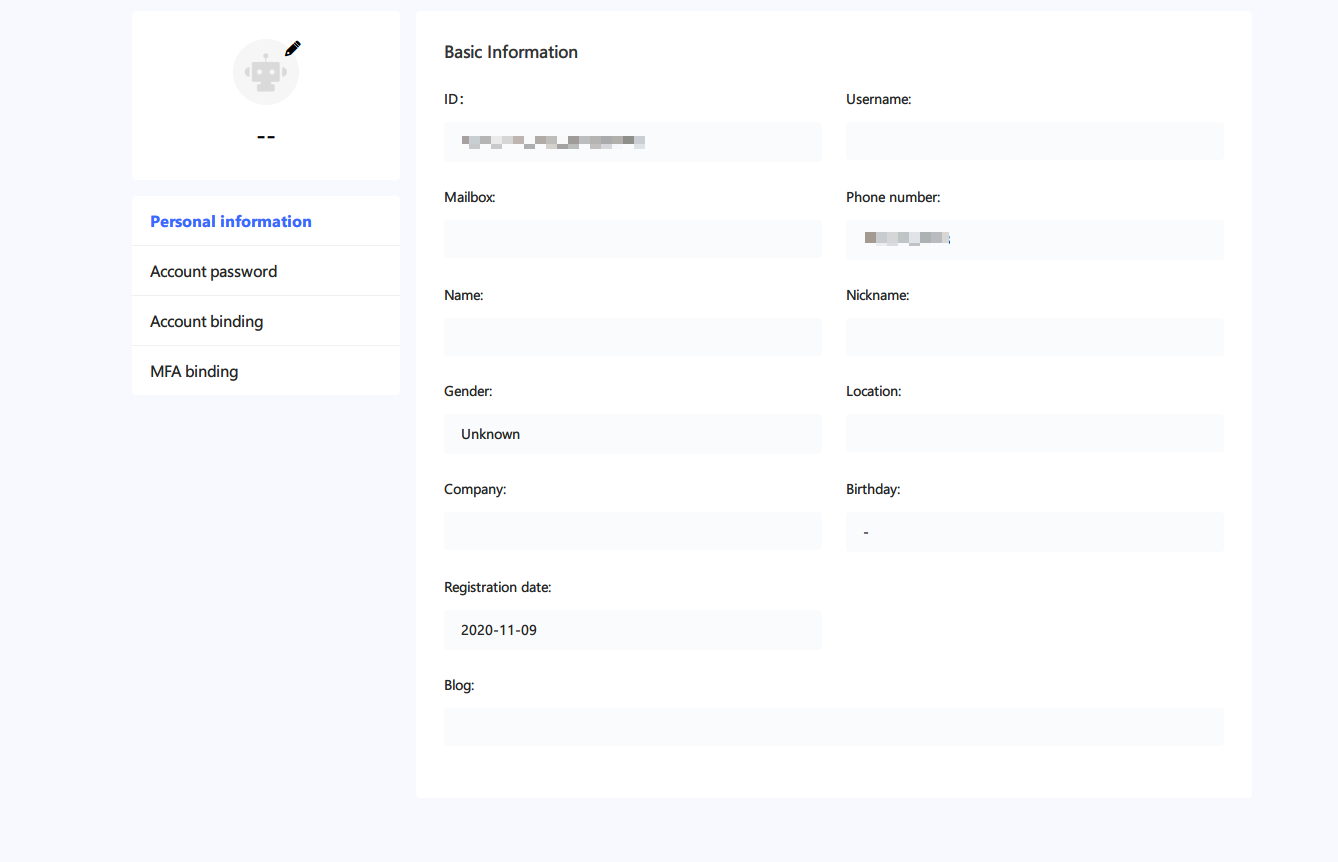
Personal center
# Verify token legitimacy
After a successful login, the user information you get contains a token field, the value is an IdToken, this is the login credential used, which can be used in the backend to determine the user's identity. You may need to know how to verify the legitimacy of the token, please refer to the following:
Verify Token# What is id_token?
id_token is equivalent to the ID of the end user, used to authenticate the user's identity, and is issued after OIDC authorization. When you need to request resources from your own server, you should carry id_token, and your server should verify the validity of this token, and then return the corresponding resource. For the difference between id_token and access_token, please see here.
# Next you may also need
Learn the basics of Authing and the professional terms we will use:
Basic ConceptsThe console is where you manage all Authing resources. You can learn about the contents of each module of the Authing console and the things you can do in the console:
Overview of ConsoleLearn about the multiple deployment models provided by Authing to help you choose how to deploy Authing:
Privatization Deployment and PricingUnderstand the detailed parameters of "SDK for Single Sign-on":
SDK for Single Sign-On