# Manage resource permissions
As an administrator, you can manage and assign resource permissions in the console. Before practicing rights management and authorization, you need to understand several concepts.
- Application: As an administrator, you can create an application. The application is a definition of the application project you are developing in Authing. For example, when you are actually developing a "network note" application, you should Authing created an application called "Web Notes".
- Resources: Afterwards you can define some resources in Authing. For example, the resources in the "Web Notes" application may include notebooks, note content, authors, etc.
- Users: You can also directly assign permissions to users. You can also divide your users into different groups, roles, and organizational departments, so that you can easily manage them when assigning permissions in the future .
- Role: A role is a collection of a group of users. The users in the role will automatically inherit the authorized permissions of the role.
Next, we create applications, create resources, create users, and then define the authorization relationship between resources and users.
# Create an application
Please check Create Application Document.
# Create resources
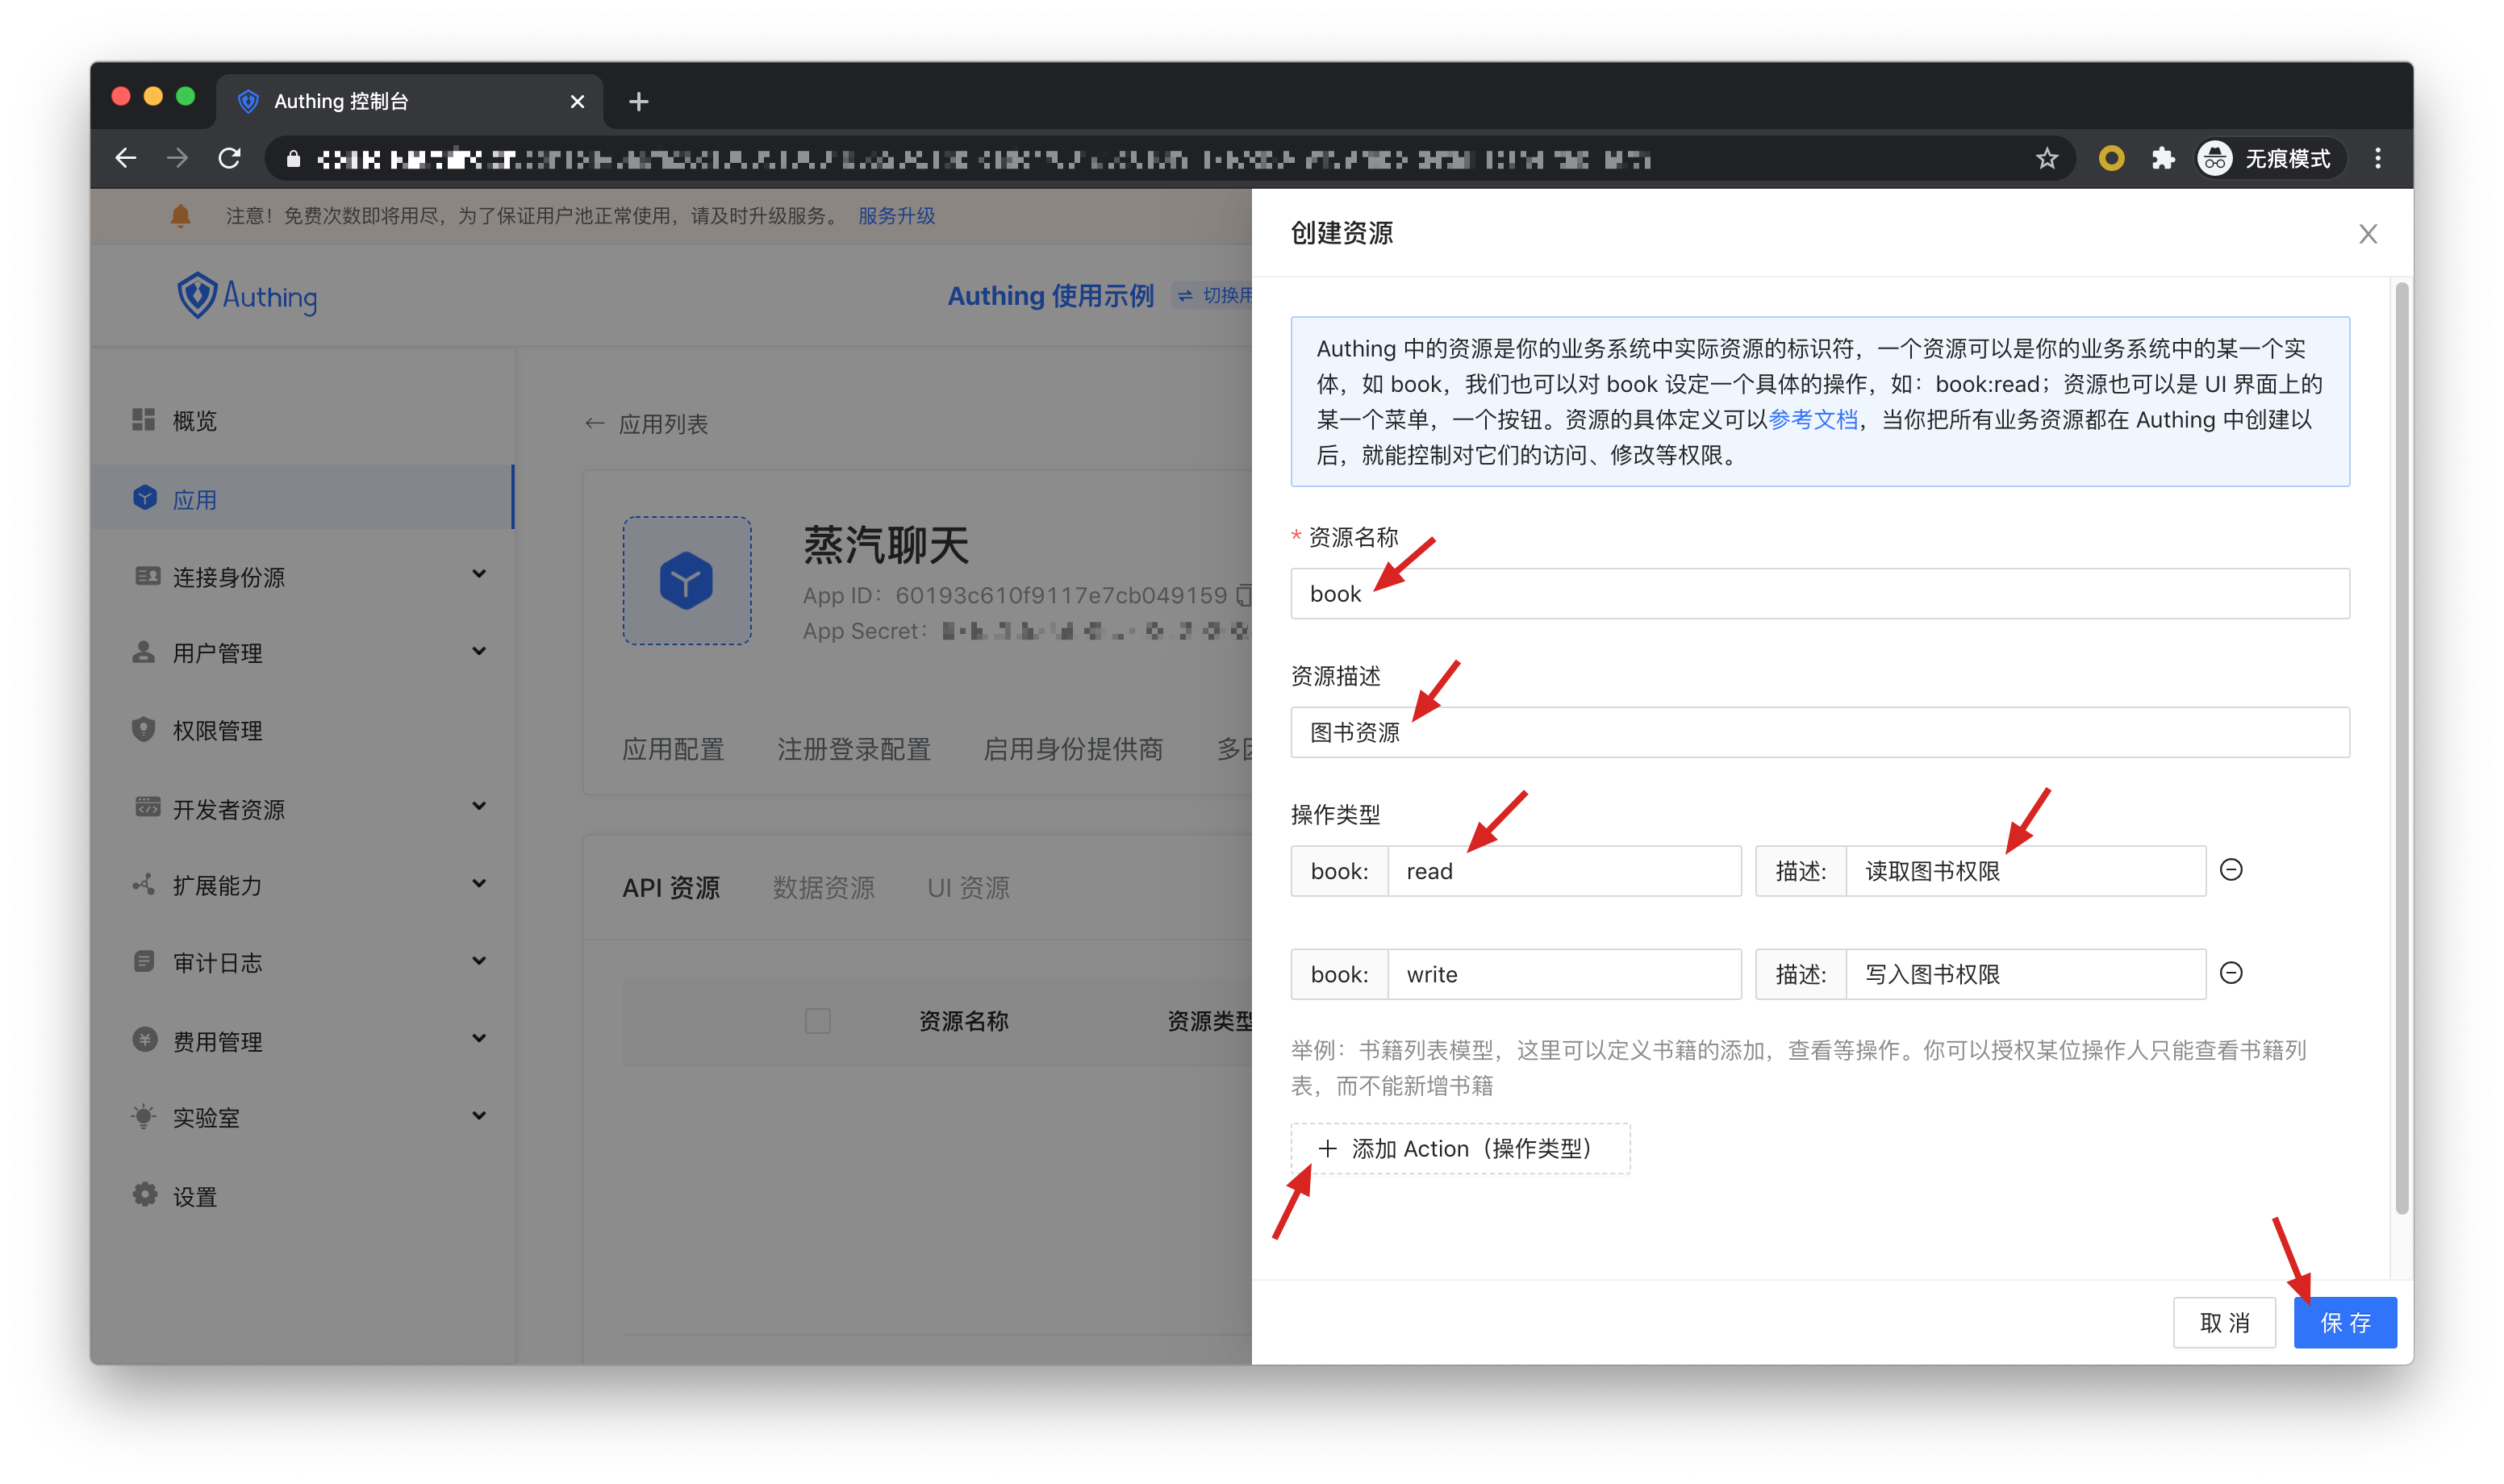
In the resource card under the application, click the Add button on the right.

Then fill in a resource name. It is recommended to fill in a semantic resource name for subsequent management. Resource operations can be defined in the operation type, where read and write operations are defined. Finally, click Save, and a resource is created.
# Create user
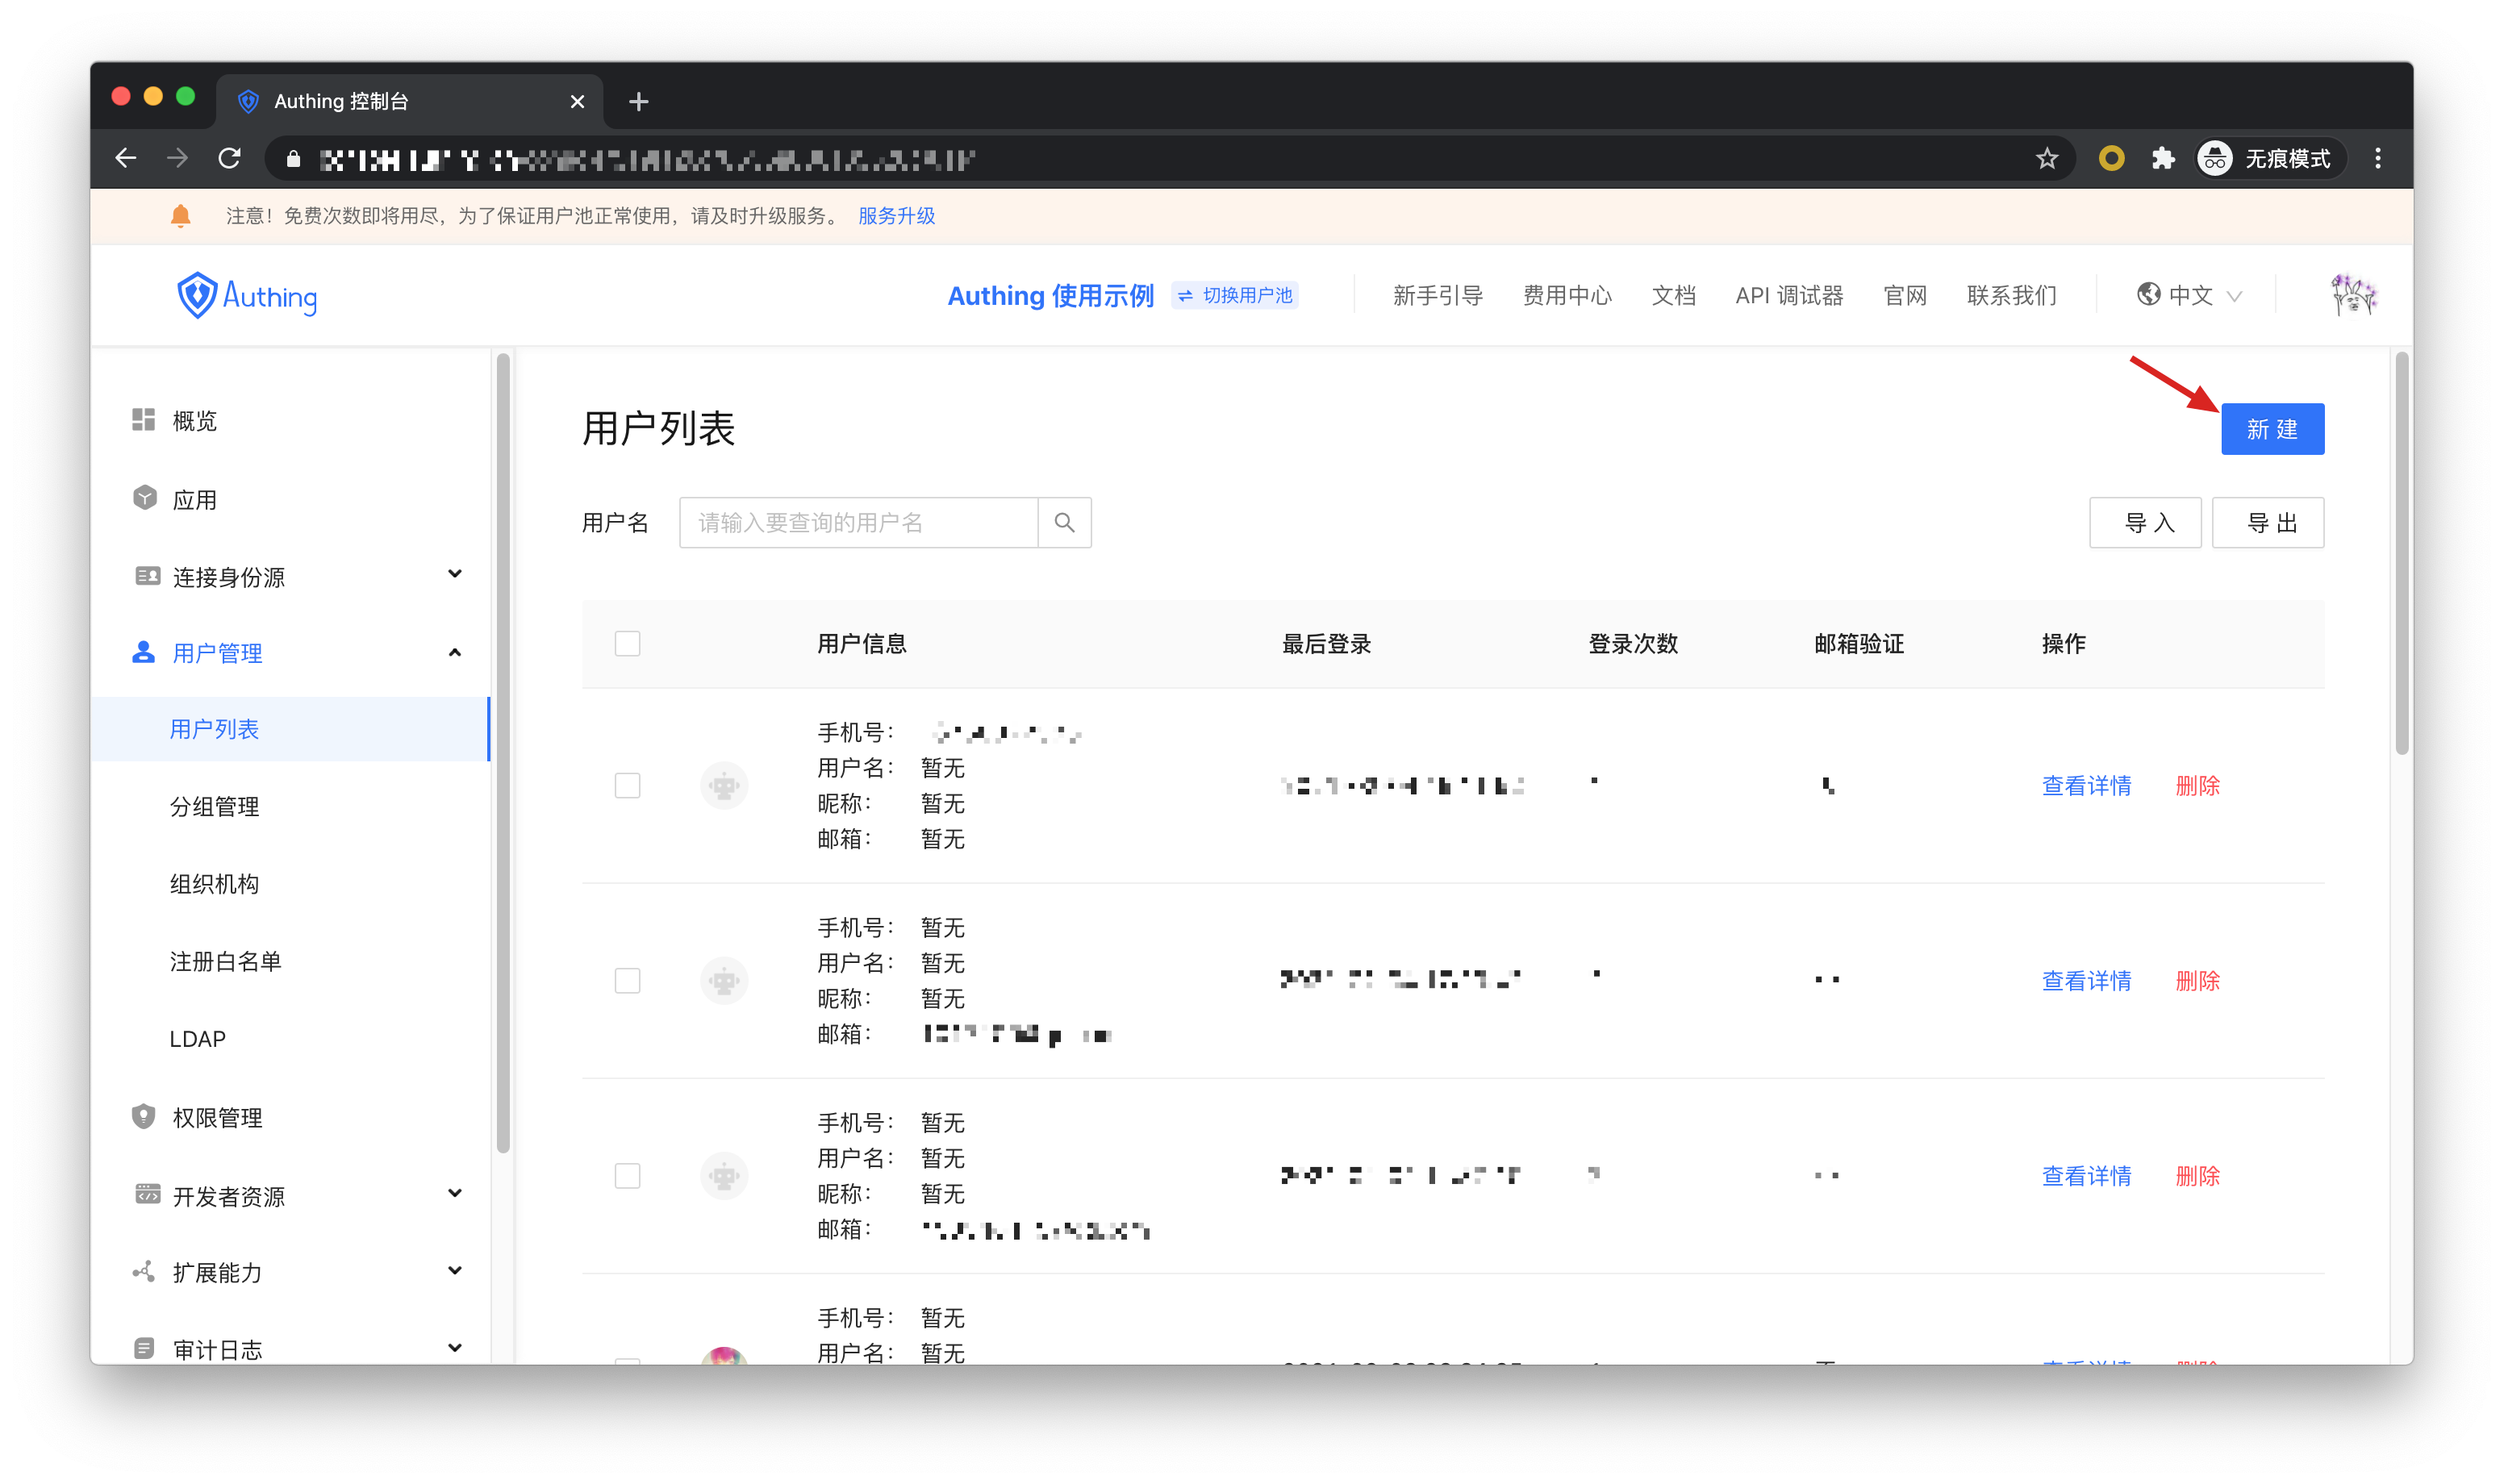
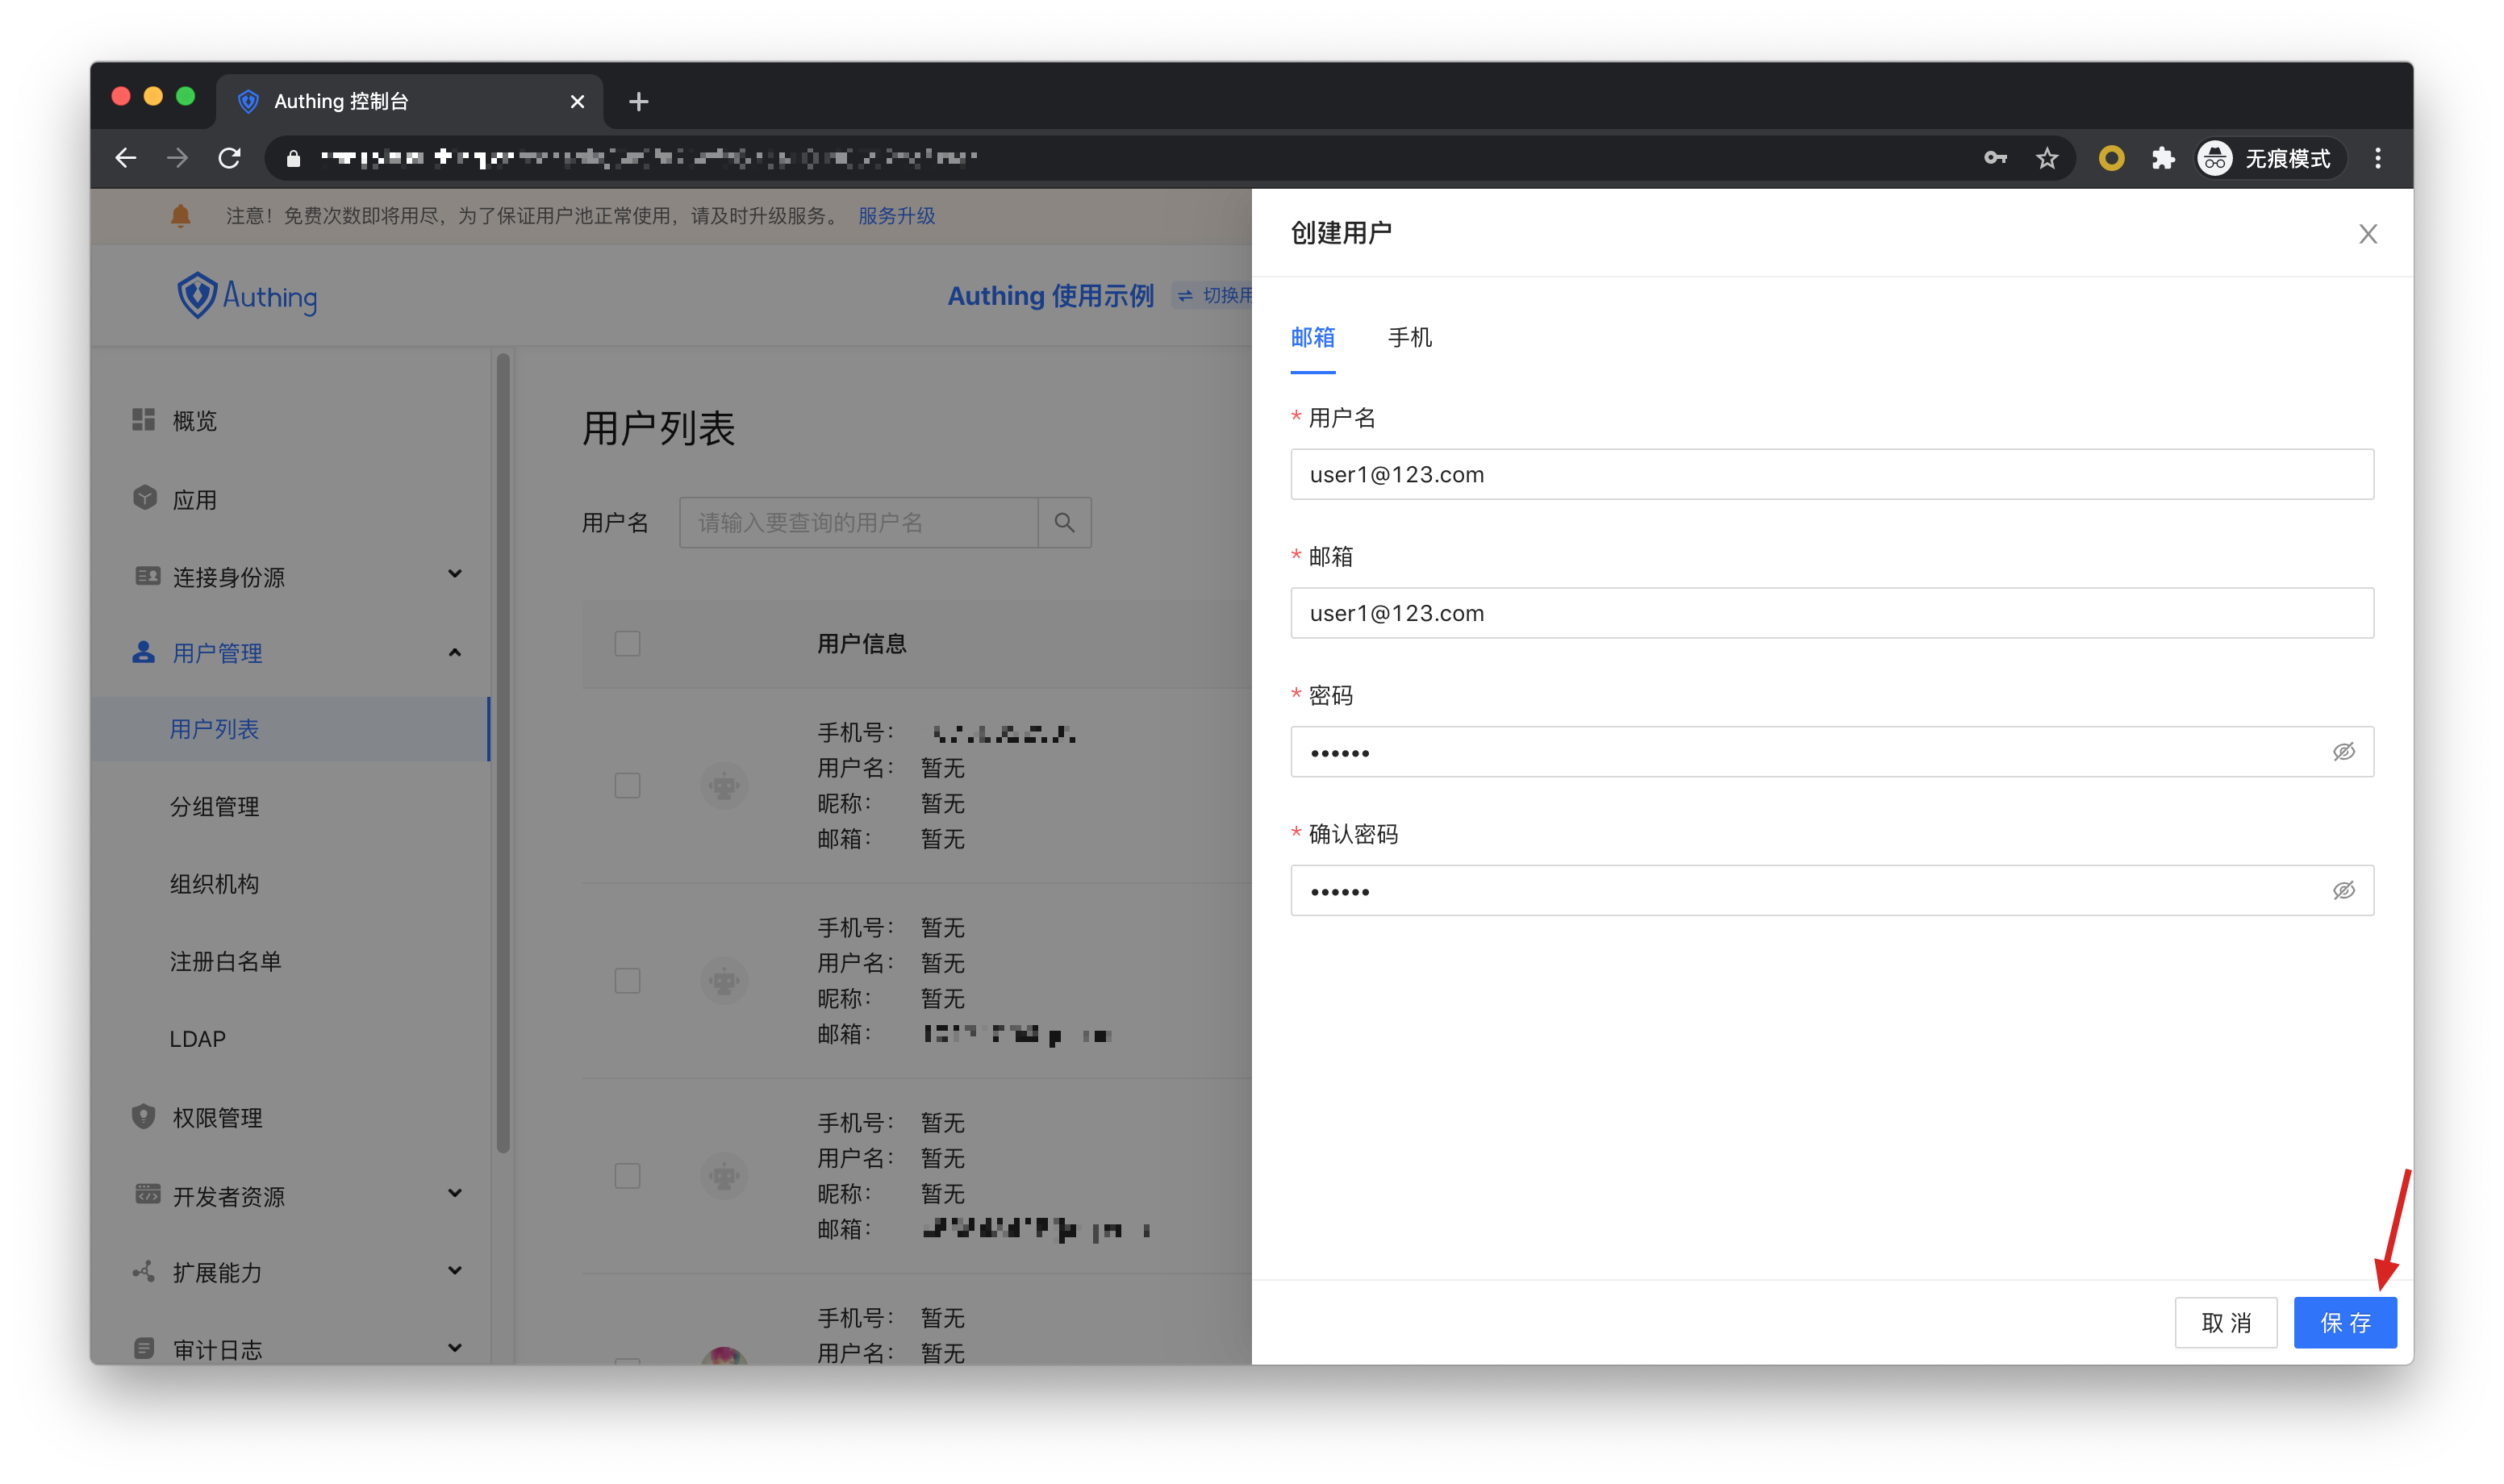
In the user list, click New to create a user.
# Creating a Role
In the Role Management card of the Application Details-Authorization menu, click the Add button on the right:
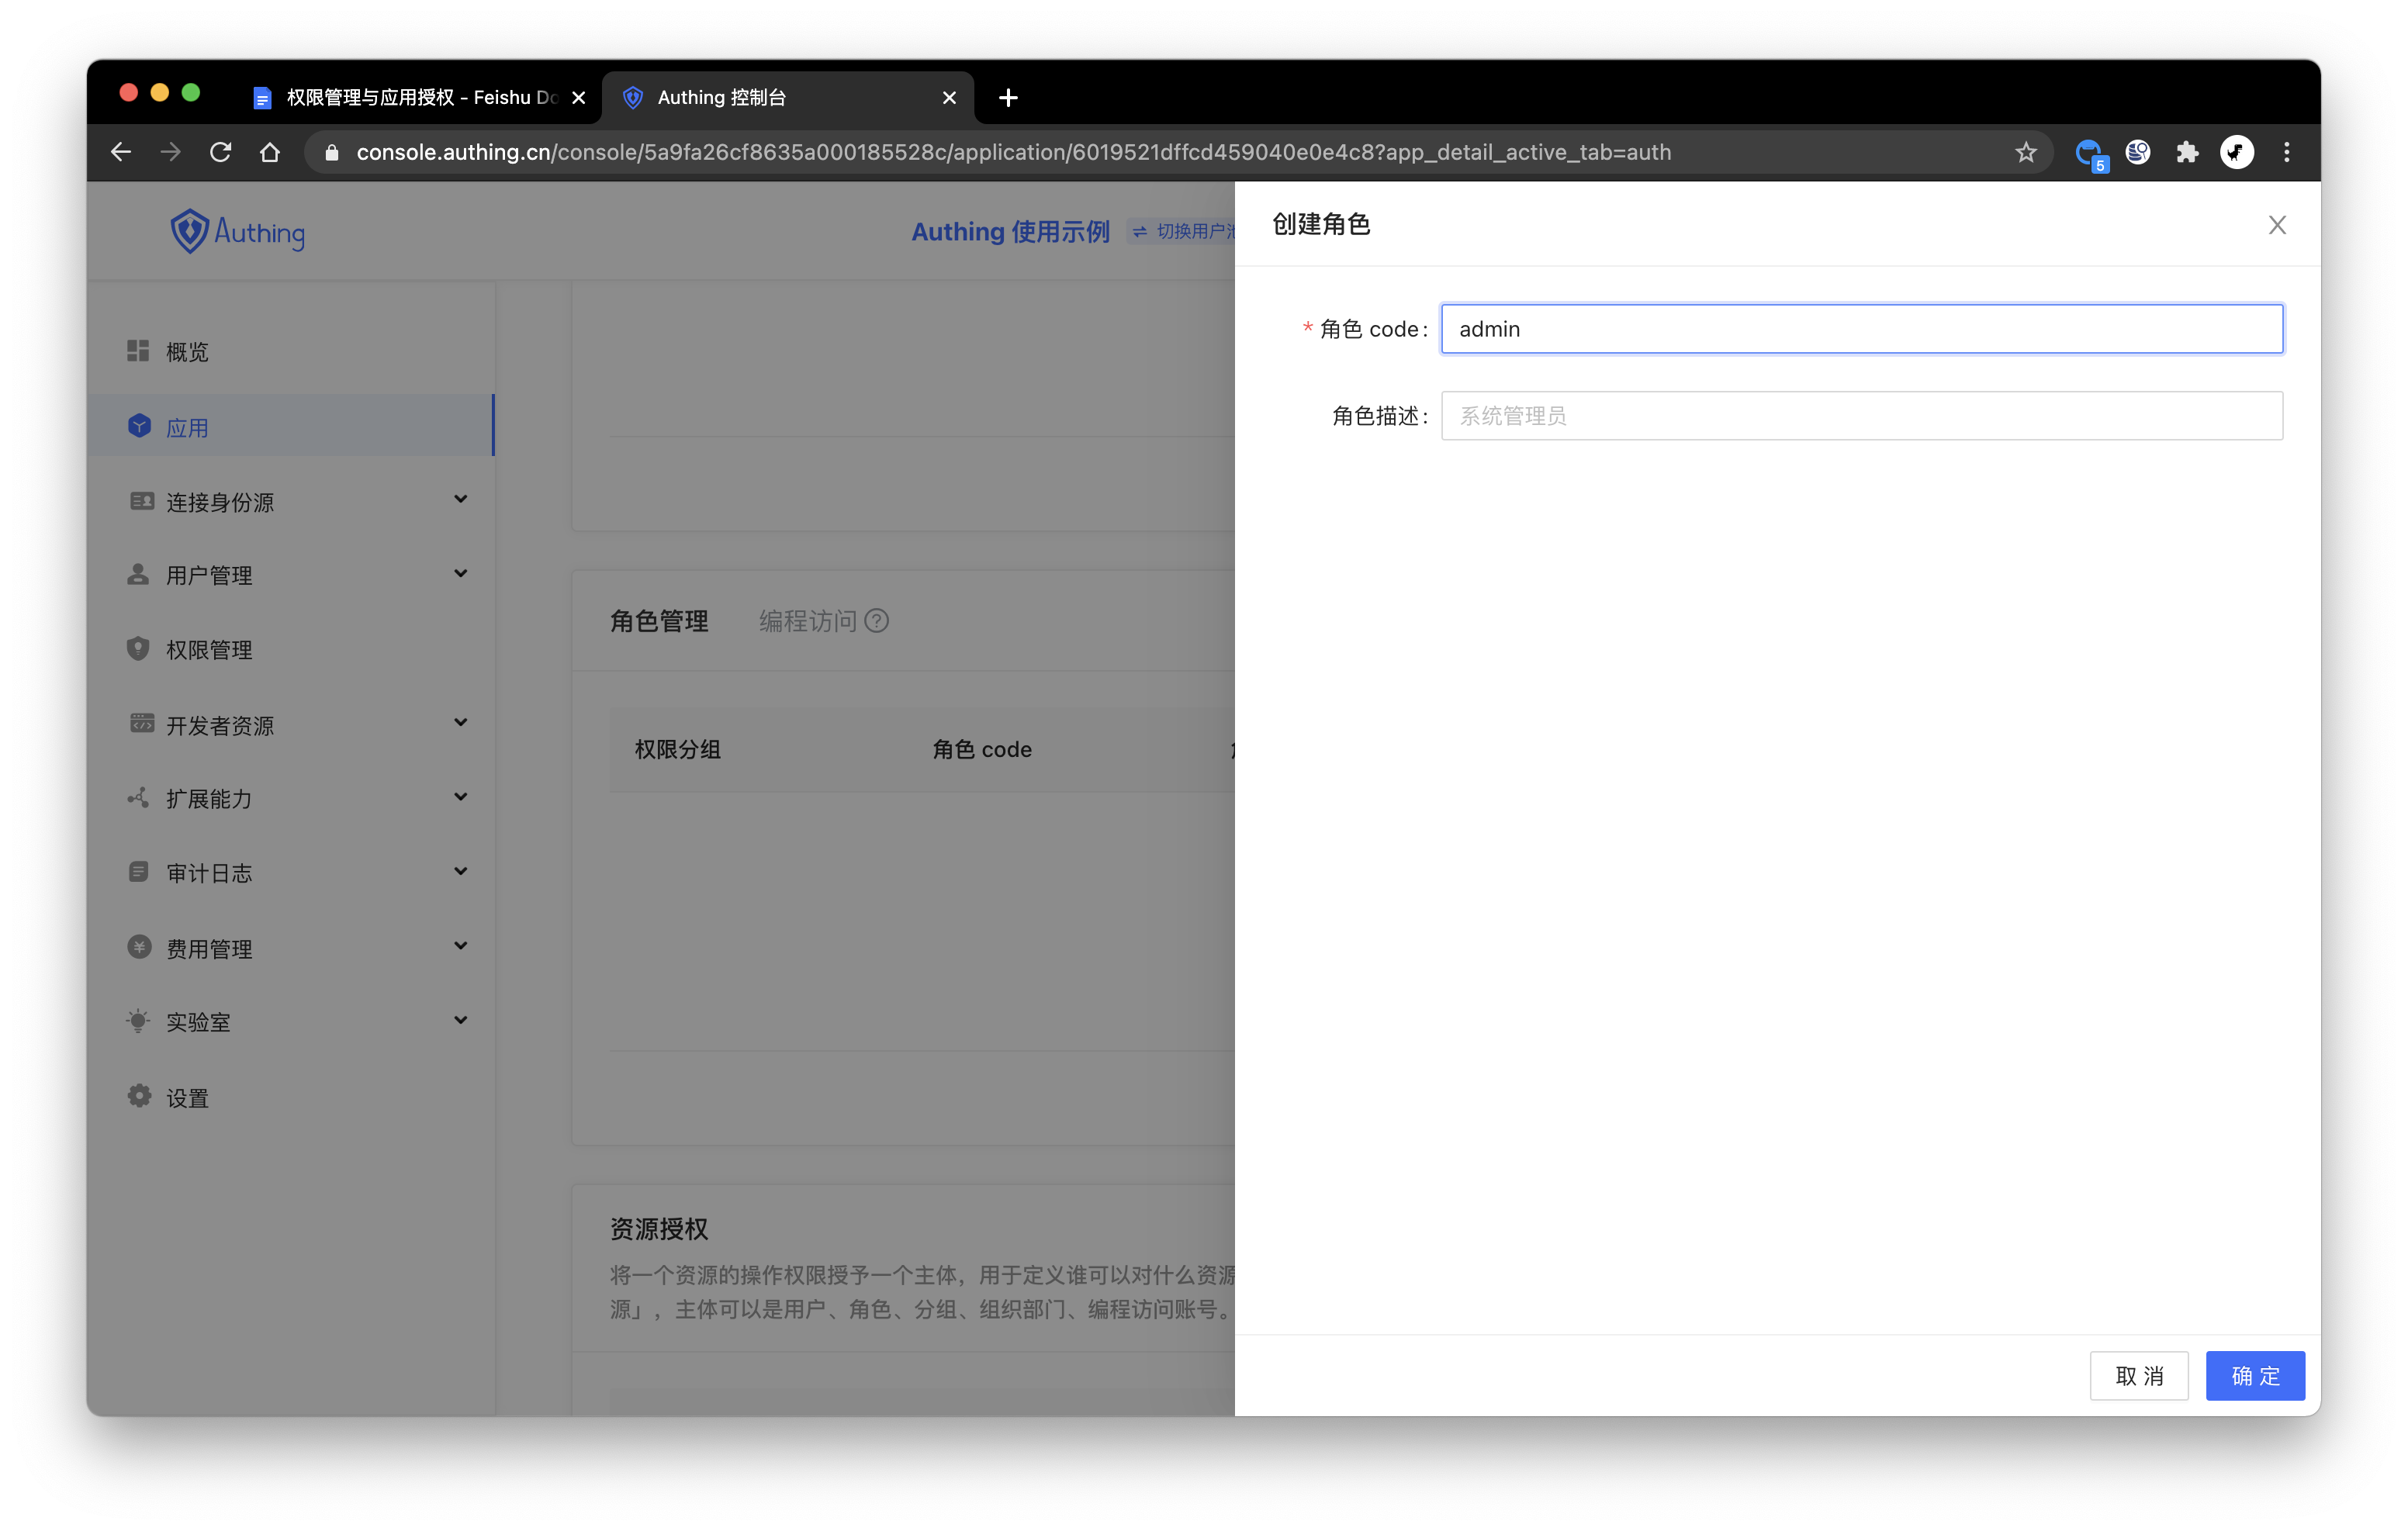
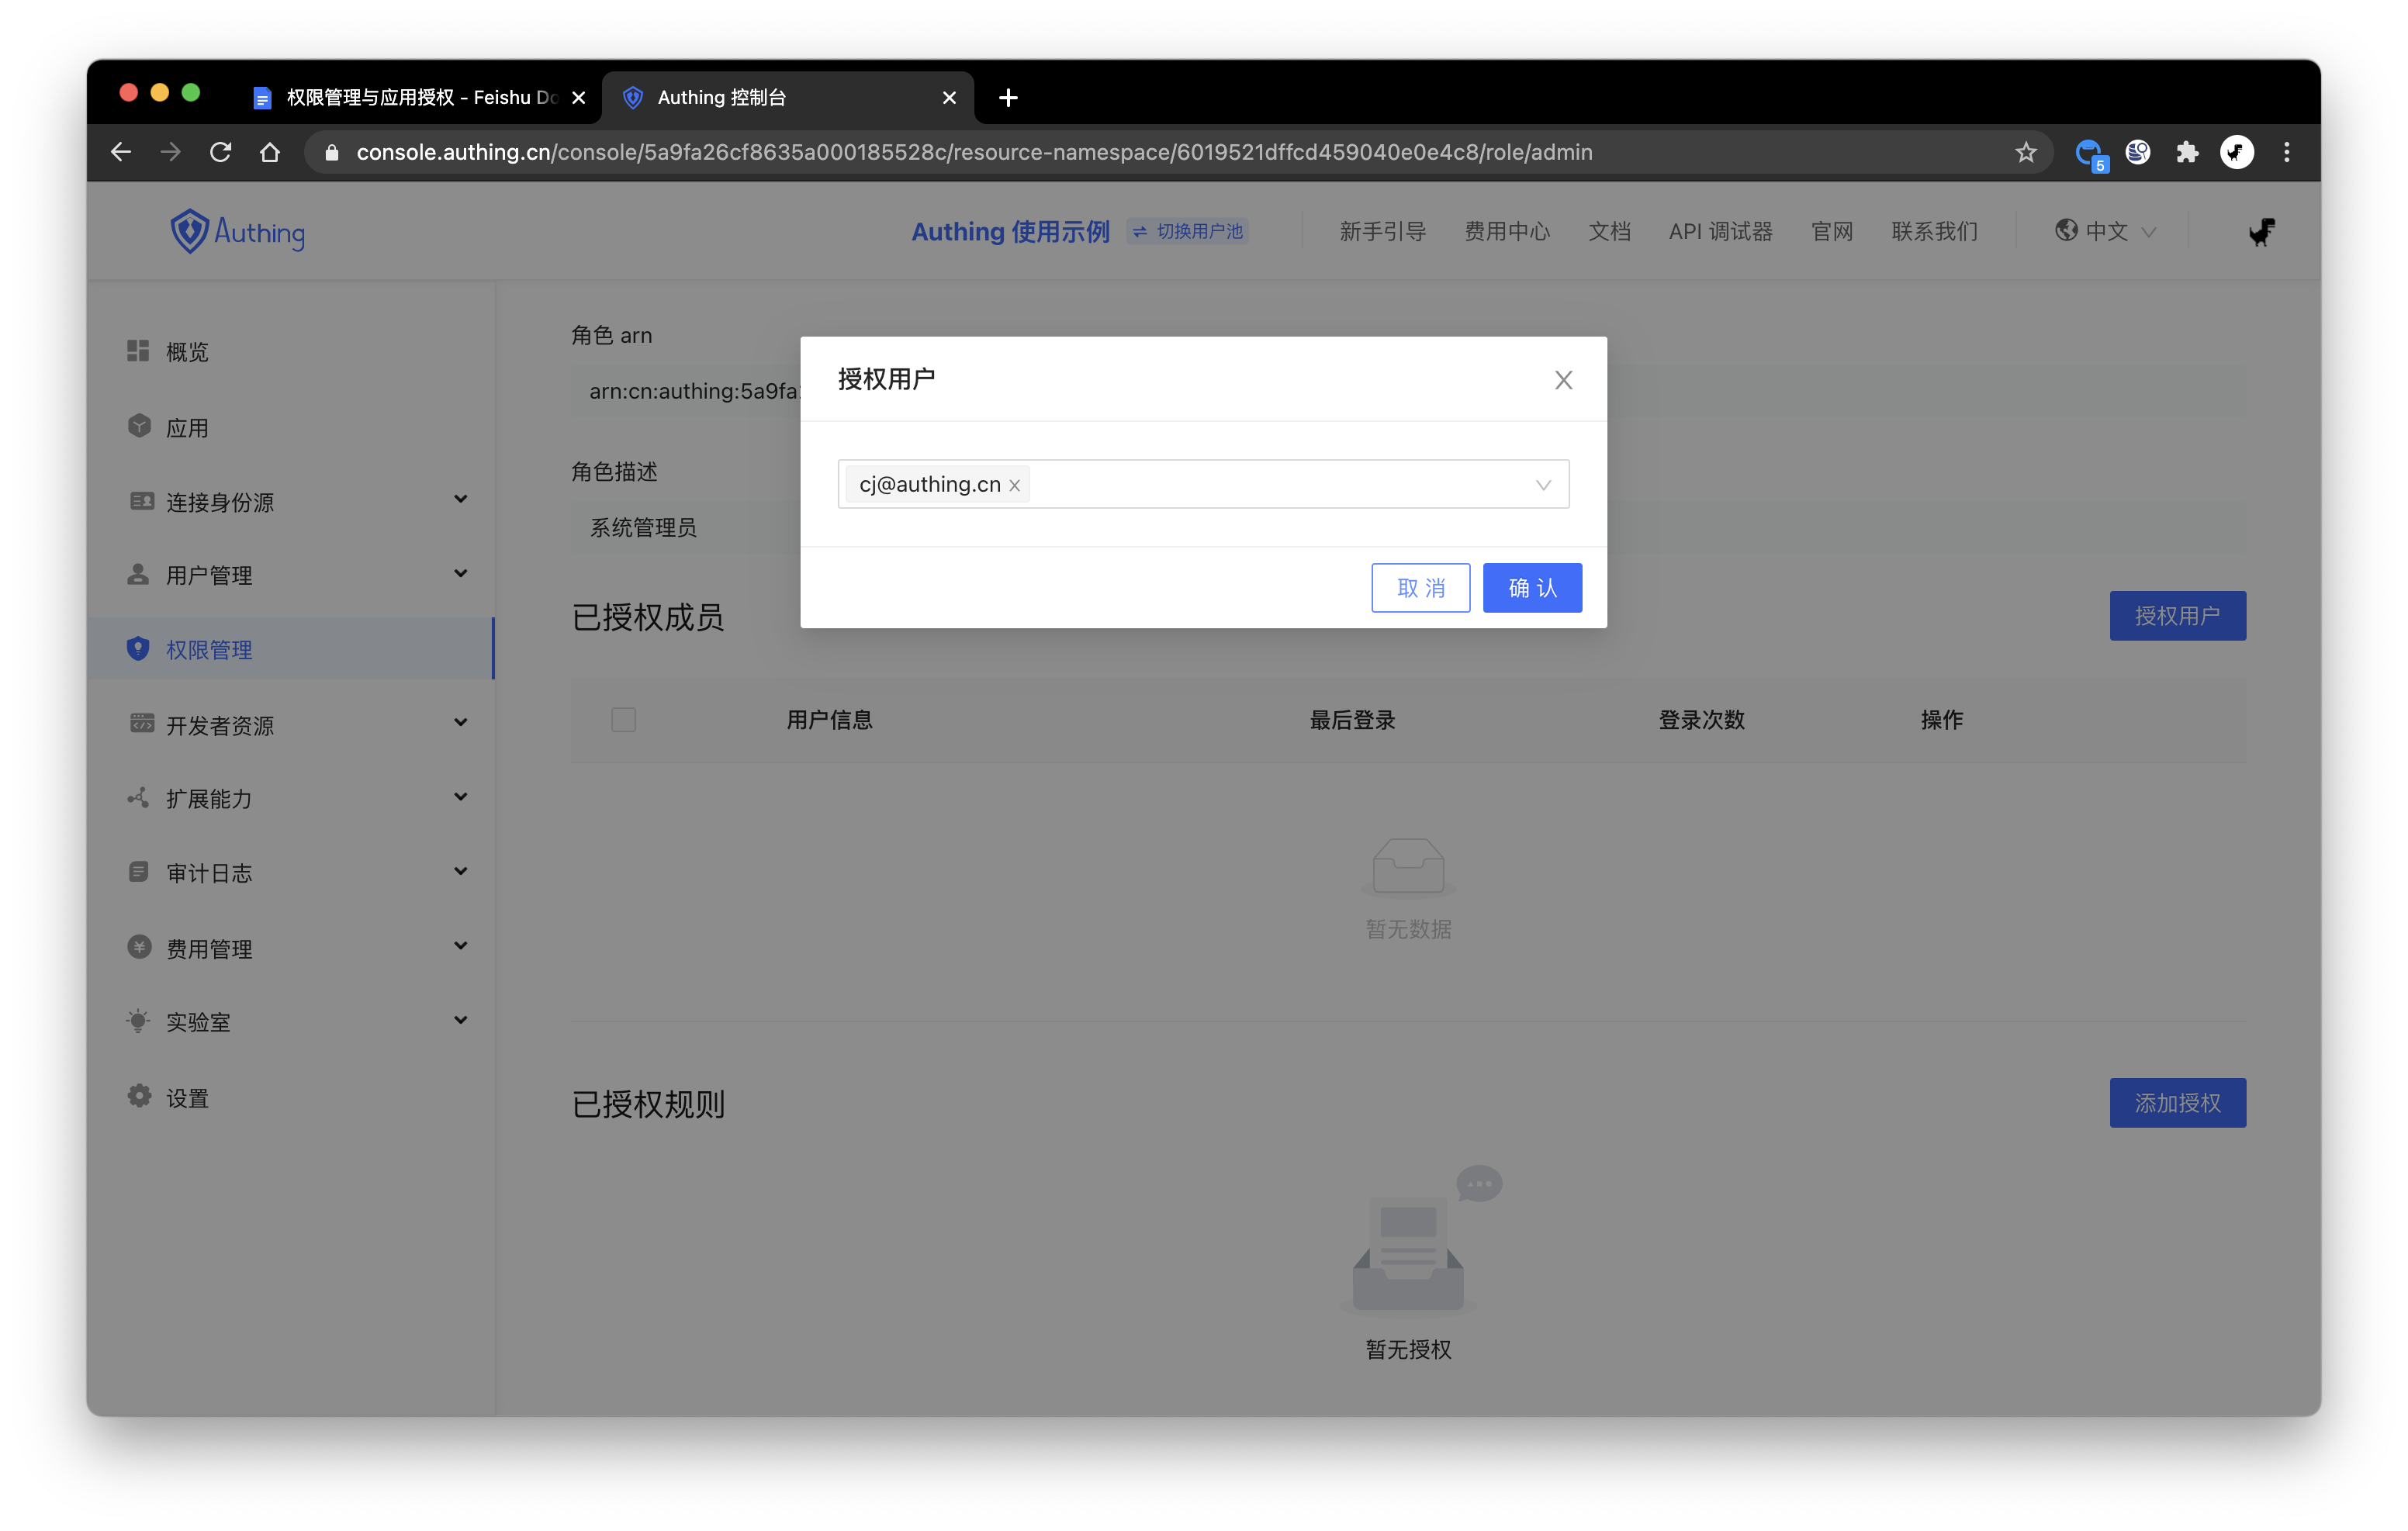
After creating the role, you can add users to this role:
You can search for users by username, email, nickname.
# Manage permissions
Now that you have resources and people, next you have to define "who" what "resources" can do with "operations". In the application’s resource authorization card, click the Add button on the right.

Authorized subject can choose User, here we select the user we just created, and select the book resource we just created in the Resource Type below.
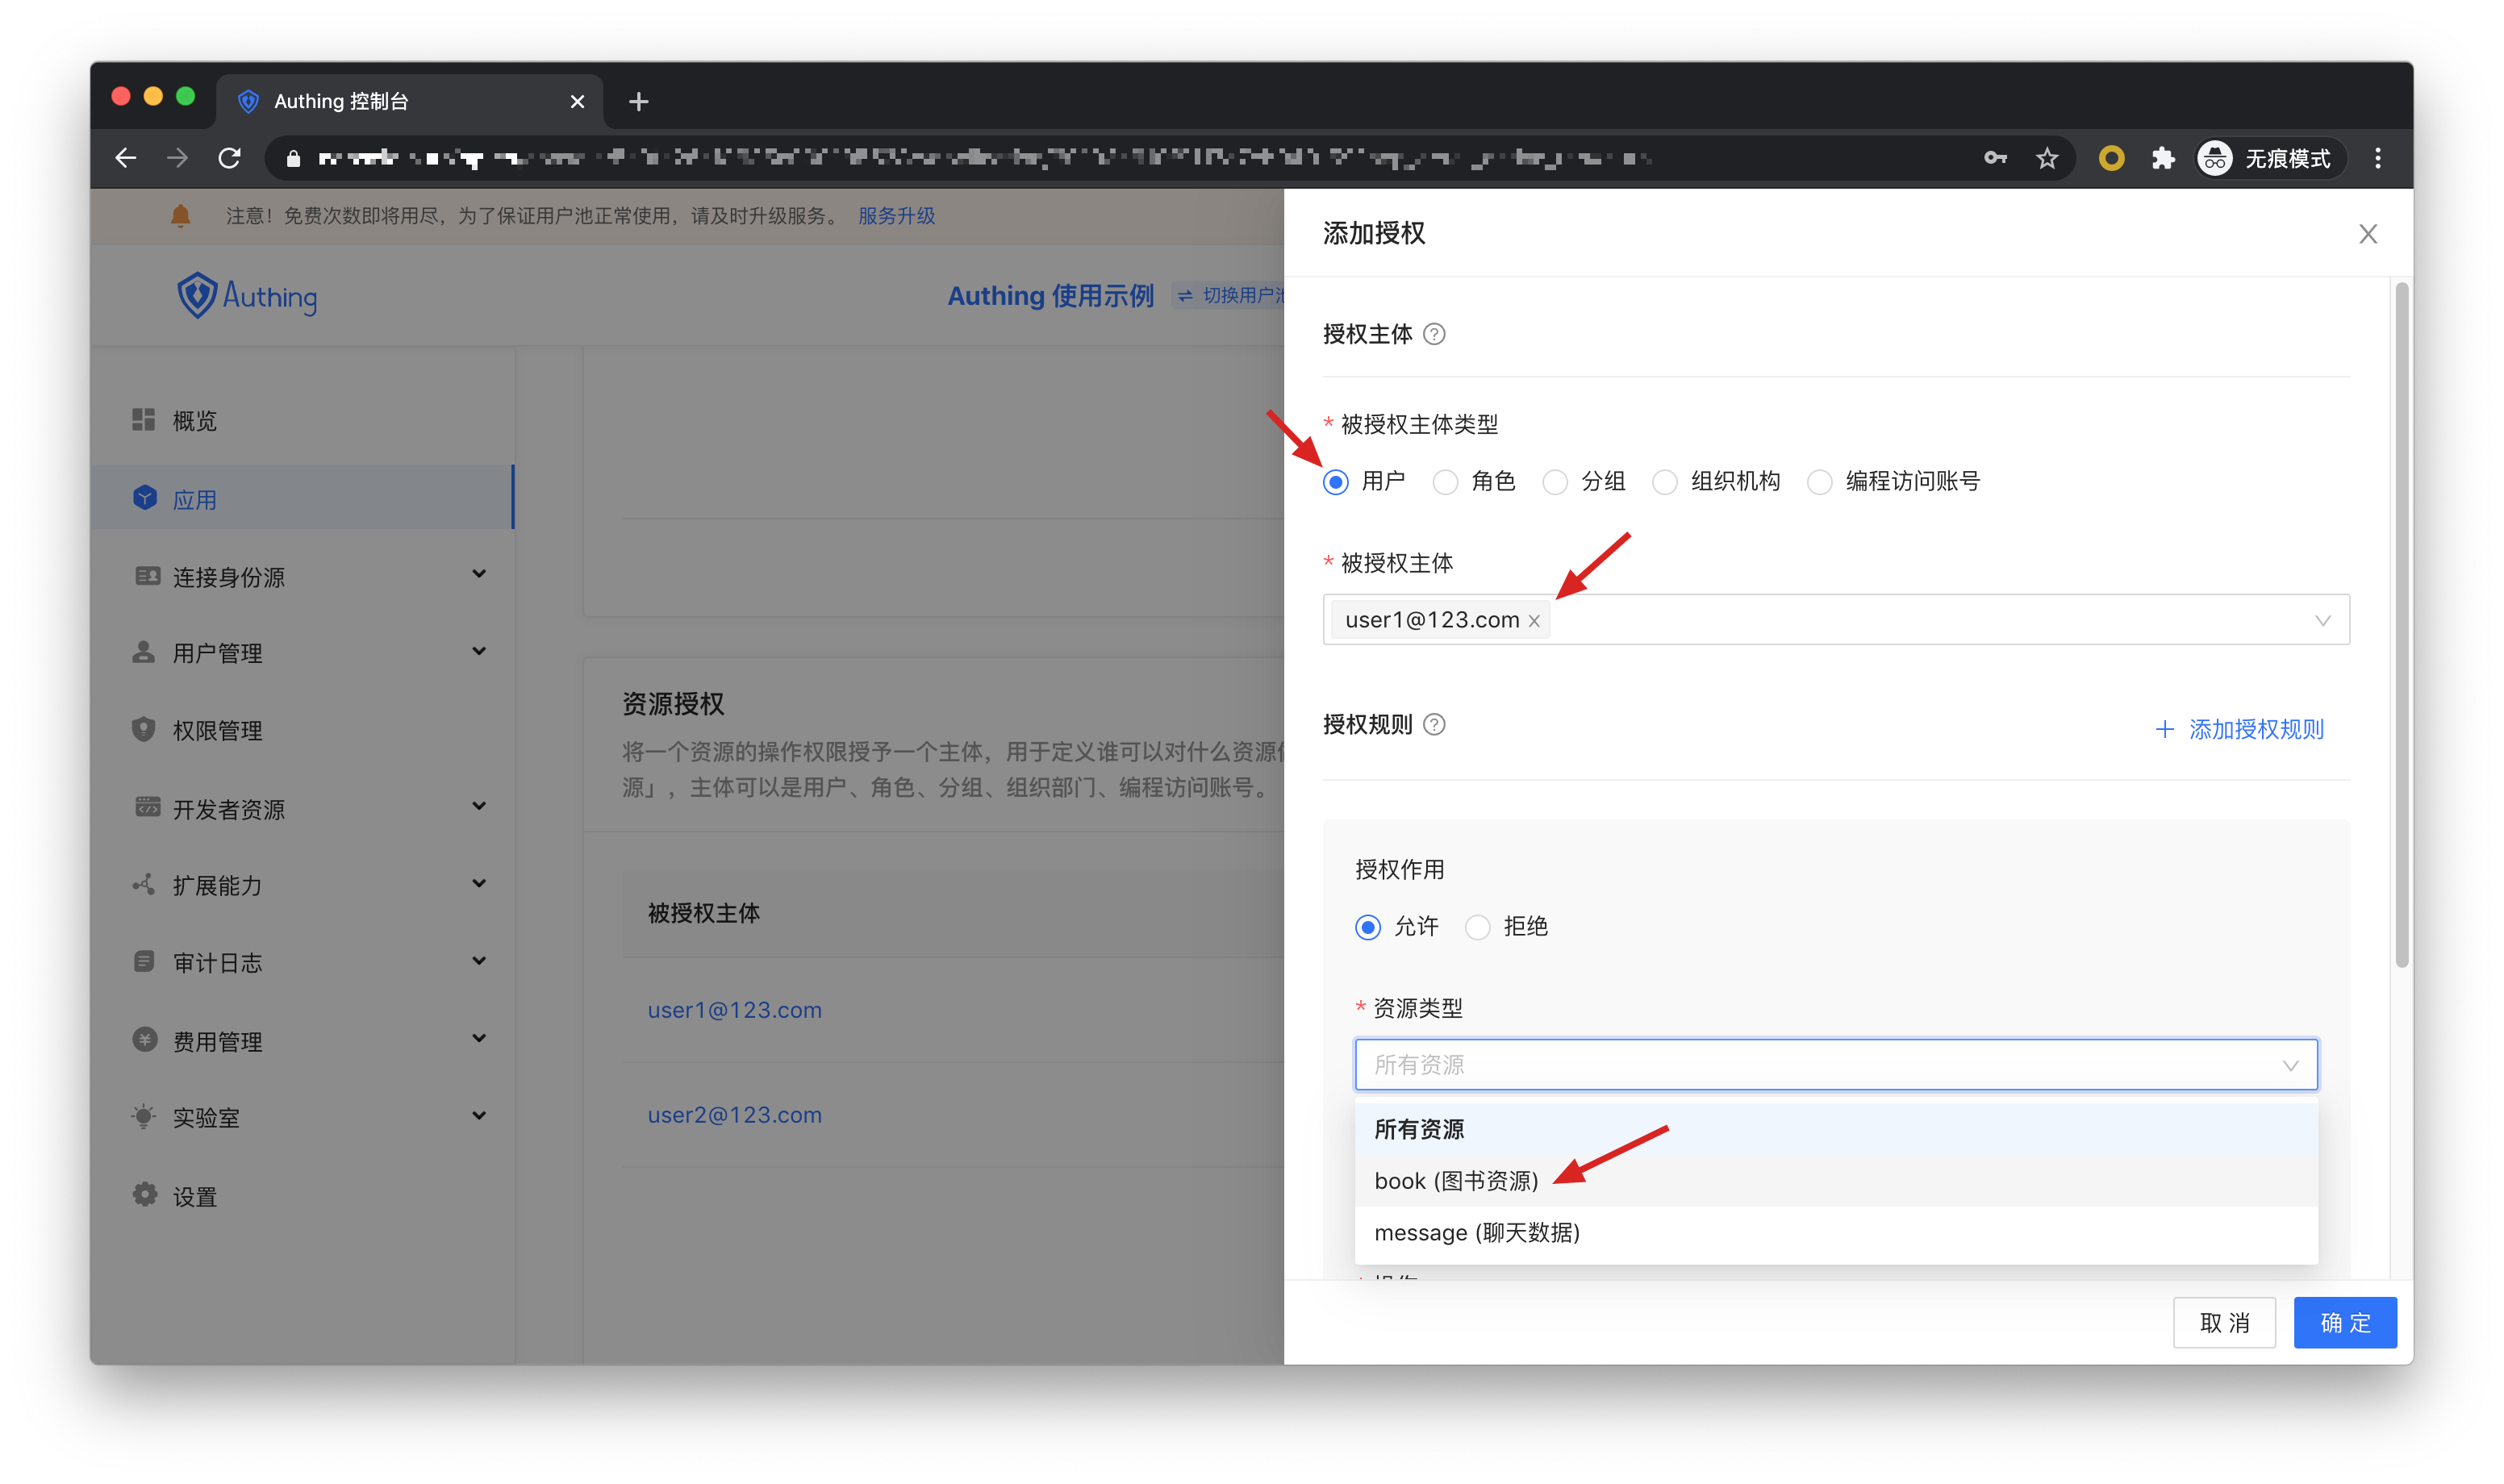
At the same time, the authorized subject can also select role, so that all users in the role will automatically inherit the authorized permissions of the role.
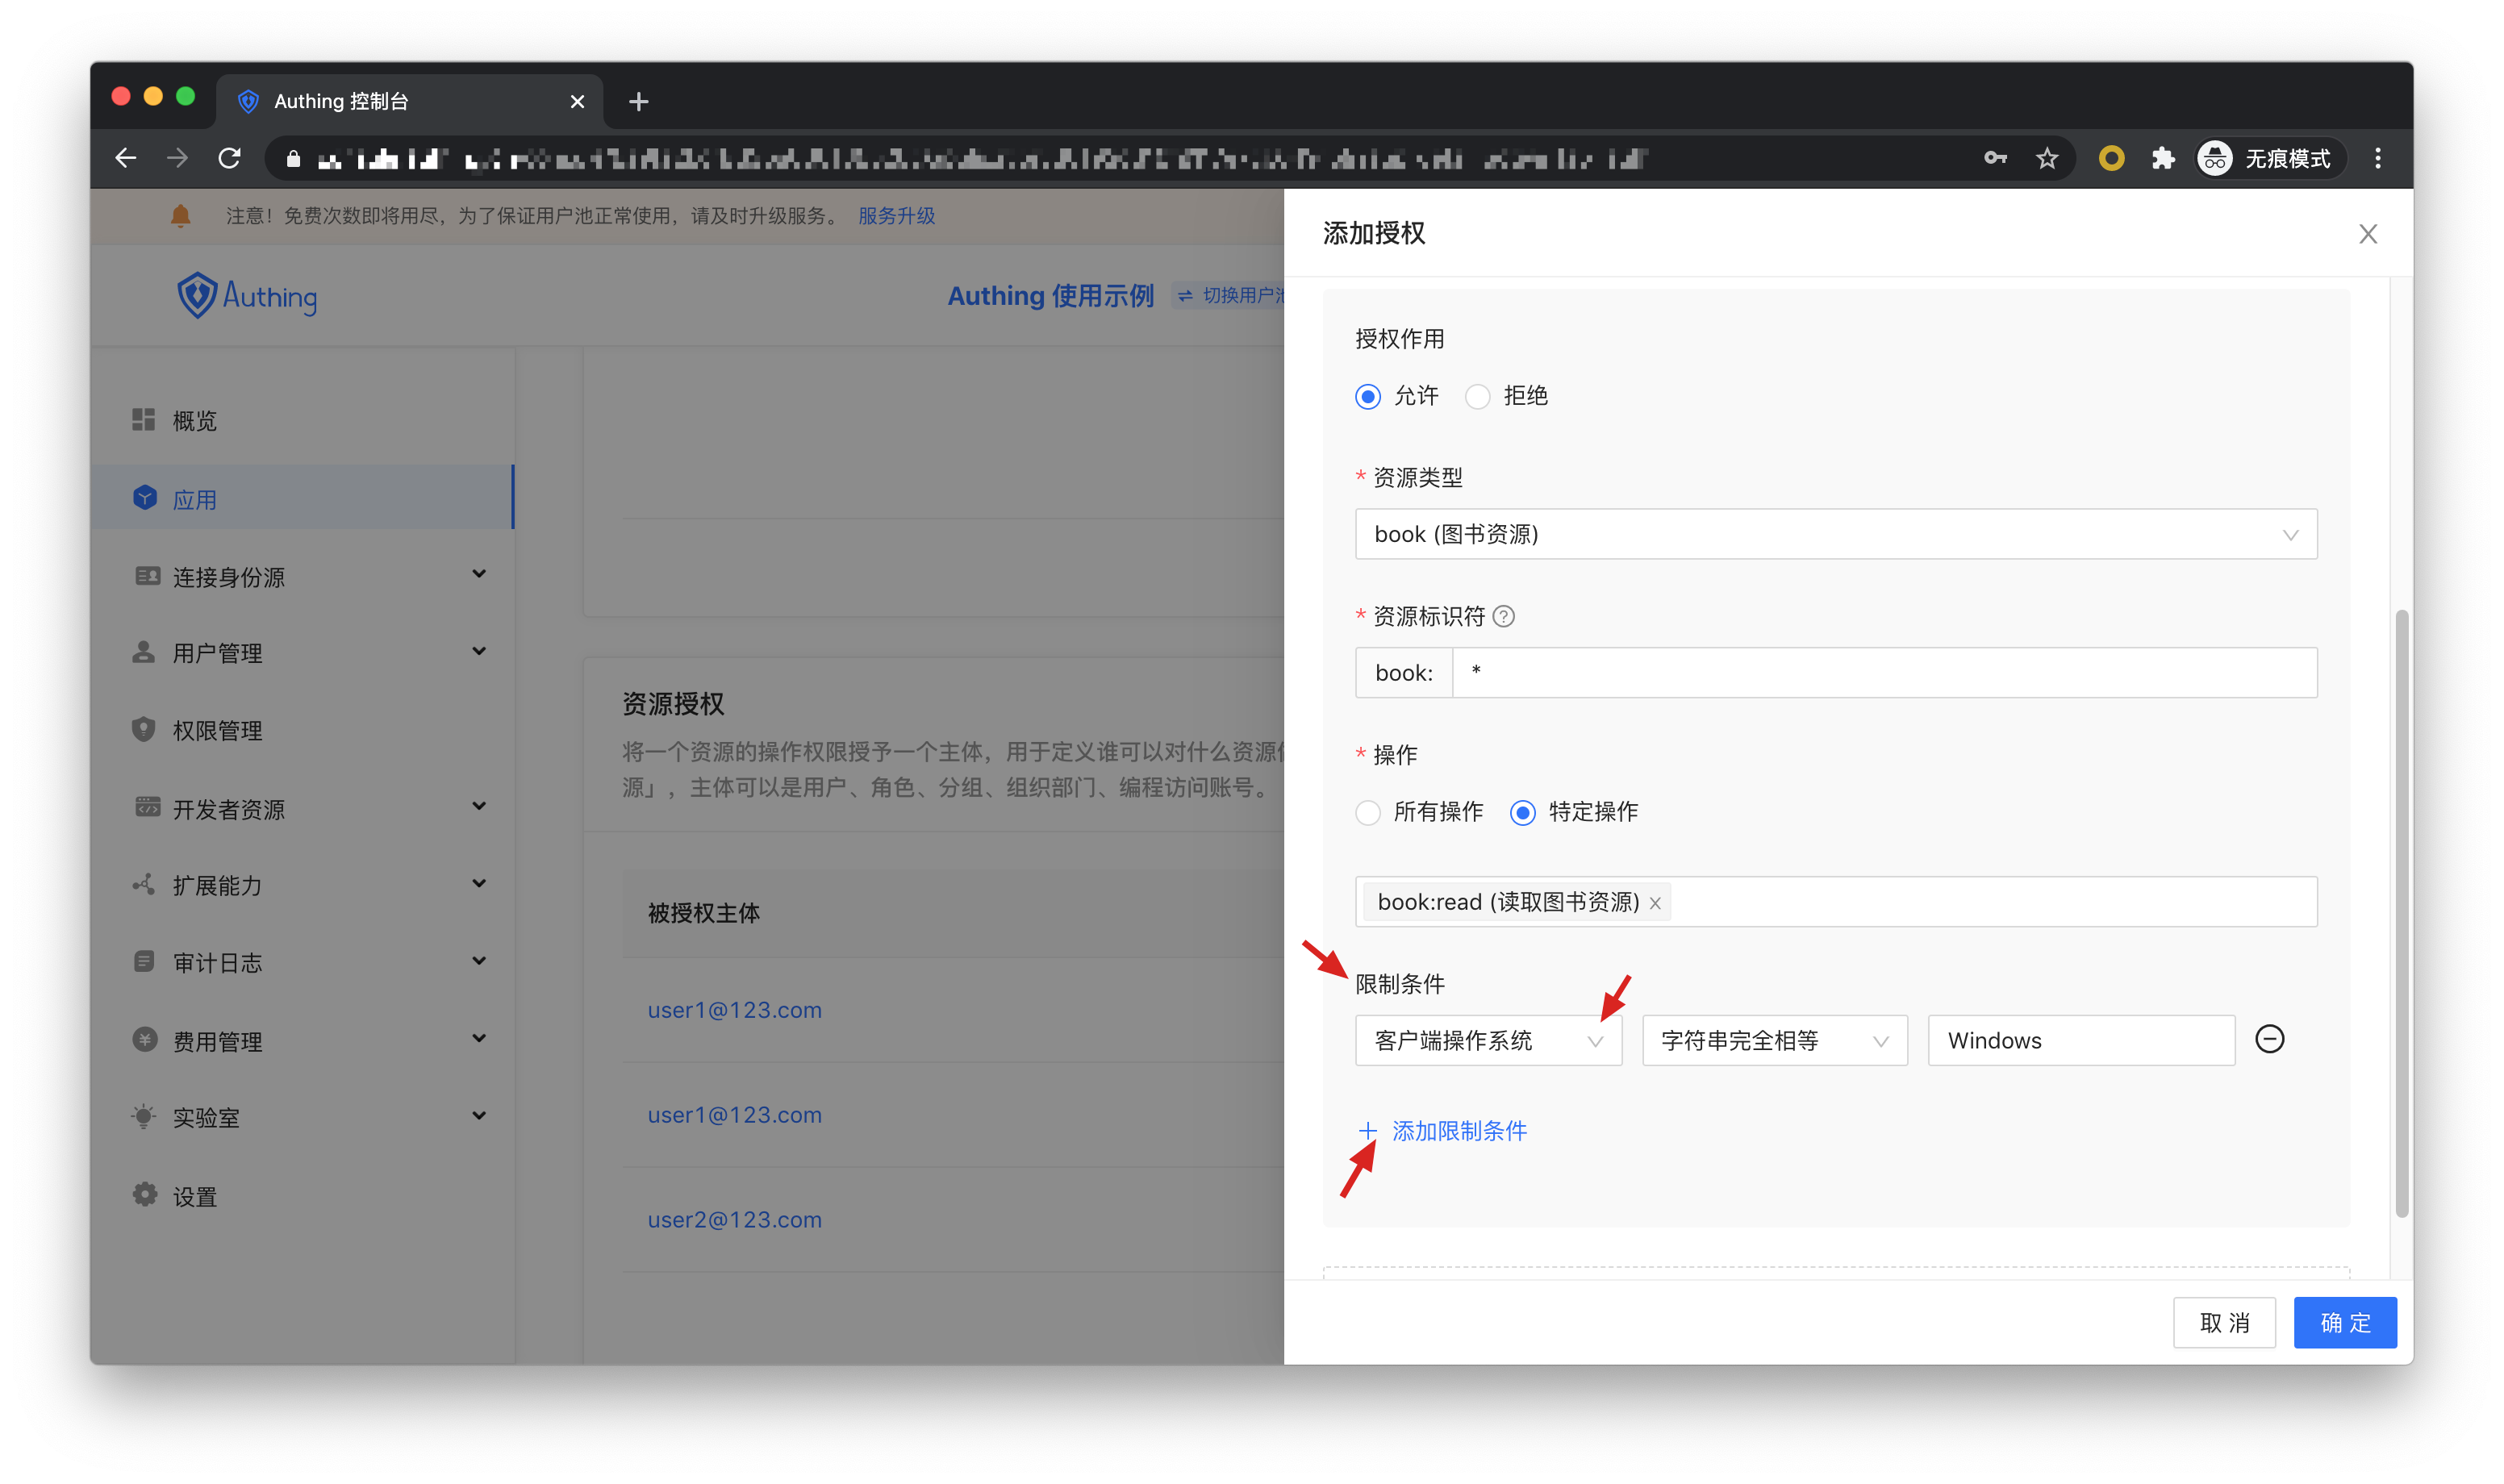
Then resource identifier fill in *, which means to authorize all book resources, select specific operation for the operation, select the read book list operation in the resource operation we just defined, and finally click OK .
If you fill in a specific identifier, such as 42, it means that the book resource number 42 is authorized to the subject. The subject only has the authority of the book:42 resource, and can only authorize the relevant authority of the book:42 resource during authorization.

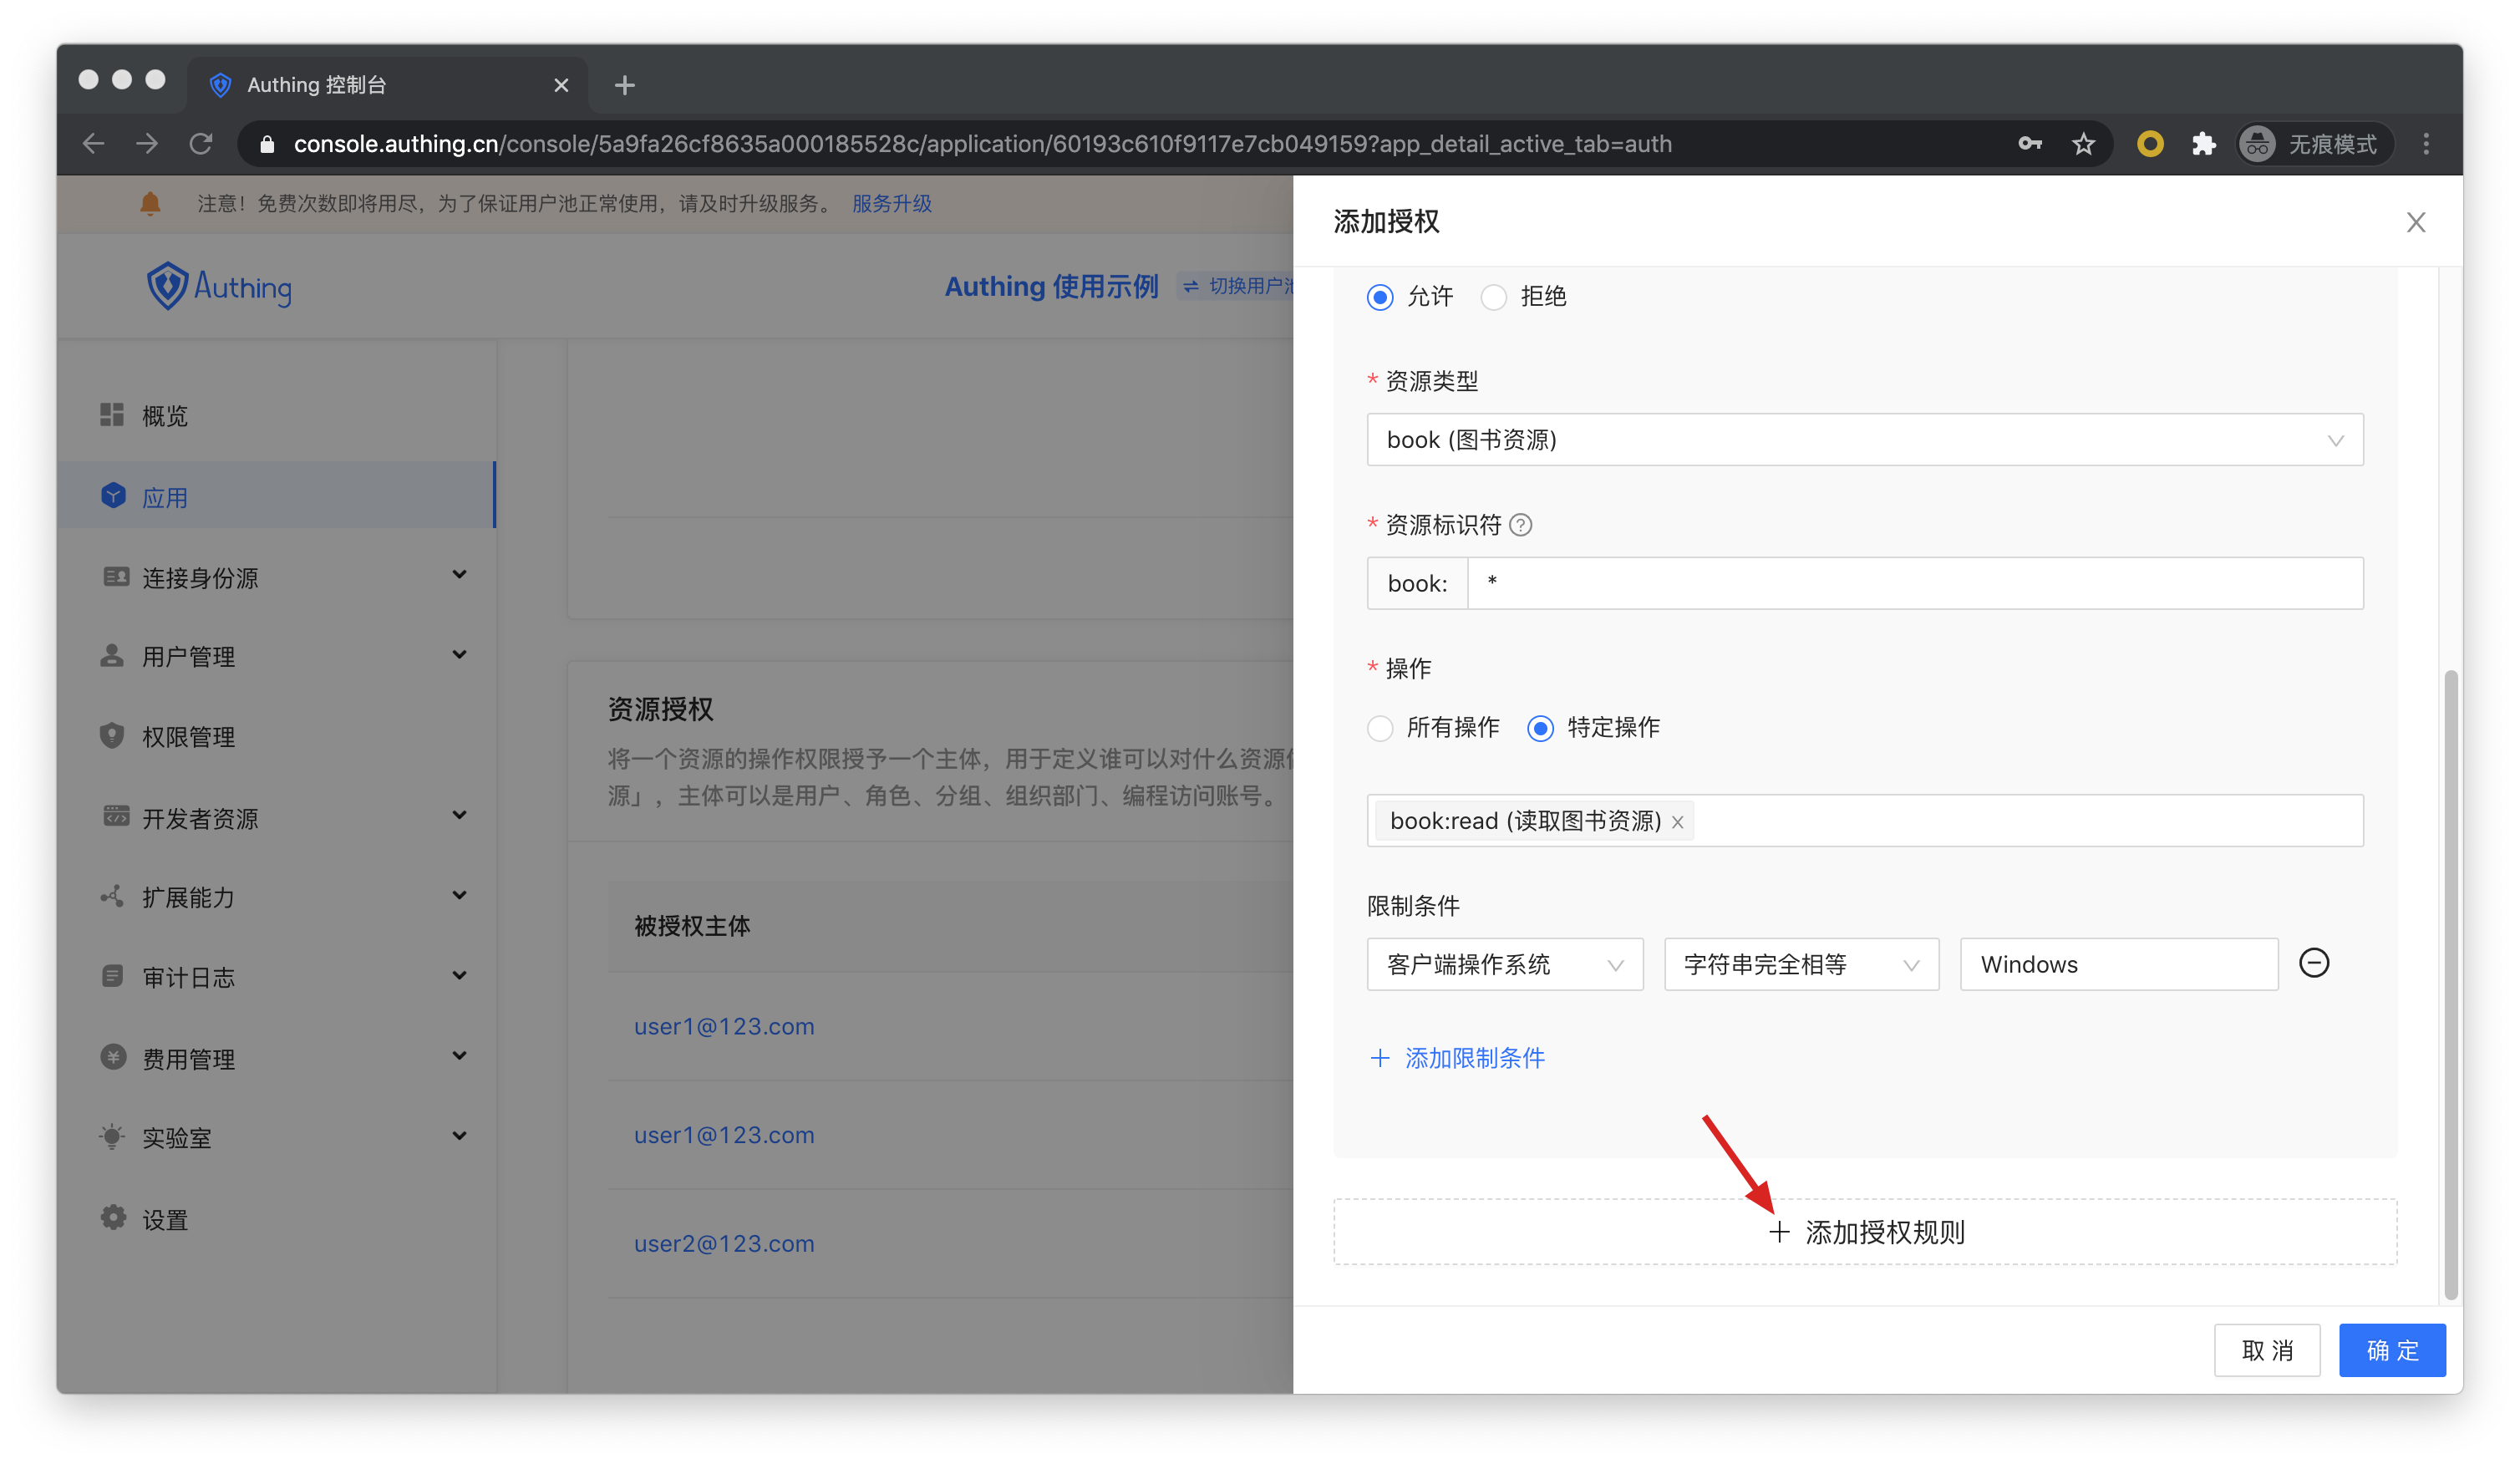
We can also add restrictions to authorization rules, for example, the rules are only valid for Windows users. If you initiate authorization from a Linux machine, Authing will think that the user has no permission and cannot complete the authorization of the book resource.
If you want to authorize multiple resources to users, you can continue to add authorization rules.
# Programming access account
The program access account is a pair of AccessKey and SecretKey under the application, which is used to hand over to third-party vendors such as outsourcers. You can use the programmatic access account in combination with the OIDC authorization code code to obtain the user's AccessToken and IdToken, or use the programmatic access account for OIDC ClientCredentials mode to request authorization on behalf of the caller itself.
