# Basic Concepts
In the field of technology, the biggest obstacle to learning new knowledge comes from "terminology." When you try to understand a new concept, a large number of terms will hinder your understanding. This article will explain the commonly used terms in Authing, hoping to help you become familiar with the knowledge involved in Authing as soon as possible.
This article will introduce the concepts of user pool, account, communication, domain name and third-party login. If you are familiar with these concepts, you can safely skip this chapter.
We will assume that there is a technology company called "extraordinary" with more than 300 people. This company wants to use Authing to authenticate their web applications with usernames, passwords and WeChat, and also wants to manage their own internal software systems , To realize the employee's single sign-on to the internal software.
# User pool
After registering an Authing account (opens new window), what you see is a blank list page. At this time, you need to create a user pool. After you have a user pool, you can authorize other applications (third-party applications or applications written by yourself) to read user data. The authorization protocol supports OAuth2.0, [OIDC](. ./authentication/oidc/understand-oidc.md), SAML and LDAP.
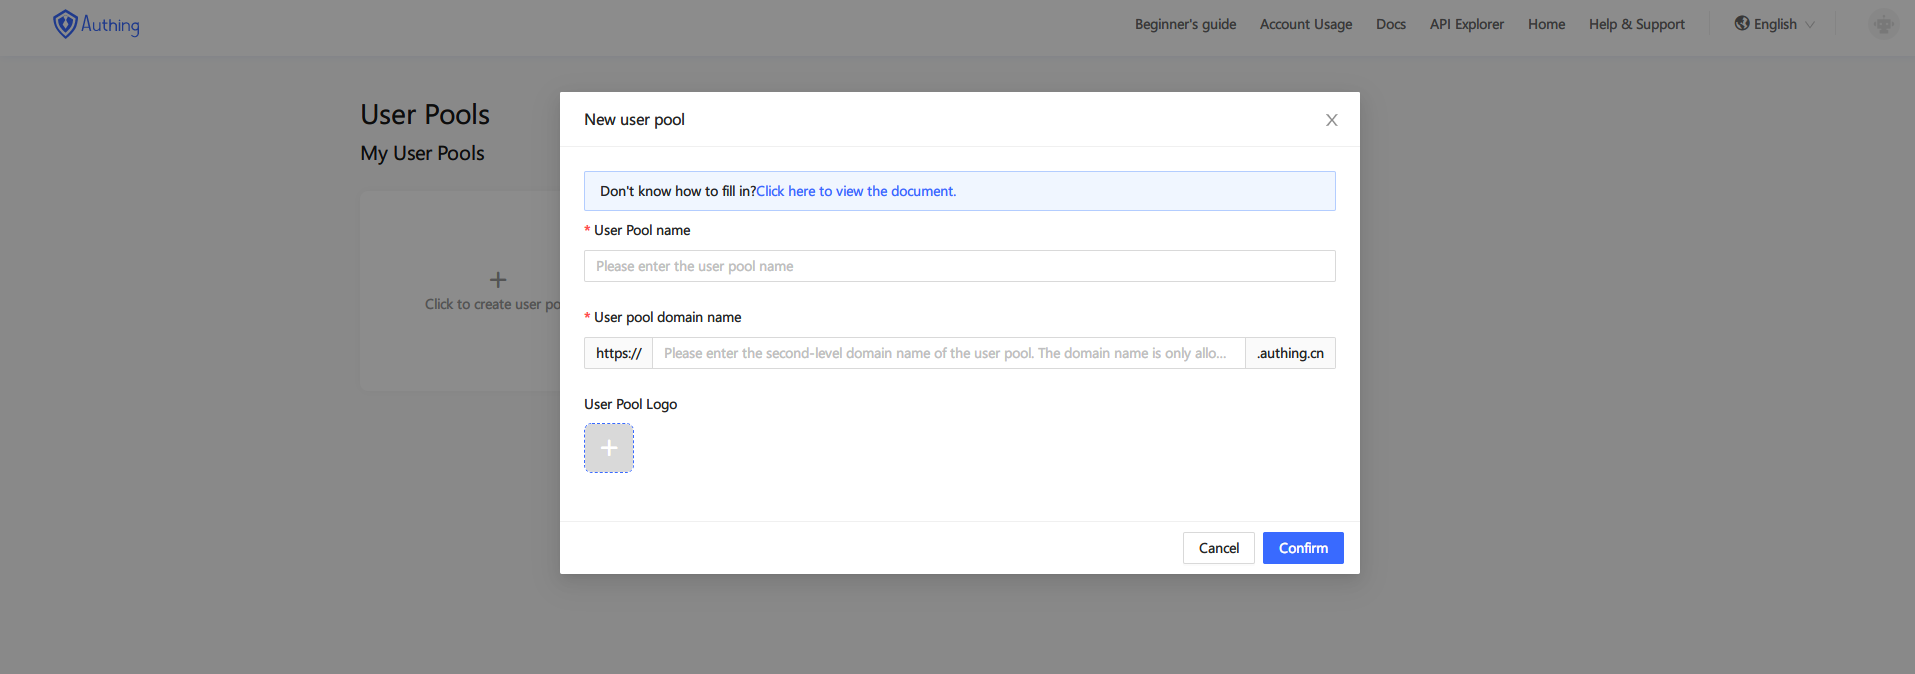
Create user pool
Each user pool has a unique userPoolId (check via Control Panel -> Settings -> Basic Information), such as "5cc59bdf1bbaf0188cce6d84". This userPoolId cannot be modified. Mainly used to identify your user pool; in addition to userPoolId, each user pool also has a secret, userPoolId and secret can authorize developers to access the user pool at the code level User data (including registration, login, logout, modification of information, deletion of users, etc.).
The viewing position of userPoolId and secret in the console is shown in the figure below:
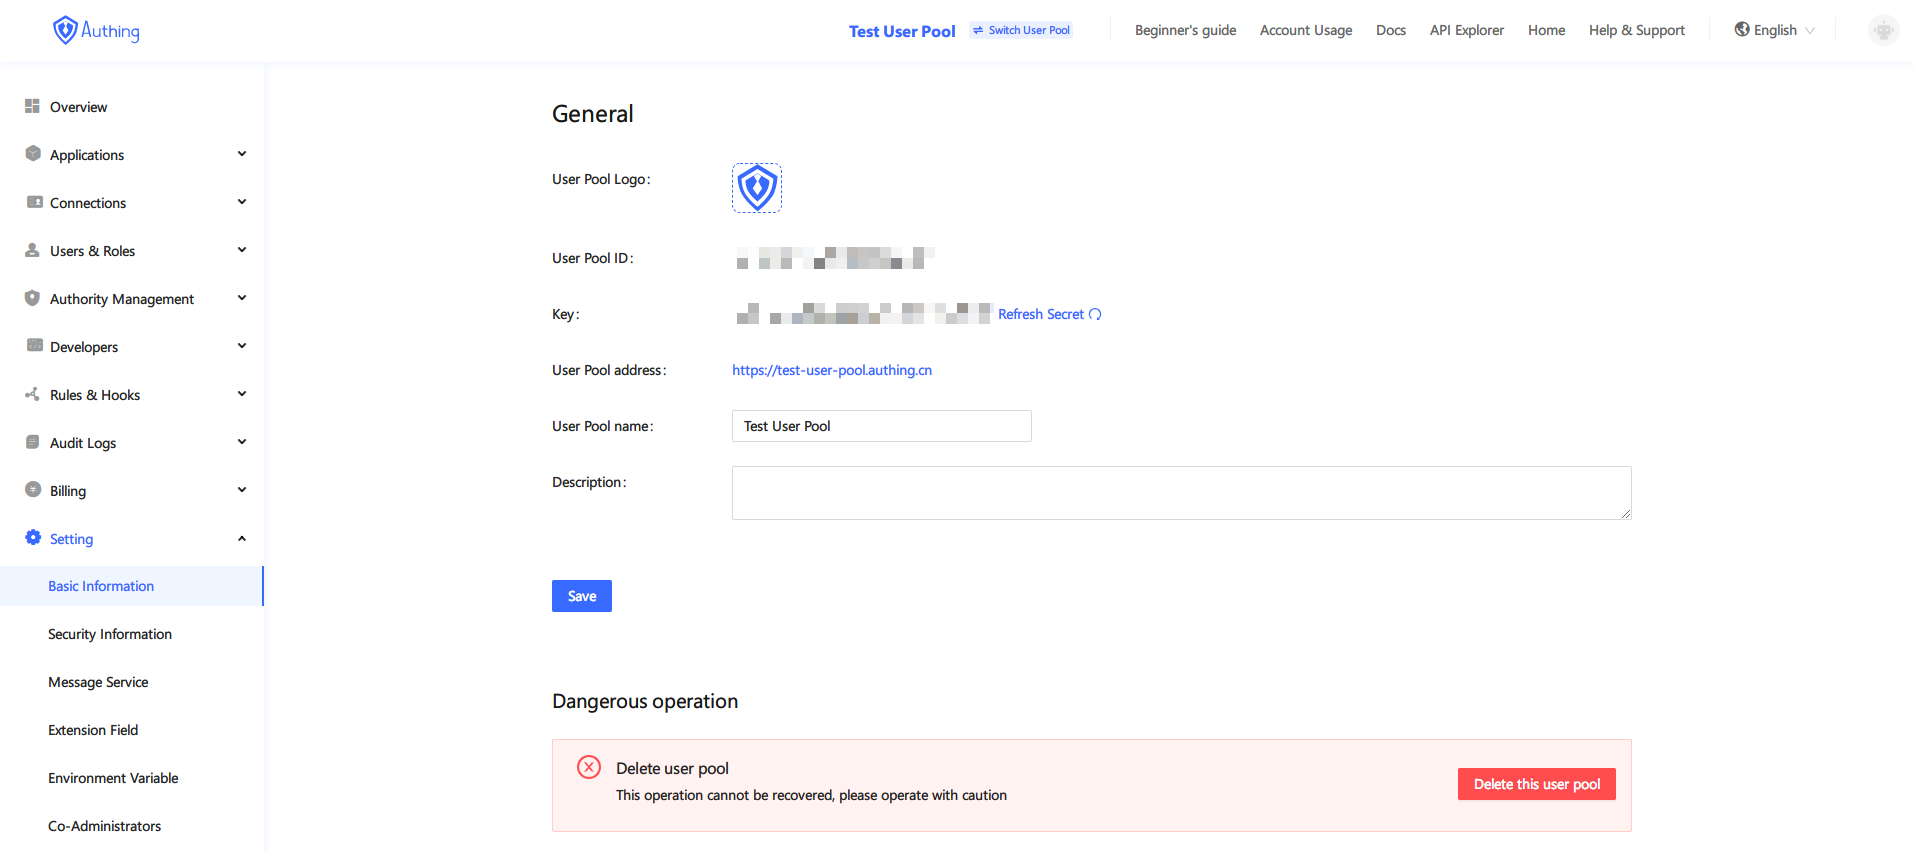
userPoolId / secret
As shown in the figure above, if your secret is accidentally leaked, you can reset the secret by pressing the "Refresh" button. But please note that if you use the secret in some programs, the program that uses the secret must also manually update the secret, otherwise the "identity authentication function" of the program will be destroyed.
In the example in this article, "Extraordinary Technology" has a Web application, so he chose the application type "Web" and named the application "Extraordinary Technology User Pool".
If you have many independent systems, you can create multiple "user pools" to divide users. If you want multiple applications to share a user pool, please learn our [single sign-in] (#单 sign-in) concept first.
# account number
An account is a single user in the user pool you create. Each account has a unique id, you can store this id in your own database when using Authing, and then associate it with your specific business.
A single account can use four basic methods to log in:
- Email-password login
- Mobile Phone-Verification Code Login
- Mini Program Scan Code Login
- Social network login (WeChat login, Github login, etc.)
You can create users in the console:

Create user portal
In the example in this article, "Feifantech" created an account with the mailbox "test@feifantech.com" to test the Authing account system.
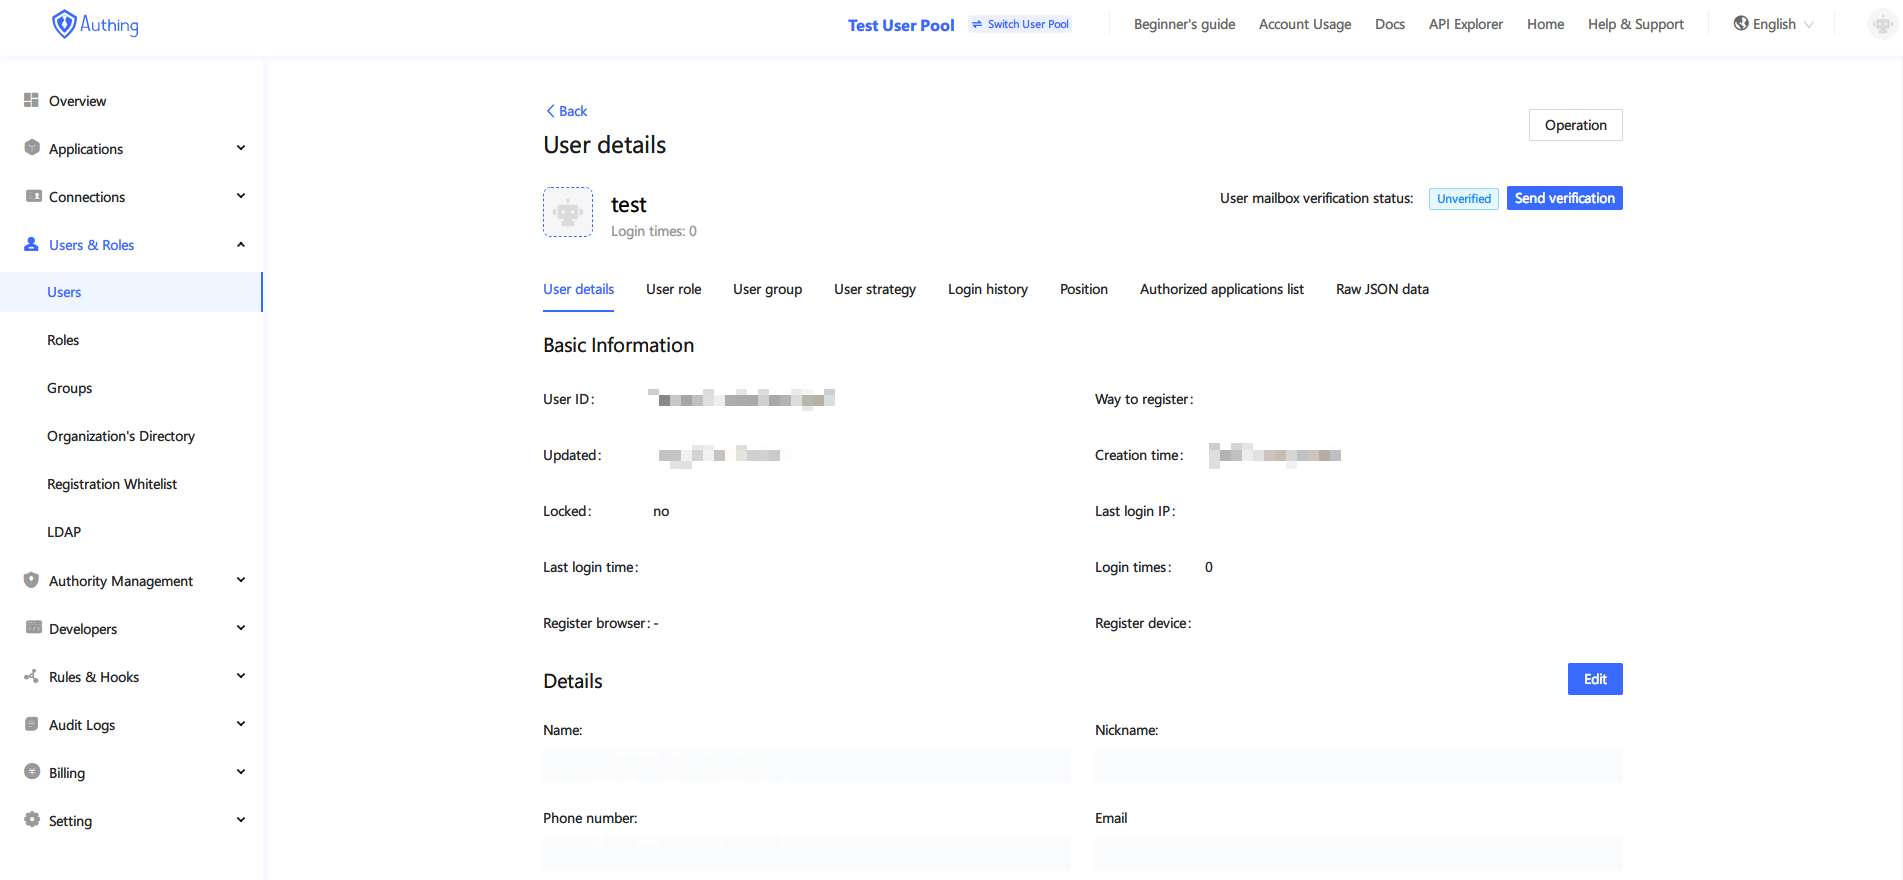
Test account
In the "Raw JSON Data" tab, you can see a piece of JSON data representing the account:
{
    "id": "5f702fcc913544c358cb2123",
    "arn": "arn:cn:authing:59f86b4832eb28071bdd9214:user:5f702fcc913544c358cb2123",
    "userPoolId": "59f86b4832eb28071bdd9214",
    "username": "xxx",
    "email": null,
    "emailVerified": false,
    "phone": null,
    "phoneVerified": false,
    "unionid": "35447896",
    "openid": "35447896",
    "identities": [
    ],
    "nickname": "xxxx",
    "registerSource": [
        "social:github"
    ],
    "photo": "https://avatars2.githubusercontent.com/u/35447896?v=4",
    "password": null,
    "oauth": "",
    "token": "",
    "tokenExpiredAt": "1602484037172",
    "loginsCount": 4,
    "lastLogin": "1601188037190",
    "lastIP": null,
    "signedUp": "2020-09-27T14:23:08+08:00",
    "blocked": false,
    "isDeleted": false,
    "device": null,
    "browser": null,
    "company": "Authing",
    "name": null,
    "givenName": null,
    "familyName": null,
    "middleName": null,
    "profile": "",
    "preferredUsername": null,
    "website": null,
    "gender": "U",
    "birthdate": null,
    "zoneinfo": null,
    "locale": null,
    "address": null,
    "formatted": null,
    "streetAddress": null,
    "locality": null,
    "region": null,
    "postalCode": null,
    "country": null,
    "createdAt": "2020-09-27T14:23:08+08:00",
    "updatedAt": "2020-09-27T14:27:17+08:00",
    "customData": ""
}
# Roles and permissions
In Authing, you can configure the user group and user group permissions that each account belongs to. If you want to use user groups and permissions in depth, please refer to the User permissions chapter.
# News
Messaging is the mail sending and SMS sending capabilities provided by Authing.
In Authing, users who register with an email address will receive two emails after successful registration, one is a "welcome email", and the other is a "verification email used to verify that the email belongs to the registrant". This is done by Authing Mail server to send.
If you want to modify the email template, you can select "Mail Template" to configure.
If you want to send mail server, you can select "Third Party Mail Service" to configure.
In addition, if the user logs in with a mobile phone-verification code, the SMS sending behind it is also done by Authing, and Authing's SMS sending capabilities rely on third-party SMS services.
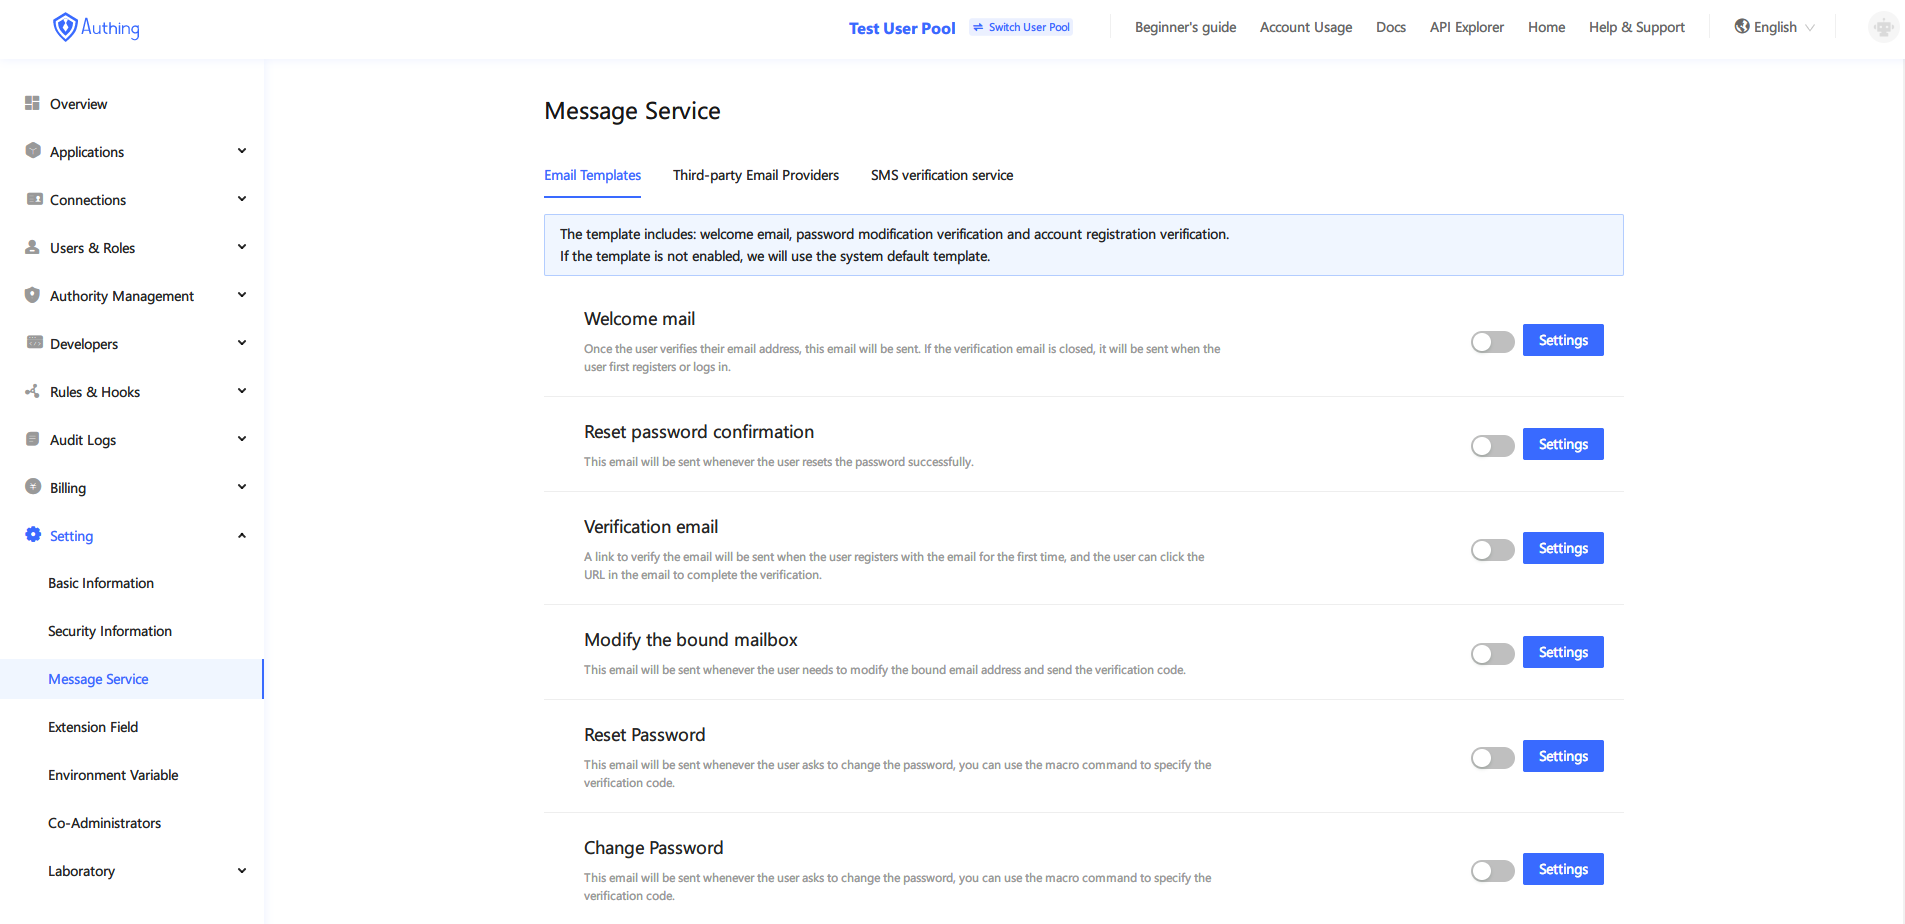
Message service
In the example of this article, "Extraordinary Technology" modified the email template, and changed the email subject "You have successfully registered { { client_name } }" to "Welcome to register { { client_name} }".
Authing’s email template supports macro commands, which can include the following macros:
- { { client_name } }: { { client_name } } in the message body will be replaced with the name of the current application;
- { { time } }: { { time } } in the body of the email will be replaced with the current time;
- { { client_description } }: { { client_description } } in the email body will be replaced with the description of the current application (can be modified in the application configuration);
- { { user_email } }: { { user_email } } in the body of the email will be replaced with the mailbox of the current registered user.
In the current version of Authing, Modification of SMS template is not allowed.
# Connect identity source
The connected identity source user uses a third-party application to log in to his own application. In simple terms, it refers to the function of quickly completing the login or registration of their own application based on the user's existing account and password on the third-party platform. Common third-party login platforms are generally platforms that already have a large number of users. The domestic ones are generally: WeChat, Weibo, QQ, etc., and there are Facebook, Twitter, Google, etc. abroad.
In addition to the convenience for C-end users, there is also the convenience for enterprise users. Every modern enterprise will more or less use some SaaS systems, such as mailboxes, code hosting, ERP, HR software, etc. In order for employees to use one account to access all systems, single sign-on has become an urgent need Addressed needs. Large companies will develop their own systems, and small and medium-sized companies will often seek third-party solutions.
# Social Login
Social login refers to the use of platforms such as WeChat and Github to log in to other applications. At present, Authing supports more than 10 social login methods such as WeChat, Github, Weibo, Google, etc., and also supports login by scanning small program codes. Authing abstracts such functions, so that developers don't need to care about the specific implementation, only need to configure in the console to complete.
# sign in
The purpose of single sign-on (SSO) is to allow users to log in only once, and then they can log in to all systems that access the SSO. Similarly, when logging off each application or service session that the user logs in, a unified logout will occur.
For applications that use SSO, there are generally three different session layers:
- Local sessions maintained by the application
- Authorization server session
- Identity provider session, if the user chooses to log in through an identity provider (such as Google, Facebook or corporate SAML identity provider)
Click here to learn how to use SSO in Authing.
In the example in this article, "Extraordinary Technology" hopes that their users can use the email-verification code, small program scan code and Github to log in, so the specific steps are:
- Configure Github's third-party login;
- Configure the small program to scan the code;
- Use Guard to mount to your own application;
# Domain
Authing provides the ability to customize the second-level domain name (*.authing.cn). This second-level domain name is the address for the user to authenticate (only for [single sign-in](#single sign-in)).
When you create OAuth applications, OIDC applications, and SAML applications, you will be asked to fill in the second-level domain name you want to use. Authing has the right to review user-defined domain names. If a domain name that violates laws and regulations is found, Authing has the right to do so Shut down and report to the public security organs.
# Next you may also need
The console is where you manage all Authing resources. You can learn about the contents of each module of the Authing console and the things you can do in the console:
Overview of ConsoleLearn about the multiple deployment models provided by Authing to help you choose how to deploy Authing:
Privatization Deployment and Pricing