# Authing-Node/JavaScript
Authing JavaScript/Node SDK consists of two parts: ManagementClient and AuthenticationClient. AuthenticationClient includes methods such as registering and logging in, resetting mobile phone number email, modifying account information, etc. It is requested as your end user (End User), suitable for use in browsers and back-end environments. ManagementClient is suitable for use in a back-end or **trusted front-end environment. Generally speaking, all the operations you can do in Authing console (opens new window) can be done with this SDK.
# Installation
Use npm:
npm install authing-js-sdk
Use yarn:
yarn add authing-js-sdk
If you want to use it in the React Native environment, you need to first run in the RN project root directory:
npx rn-nodeify --install "crypto,stream", and then ashim.jsfile will be generated in the project root directory. Then introduceimport'./shim.js'in the first line of App.js.
# Use authentication module
# Initialization
AuthenticationClient initialization needs to pass in the user pool ID userPoolId:
You can learn about How to get UserPoolId (opens new window) here. If you are not familiar with the concept of user pool, you can click here Understand the core concept of Authing system (opens new window).
import {AuthenticationClient} from "authing-js-sdk"

const authing = new AuthenticationClient({
  appId: "YOUR_APP_ID",
})
The complete parameter list is as follows:
appId: Authing App ID (Required);appDomain: Authing App Domain, for examplehttps://sample-app.authing.cn(Required);accessToken: Initialize the SDK with the user's token (optional).timeout: Request timeout time, in milliseconds, the default is 10000 (10 seconds).onError: Error handling function, you can use it to globally catch all exceptions requested by the Authing client. The function is defined as:
(code: number, message: string, data: any) => void
For the complete error code, please see this document (opens new window).
host: Authing server address. If you are using the public cloud version, please ignore the parameter. If you are using a privatized deployment version, this parameter is required. The format is as follows:https://authing-api.mydomain.com, without/at the end.preflight: Whether to enable preflight of network conditions, the default is false. This parameter is suitable for checking whether the authing server domain name is blocked on the user's network (some companies' intranets will block third-party websites). The check succeeds without any notification. After the check fails, the incoming error handling function will be called. After performing the pre-check, the SDK initialization speed will slow down. Please use it with caution.cdnPreflight: Whether to enable the CDN network status pre-check, the default is false. This parameter is suitable for checking whether the user's network can access the Qiniu Cloud CDN (not accessible in some scenarios where the proxy is turned on), the check is successful without any notification, and the incoming error handling function is called after the check fails. Performing the CDN pre-check will slow down the SDK initialization speed. Please use it with caution.
# Instructions
If the SDK is used in a browser environment, after the user logs in, the SDK will write the user's token to localStorage, and subsequent requests will carry the token access.
const email ='test@example.com';
const password ='passw0rd';
const user = await authing.loginByEmail(email, password); // Successful login, write token into localStorage

// You can do this after logging in
await authing.updateProfile(
  nickname:'Bob'
)
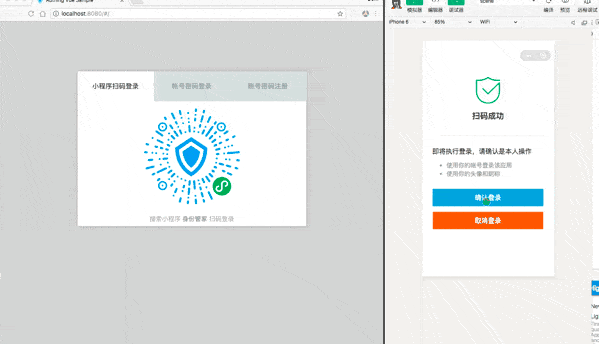
# Mini Program Scan Code Login
Mini Program Scan Code Login refers to the WeChat login using the Authing Mini Program Small Login, click here to learn more (opens new window).
You can use 5 lines of code to implement a complete scan code login form:
authenticationClient.wxqrcode.startScanning("qrcode", {
  onSuccess: (userInfo, ticket) => {
    console.log(userInfo, ticket)
  },
});
Please see the complete usage and parameters.
# App scan code login
App scan code login refers to use your own App scan code to log in to the website, click here to learn more (opens new window).
You can use 5 lines of code to implement a complete scan code login form:
authenticationClient.qrcode.startScanning("qrcode", {
  onSuccess: (userInfo, ticket) => {
    console.log(userInfo, ticket)
  },
});
# Module list
- AuthenticationClient core module
- QrCodeAuthenticationClient Mini Program Scan Code Login and APP Scan Code Login
- MfaAuthenticationClient multi-factor authentication module
# Using the management module
# Initialization
The initialization of ManagementClient needs to pass in the user pool ID userPoolId and the user pool key secret:
You can learn about How to get userPoolId and secret (opens new window) here. If you are not familiar with the concept of user pool, you can click here Learn about the Authing system Core concepts (opens new window).
import {ManagementClient} from "authing-js-sdk"

const managementClient = new ManagementClient({
  userPoolId: "YOUR_USERPOOL_ID",
  secret: "YOUR_USERPOOL_SECRET"
})
The complete parameter list is as follows:
userPoolId: User pool ID.secret: User pool secret key.accessToken: Initialize the SDK with the administrator's token. **secret and accessToken must be filled in one of **.timeout: Request timeout time, in milliseconds, the default is 10000 (10 seconds).onError: Error handling function, you can use it to globally catch all exceptions requested by the Authing client. The function is defined as:
(code: number, message: string, data: any) => void
For the complete error code, please see this document (opens new window).
host: Authing server address. If you are using the public cloud version, please ignore the parameter. If you are using a privatized deployment version, this parameter is required. The format is as follows:https://authing-api.mydomain.com, without/at the end.preflight: Whether to enable preflight of network conditions, the default is false. This parameter is suitable for checking whether the authing server domain name is blocked on the user's network (some companies' intranets will block third-party websites). The check succeeds without any notification. After the check fails, the incoming error handling function will be called. After performing the pre-check, the SDK initialization speed will slow down. Please use it with caution.cdnPreflight: Whether to enable the CDN network status pre-check, the default is false. This parameter is suitable for checking whether the user's network can access the Qiniu Cloud CDN (not accessible in some scenarios where the proxy is turned on), the check is successful without any notification, and the incoming error handling function is called after the check fails. Performing the CDN pre-check will slow down the SDK initialization speed. Please use it with caution.
# Instructions
ManagementClient can be used to manage users, roles, policies, groups, organizations, and user pool configuration. In theory, whatever you can do in the Authing console (opens new window) All operations can be done with this SDK.
Get a list of user directories:
// list list of users on the current page
// totalCount total number of users
const {list, totalCount} = await managementClient.users.list()
Creating a Role:
const role = await managementClient.roles.create('code','role name')
Modify the user pool configuration:
const userpool = await managementClient.userpool.update({
  registerDisabled: true // Close user pool registration
})
# Module list
- UsersManagementClient management module
- RolesManagementClient role management module
- GroupsManagementClient group management module
- OrgManagementClient organization management module
- PoliciesManagementClient policy management module
- AclManagementClient access control module
- UdfManagementClient custom field metadata management module
- WhitelistManagementClient whitelist management module
- UserPoolManagementClient User pool setting management module
# Error handling
You can use try catch for error handling:
try {
  const user = await authing.loginByEmail('test@example.com','passw0rd')
} catch (error) {
  console.log(error.code); // 2004
  console.log(error.message); // user does not exist
}
For the complete error code, please see this document (opens new window).
You can also specify onError to uniformly capture all Authing request exceptions, such as using antd and other front-end components to display error prompts.
import {message} from "antd";
const authing = new AuthenticationClient({
  userPoolId,
  onError: (code, msg: any) => {
    message.error(msg);
  }
})
# Get help
Join us on Gitter: #authing-chat (opens new window)
# Interface Index
Authentication module:
Core Authentication Module Scan code login module Multi-factor authentication moduleManagement module:
Manage users Manage Roles Manage Strategy Manage Authority & Access Control Manage Groups Manage Orgnizations Manage custom field metadata Manage registration whitelist Manage user pool configuration