# Quick access
APP scan code login refers to scanning a QR code on a mobile device to log in to a Web site. On the Web, Authing also provides related SDKs The interface can help you quickly implement a complete scan code login component.
# Web terminal
On the web side, we recommend using the SDK provided by Authing. Please check the SDK for JavaScript scan code login module for the installation process:
Scan code login moduleAfter the installation is complete, you can create a new Web project, and then copy the following code:
import { AuthenticationClient } from 'authing-js-sdk'
const authenticationClient = new AuthenticationClient({
  appId: "YOUR_APP_ID",
})

authenticationClient.qrcode.startScanning('qrcode', {
  onSuccess: (userInfo, ticket) => {
    console.log(userInfo, ticket)
  },
  onError: (message) => onFail && onFail(`${message}`),
})
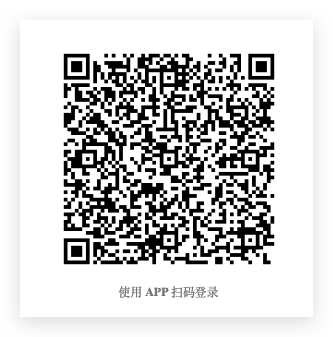
After running, it will automatically generate a QR code for APP scan code login:

After successfully scanning the code, Authing will call back the onSuccess passed in by the developer. The callback parameters include userInfo and ticket, and the ticket can be used to exchange user information.
If you want to customize the UI and learn how to use a ticket in exchange for user information, you can check:
Web Side SDK API Refrence# Mobile
The original information contained in the QR code generated by Authing is a string of strings, converted to JSON as follows:
{
  "scene": "APP_AUTH",
  "random": "5e05f0c57fde537d950f7da5",
  "userPoolId": "5e04ae0d5f3cee22fb37612b",
  "createdAt": "2019-12-27T11:53:41.260Z",
  "expireAt": "2019-12-27T11:55:41.260Z",
  "customData": { "hello": "world" }
}
The meanings of the fields are as follows:
- scene: scene value, APP_AUTH means APP scan code login.
- random: QR code ID, the mobile terminal will confirm the scan code, agree to the authorization, and cancel the authorization according to this ID (note that the "confirm scan code" here means that the mobile terminal marks that the QR code has been scanned, but the user still No consent or cancellation action was taken. For the detailed status of the QR code, please see the API Refrence page)
- userPoolId: User pool ID.
- createdAt: the time when the QR code was created.
- expireAt: the expiration time of the QR code.
- customData: User-defined fields. To learn how to add custom data, please see the API Refrence page.
For information on how to scan and parse the QR code in IOS, you can view [this article] (https://github.com/darkjoin/Learning/wiki/Use AVFoundation to read the QR code).
To realize APP scanning and logging in to the Web, the APP user is required to be in the logged-in state (this is a matter of course), and the end user's token is required when calling related interfaces. A total of three interfaces are required for the mobile terminal:
- Confirm scan code
- Agree to authorize
- Cancel authorization
To learn more about these three interfaces, please see the API Refrence page.
Let’s take Objective-C as an example to implement consent to authorize login:
-The api address is: http://core.authing.cn/api/v2/qrcode/confirm (opens new window) -Line 9 puts the user login credentials on the request header.
- (void) ConfirmAuthorization:(NSString *) random{
    NSURL * api =[NSURL URLWithString:@"http://core.authing.cn/api/v2/qrcode/confirm"];
    NSDictionary *bodyDict = @{
        @"random": random,
    };
    NSData *body = [NSJSONSerialization dataWithJSONObject:bodyDict options:kNilOptions error:nil];
    NSMutableURLRequest *request = [[NSMutableURLRequest alloc] initWithURL:api];
    request.HTTPMethod = @"POST";
    [request setValue:self.USER_TOKEN forHTTPHeaderField:@"Authorization"];
    [request setValue:@"application/json" forHTTPHeaderField:@"Content-Type"];
    [request setValue:@"application/json" forHTTPHeaderField:@"Accept"];
    [request setHTTPBody:body];

    NSURLSessionConfiguration *config = [NSURLSessionConfiguration defaultSessionConfiguration];
    NSURLSession *session = [NSURLSession sessionWithConfiguration:config];
    NSURLSessionDataTask *dataTask = [session dataTaskWithRequest:request completionHandler:^(NSData *data, NSURLResponse *response, NSError *error) {
        NSHTTPURLResponse *httpResponse = (NSHTTPURLResponse *)response;
        if(httpResponse.statusCode == 200)
        {
            NSError *parseError = nil;
            NSDictionary *responseDictionary = [NSJSONSerialization JSONObjectWithData:data options:0 error:&parseError];
            NSLog(@"The response is-%@",responseDictionary);
            NSInteger code = [[responseDictionary objectForKey:@"code"] integerValue];
            if(code == 200)
            {
                NSLog(@"SUCCESS");
            }
            else
            {
                NSLog(@"FAILURE");
            }
        }
        else
        {
            NSLog(@"Network Error");
        }
    }];

    [dataTask resume];
}
# After the user scans the code successfully
After the mobile terminal confirms the authorization, the web will see the relevant prompt.

At this time, the entire login process is complete, and developers can use tickets in exchange for user information.
const authenticationClient = new AuthenticationClient({
  appId: "YOUR_APP_ID",
})
const user = await authenticationClient.qrcode.exchangeUserInfo('TICKET')
Examples of returned results:
{
  "code": 200,
  "message": "Successful in exchange for user information",
  "data": {
    "id": "5e05bbf2d51b3761d5c71070",
    "email": "983132@qq.com",
    "emailVerified": false,
    "oauth": "",
    "username": "983132@qq.com",
    "nickname": "",
    "company": "",
    "photo": "https://usercontents.authing.co/authing-avatar.png",
    "token": "eyJhbGciOiJIUzI1NiIsInR5cCI6IkpXVCJ9.eyJkYXRhIjp7ImVtYWlsIjoiOTgzMTMyQHFxLmNvbSIsImlxxxxxxxxx",
    "phone": "",
    "tokenExpiredAt": "2020-01-11T08:08:18.000Z",
    "loginsCount": 1,
    "lastIp": "::1",
    "signedUp": "2019-12-27T08:08:18.115Z",
    "blocked": false,
    "isDeleted": false
  }
}
Congratulations, you have now accessed the App, scan the code to log in. After obtaining the user information, you can get the login credential token. You can carry this token in subsequent API requests, and then distinguish different users based on this token in the back-end interface. For details, see [Verification token](../ ../advanced/verify-jwt-token.md#yan-zheng-authing-qian-fa-de-token).