# Web Social Connections
Online Demo: https://sample-sso.authing.cn/ (opens new window)
Authing social login supports two modes: managed mode and manual mode.The following is a comparison of the two modes:
- Hosting mode: Use the built-in login form provided by Authing, no need to write a line of code, suitable for most common scenarios.
- Manual mode: Manually lead to the social login authorization page, and finally manually parse the user data, which is suitable for scenarios where you have a custom login page.
# Use in Authing hosted mode
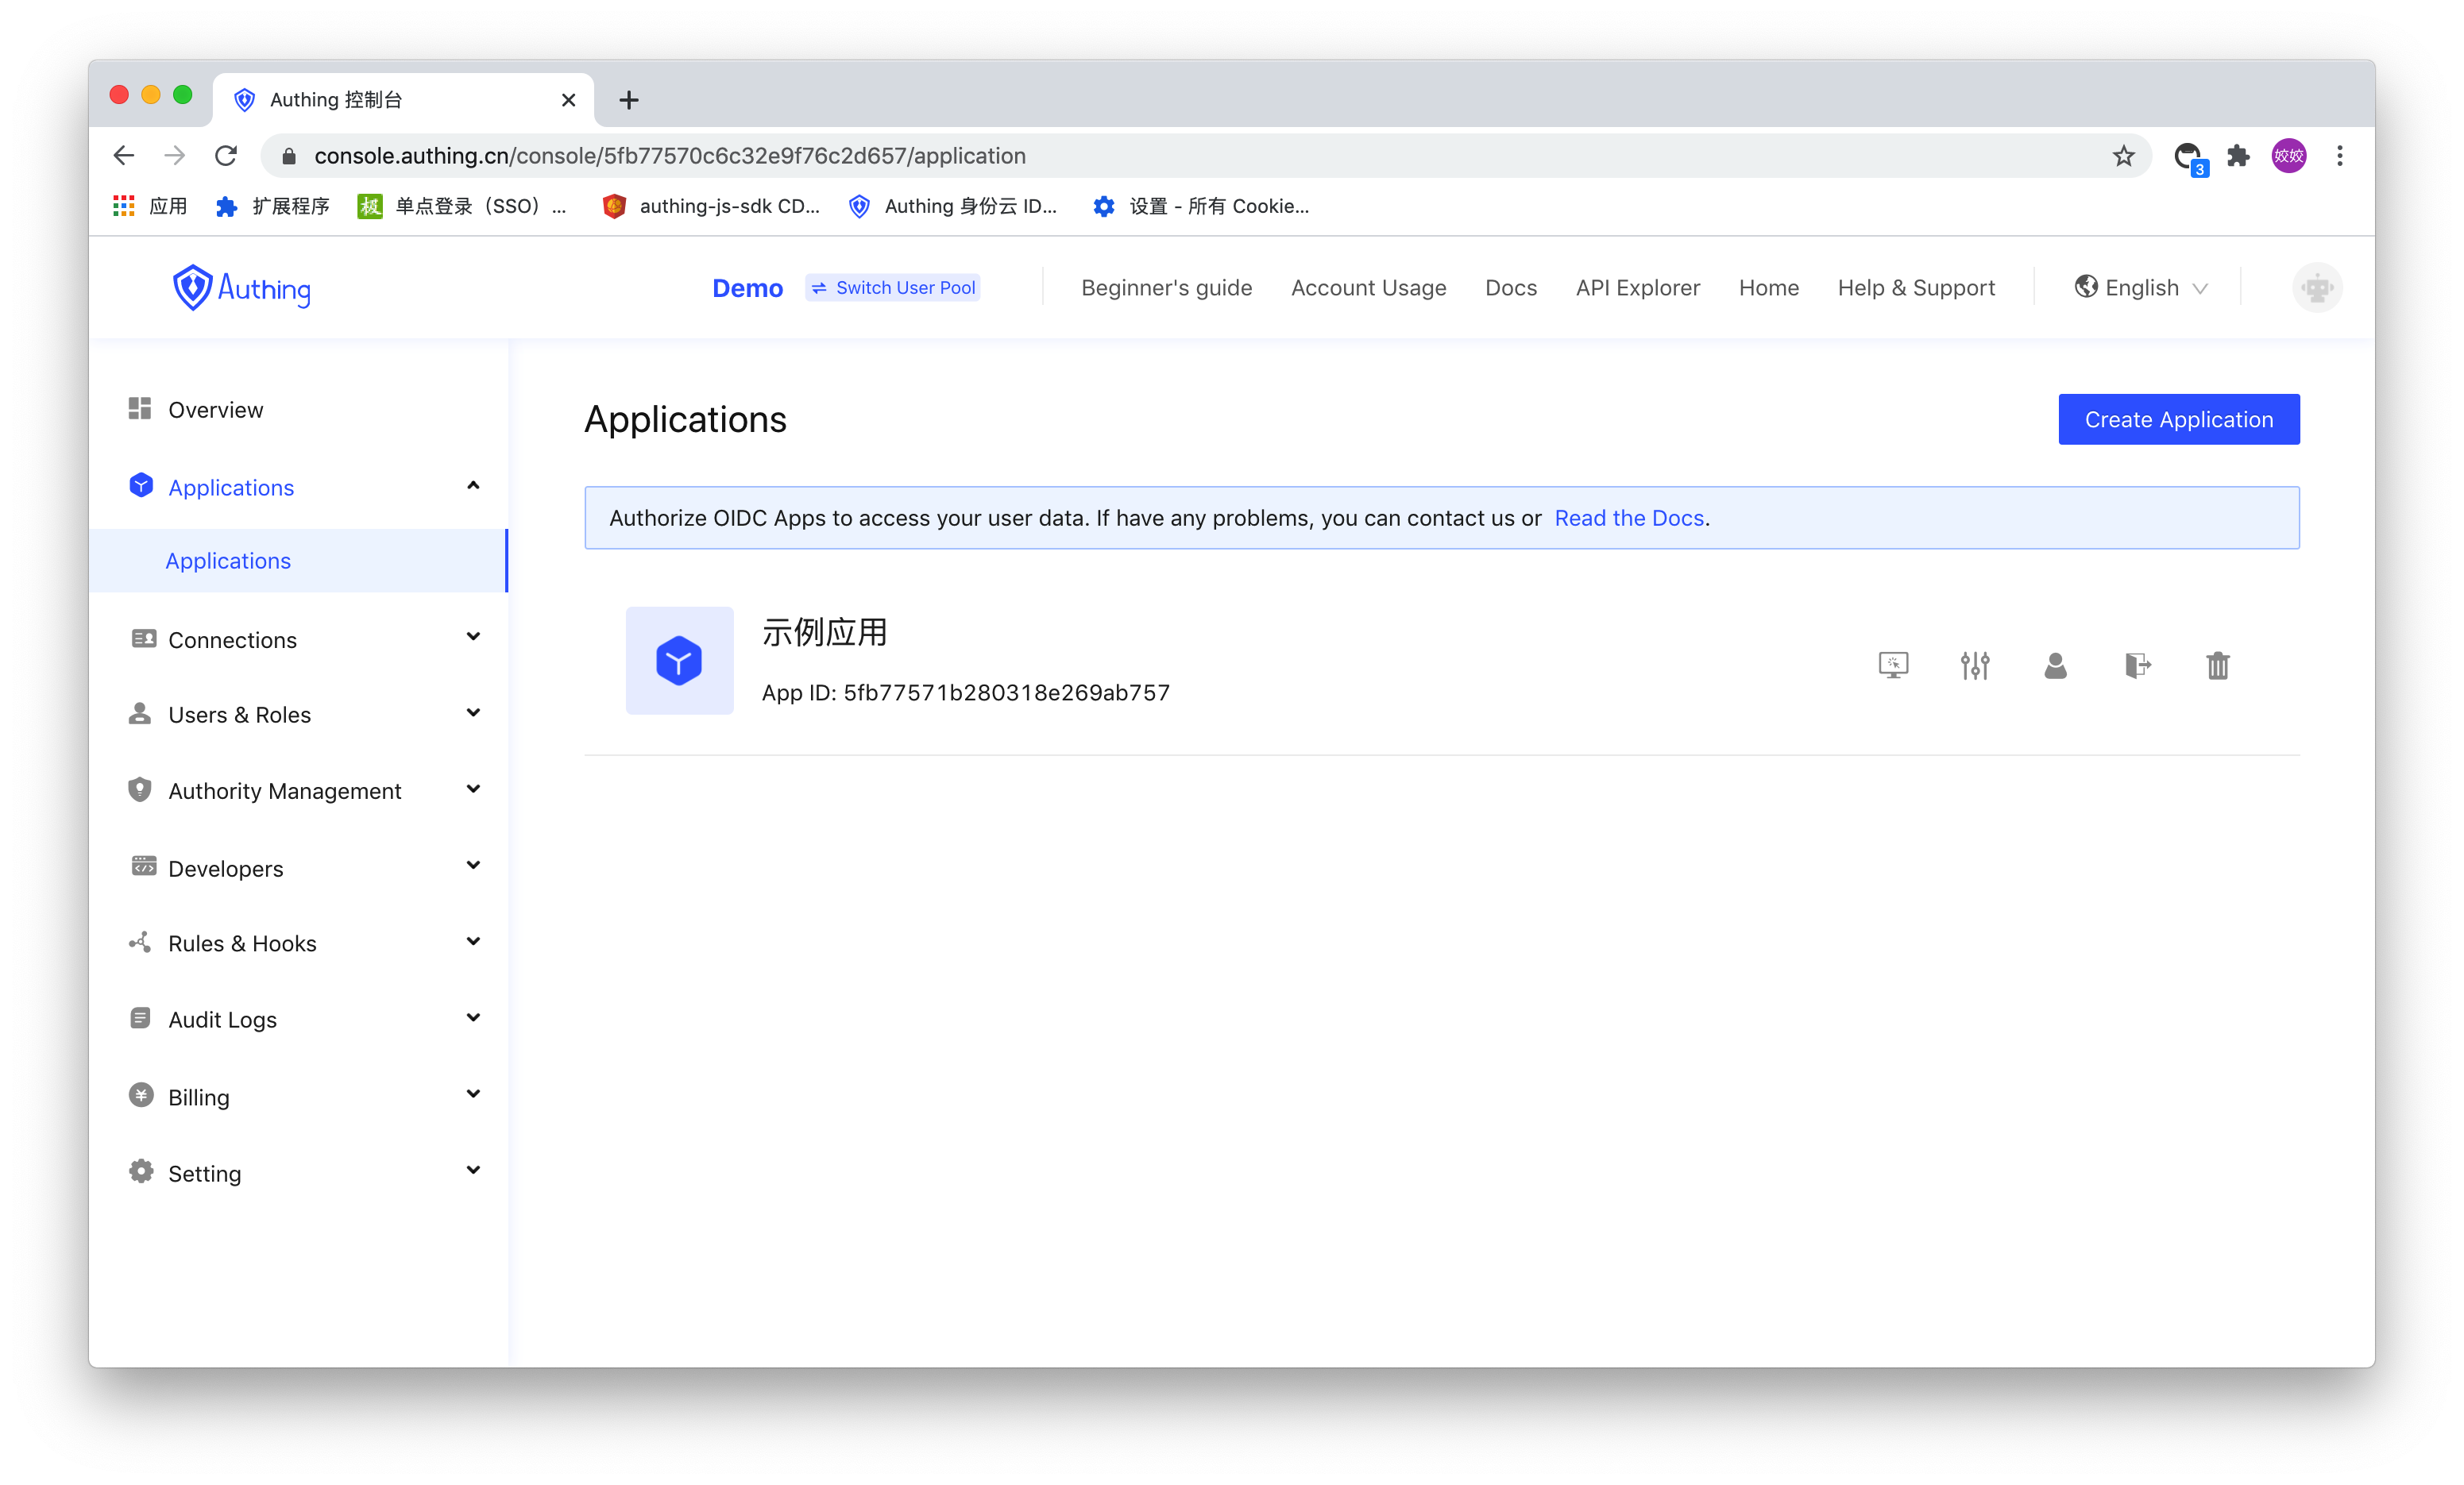
You can query your own application list on the console Applications - Applications page:
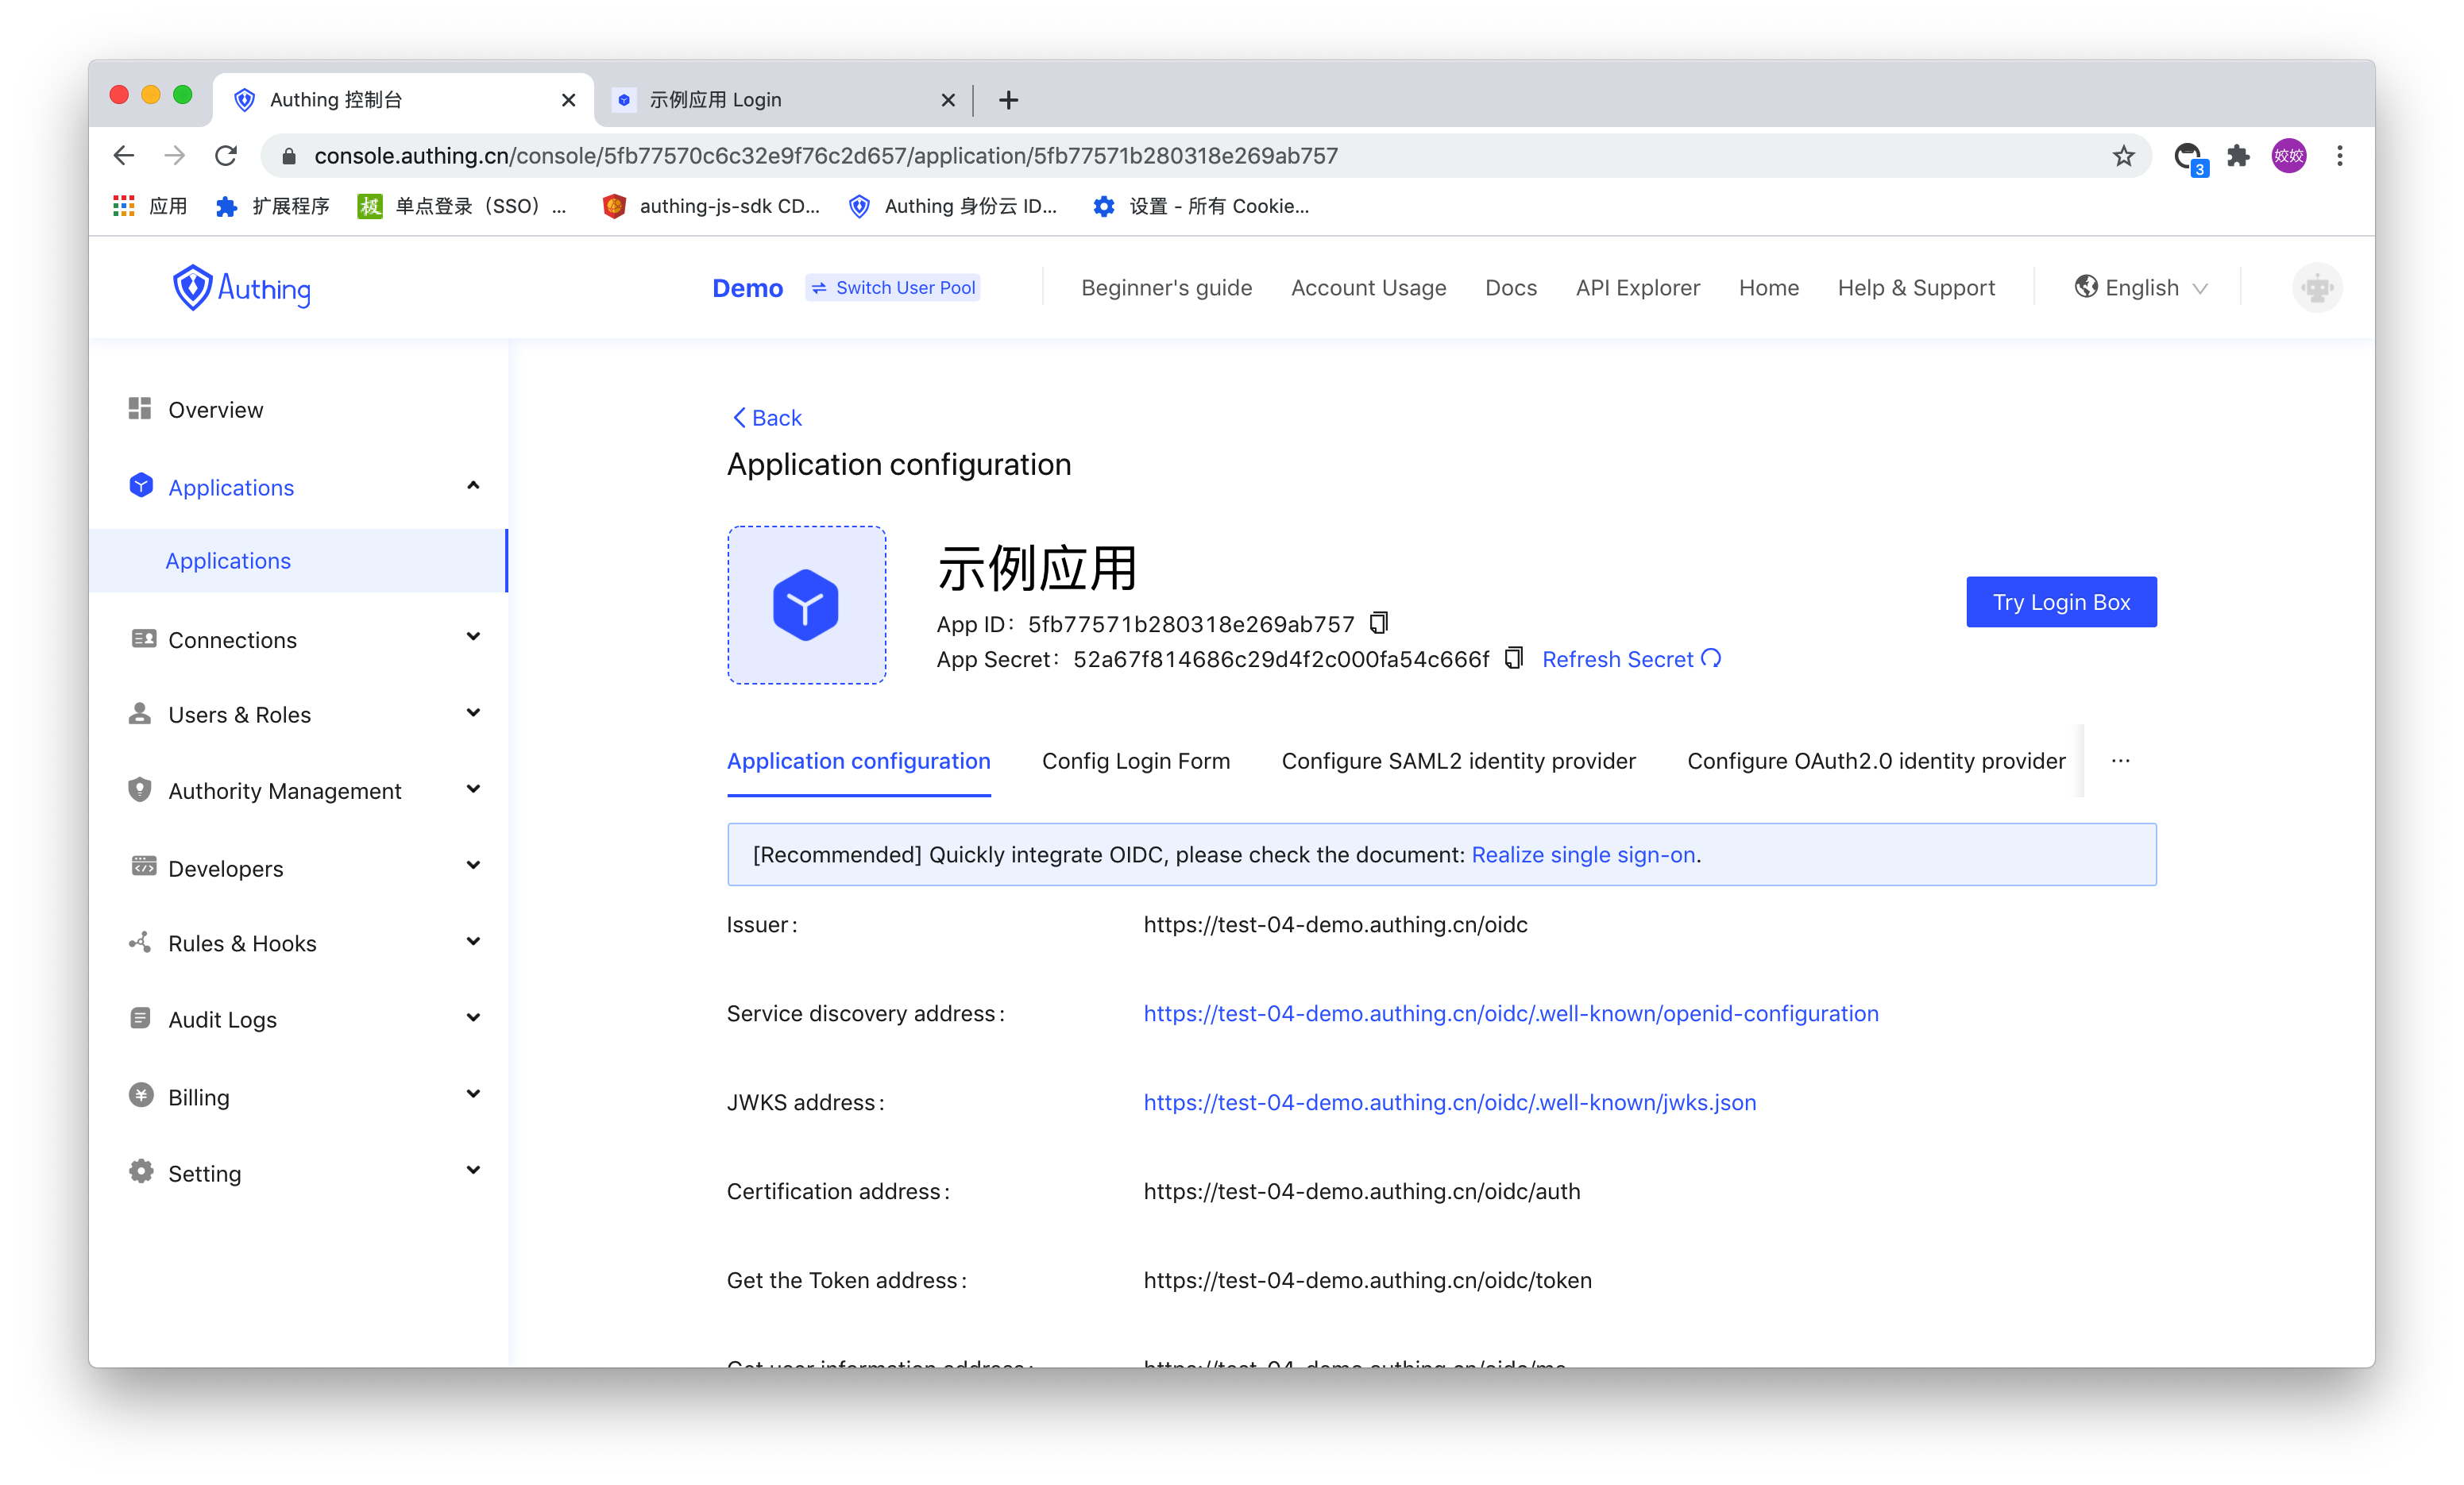
Click the configuration button to enter the configuration page of one of the applications. Each application will have a login callback URL. After the user logs in, the browser will jump to this address:
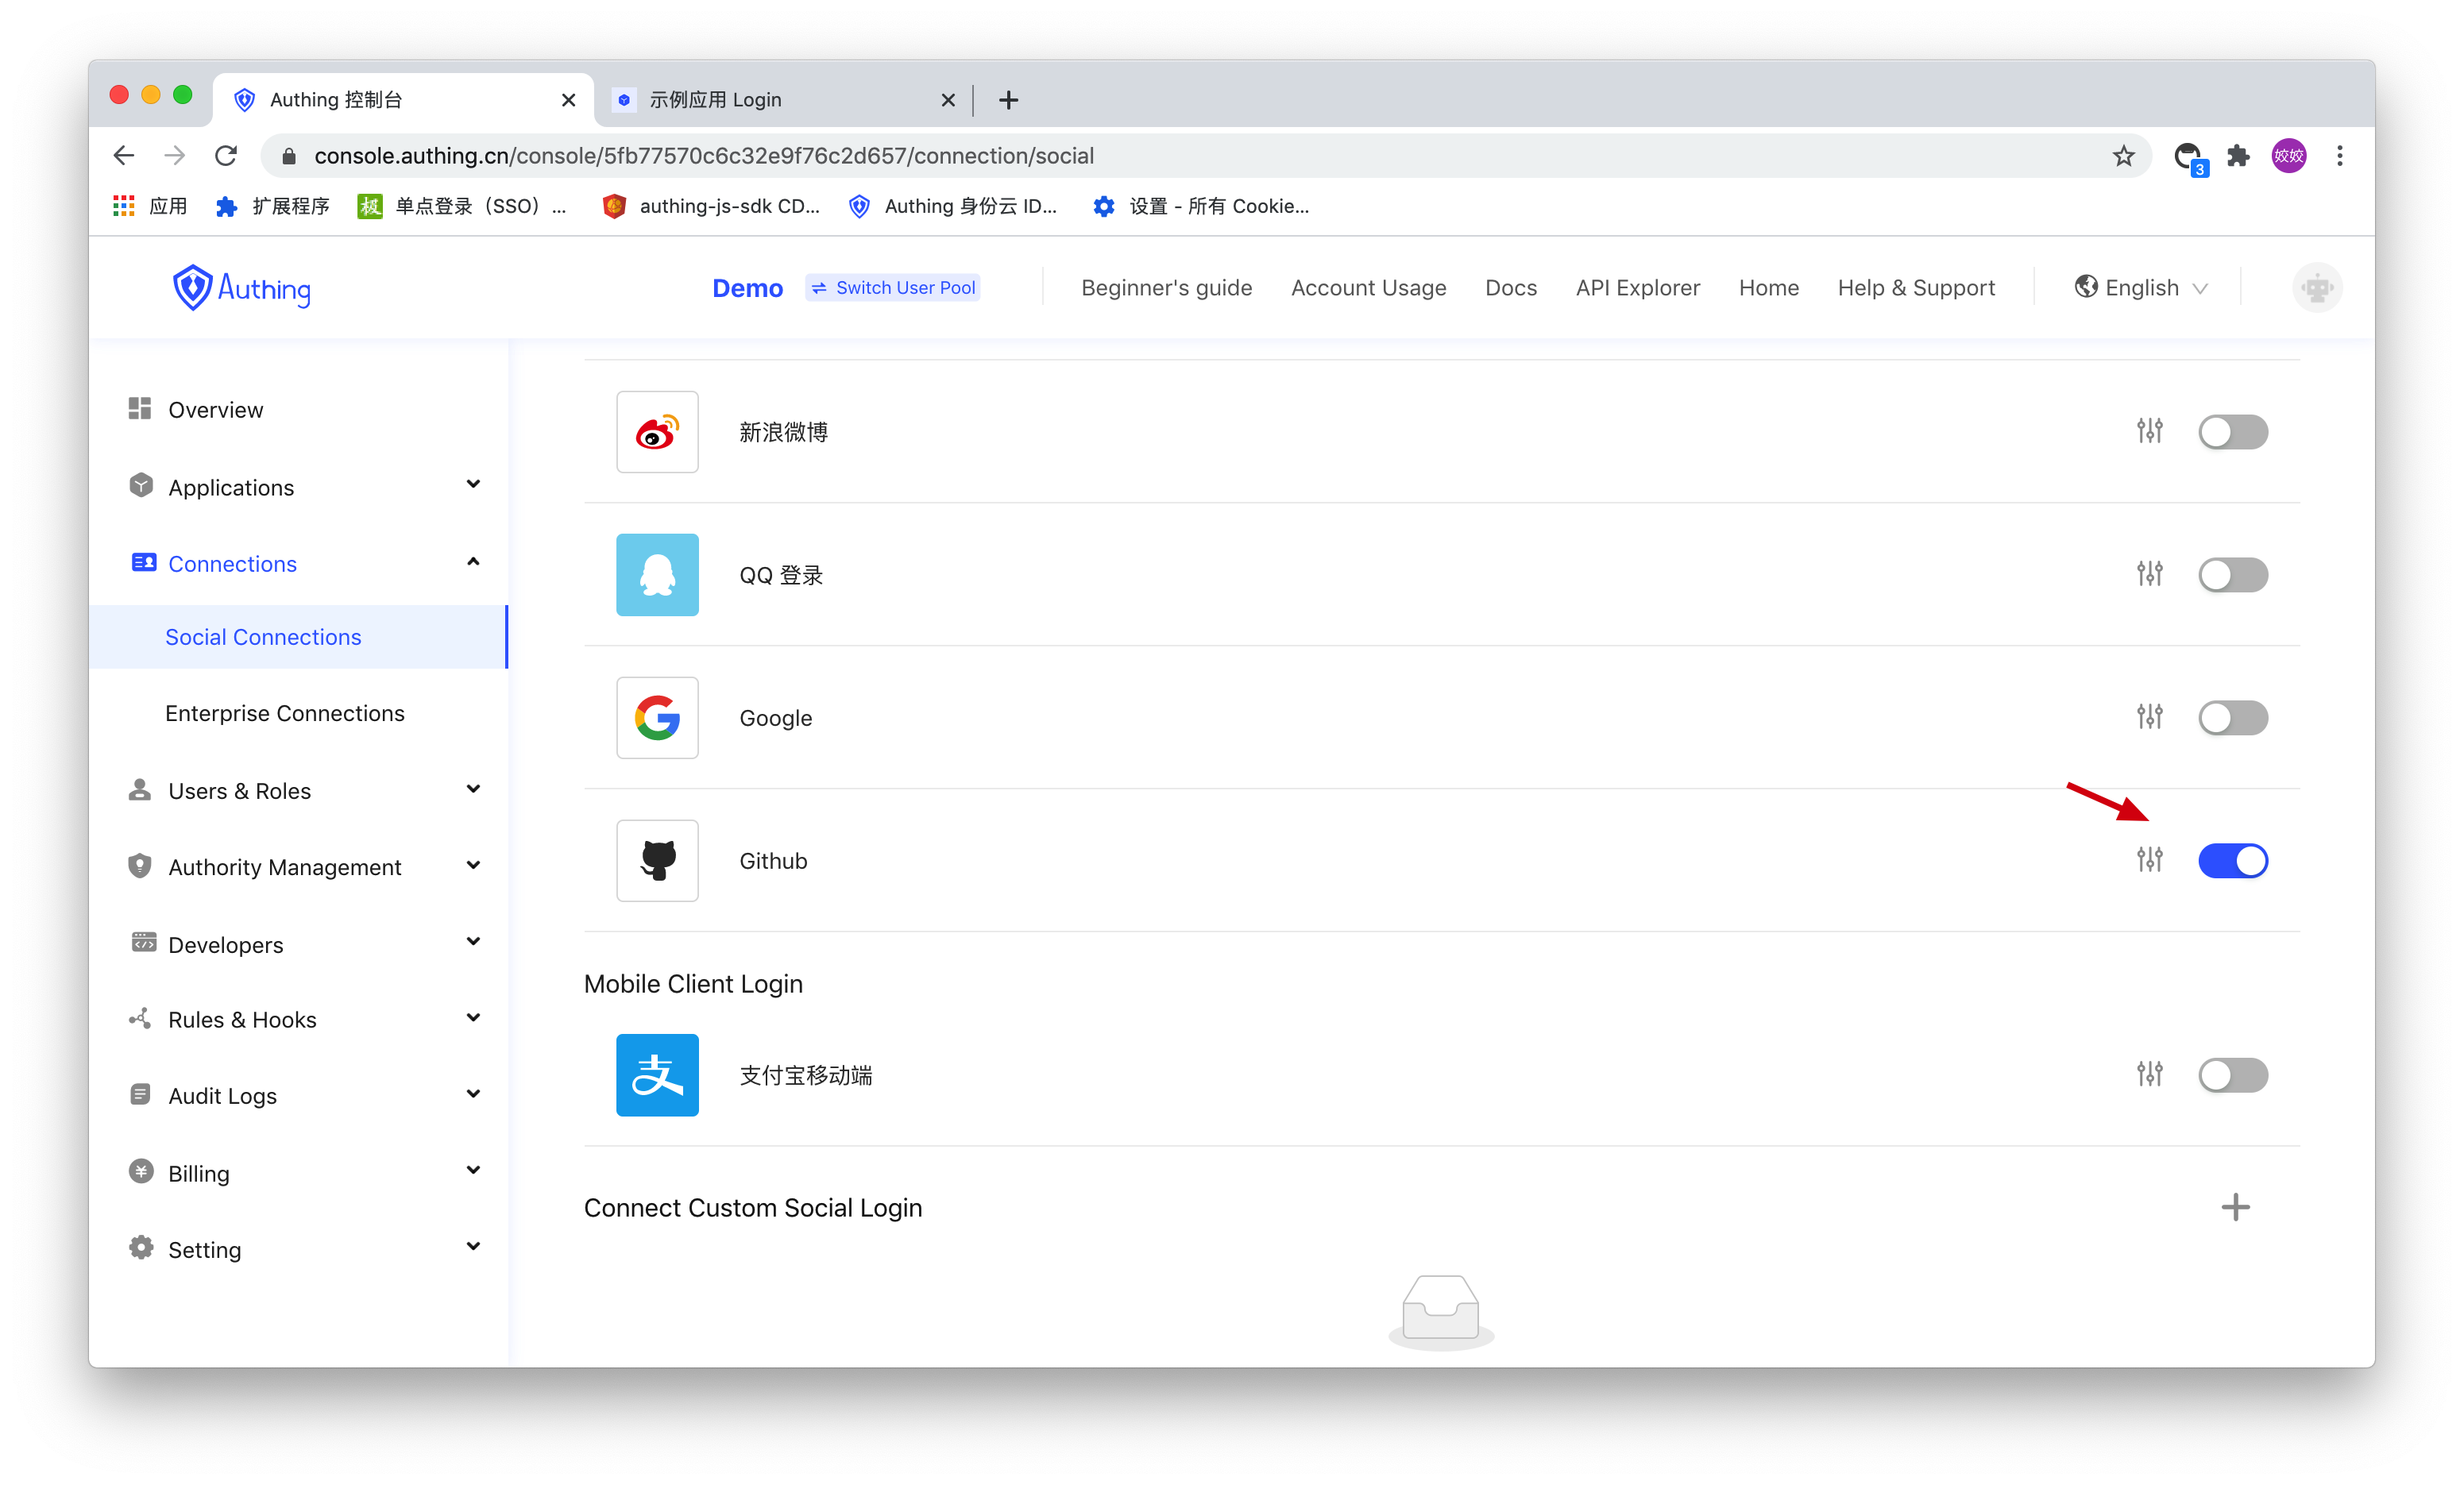
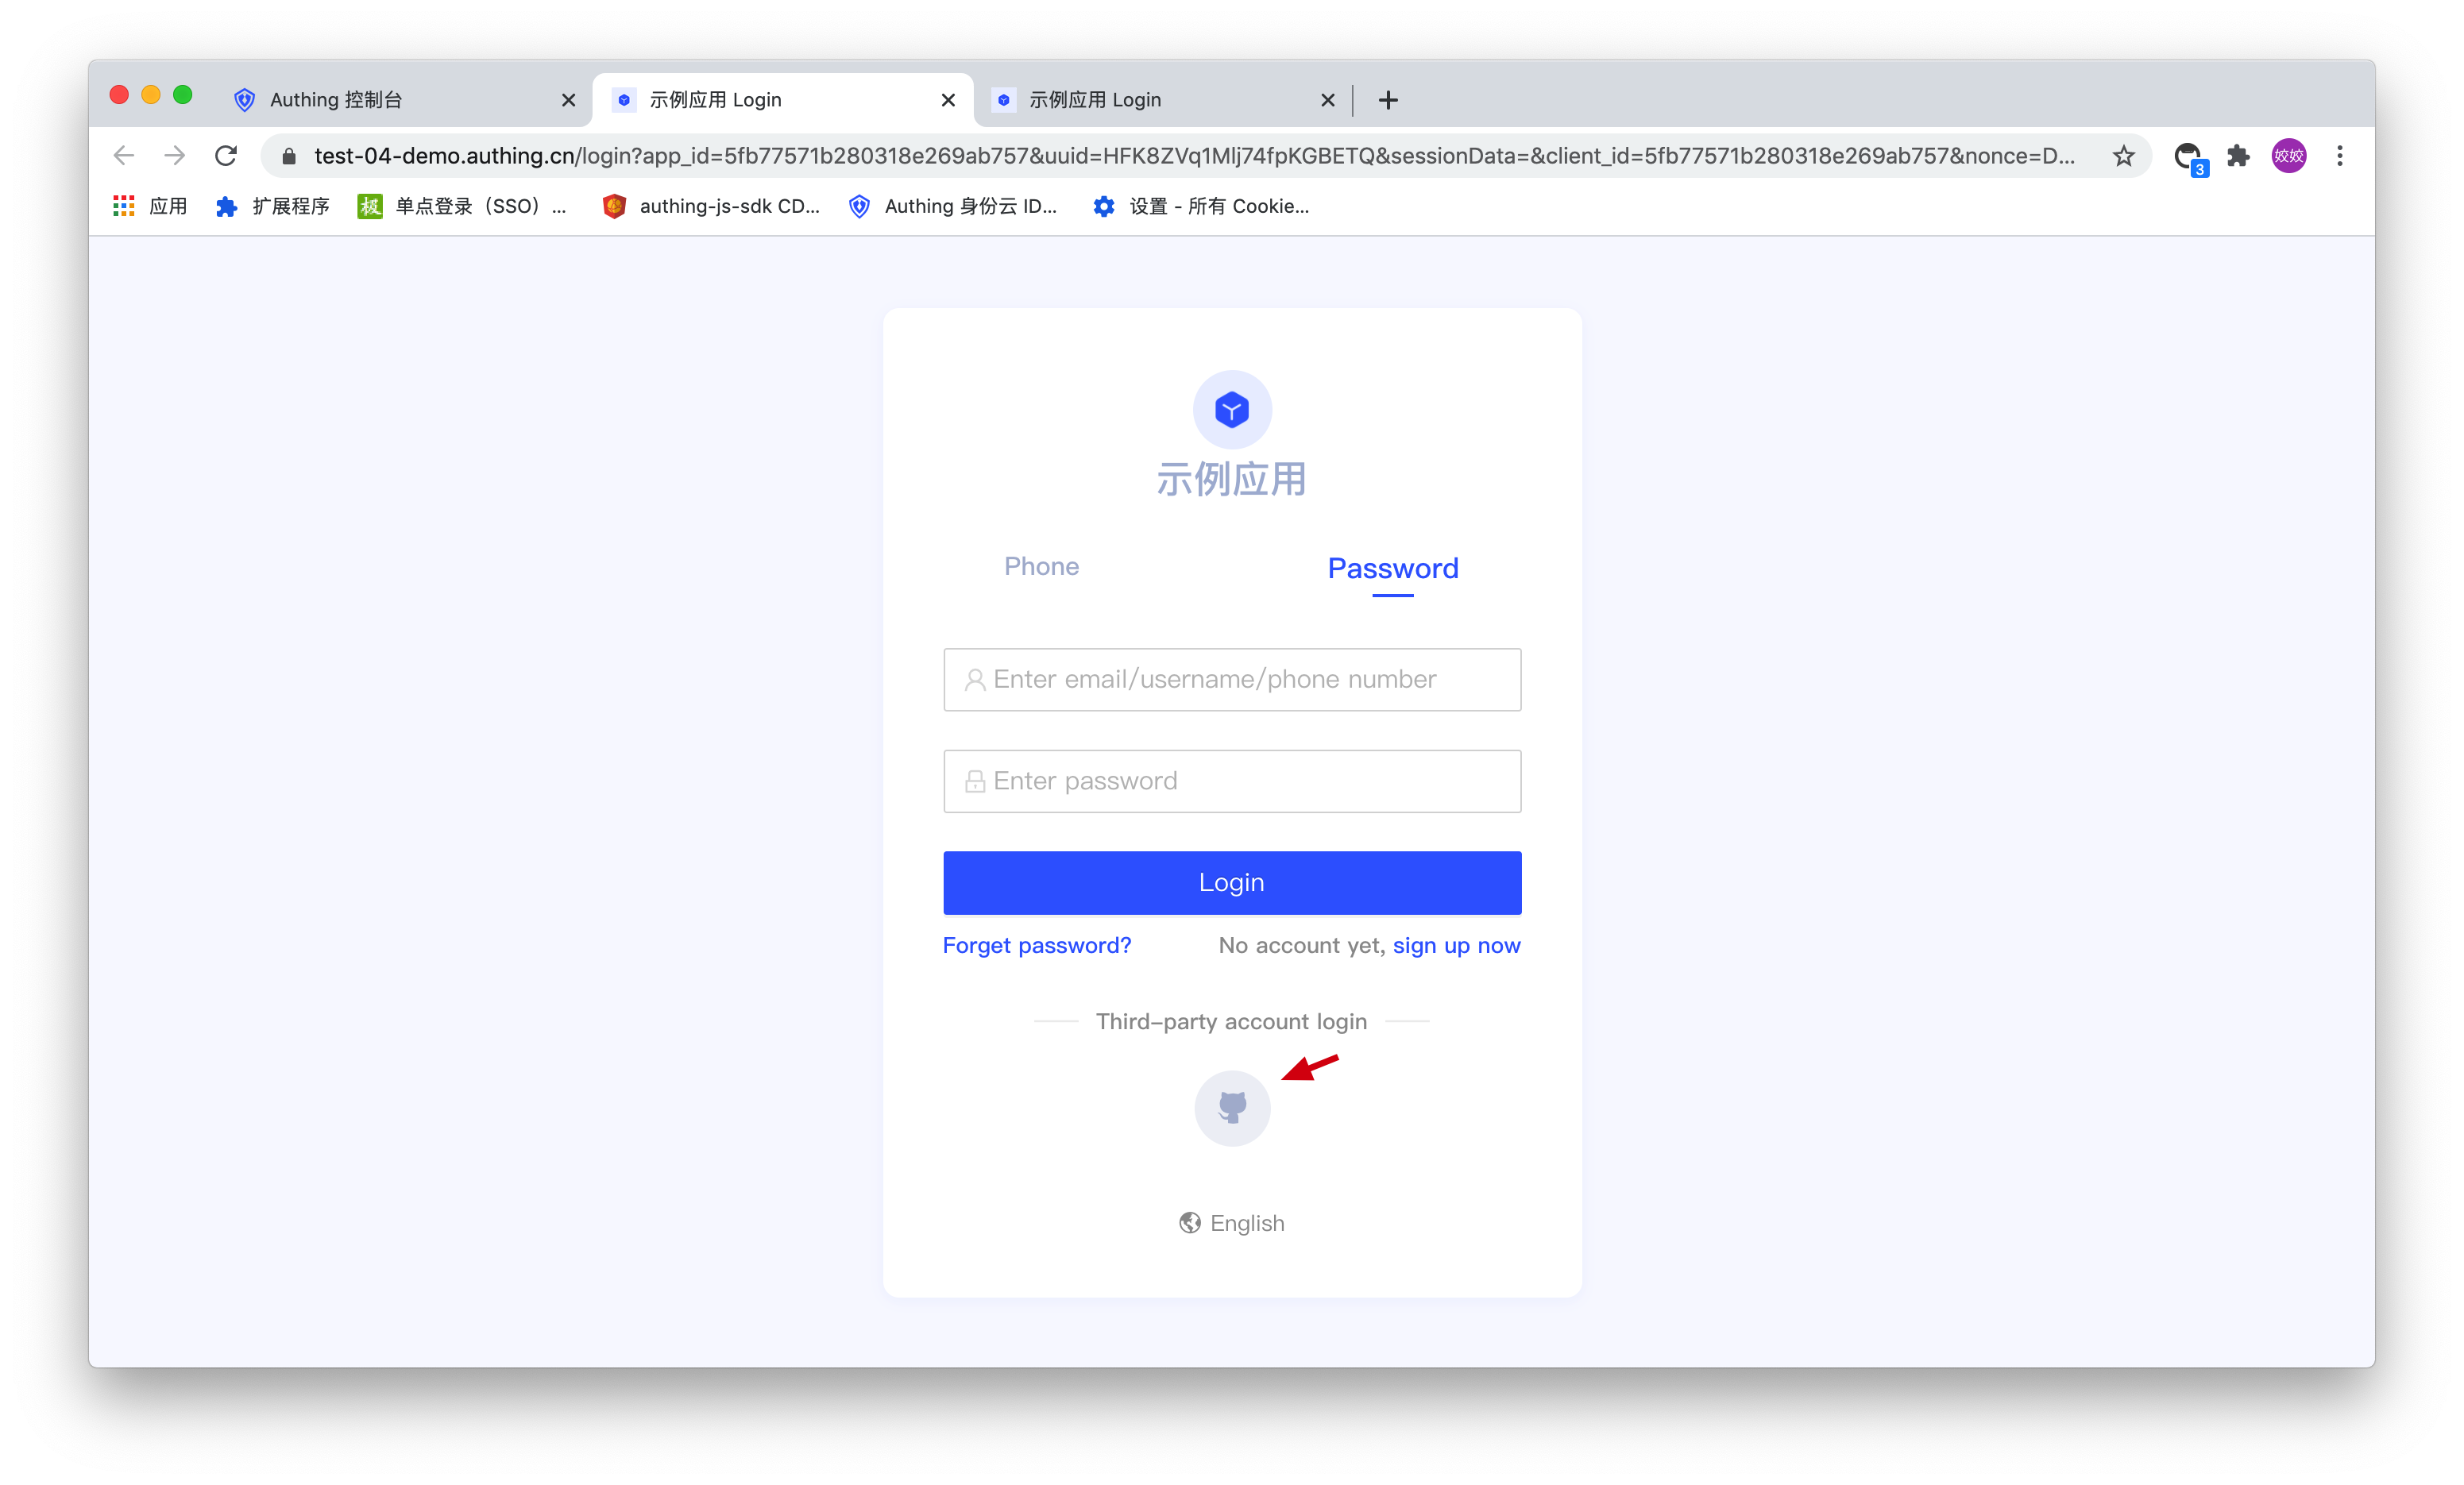
in the social login tab, you can configure which social login methods the application opens:
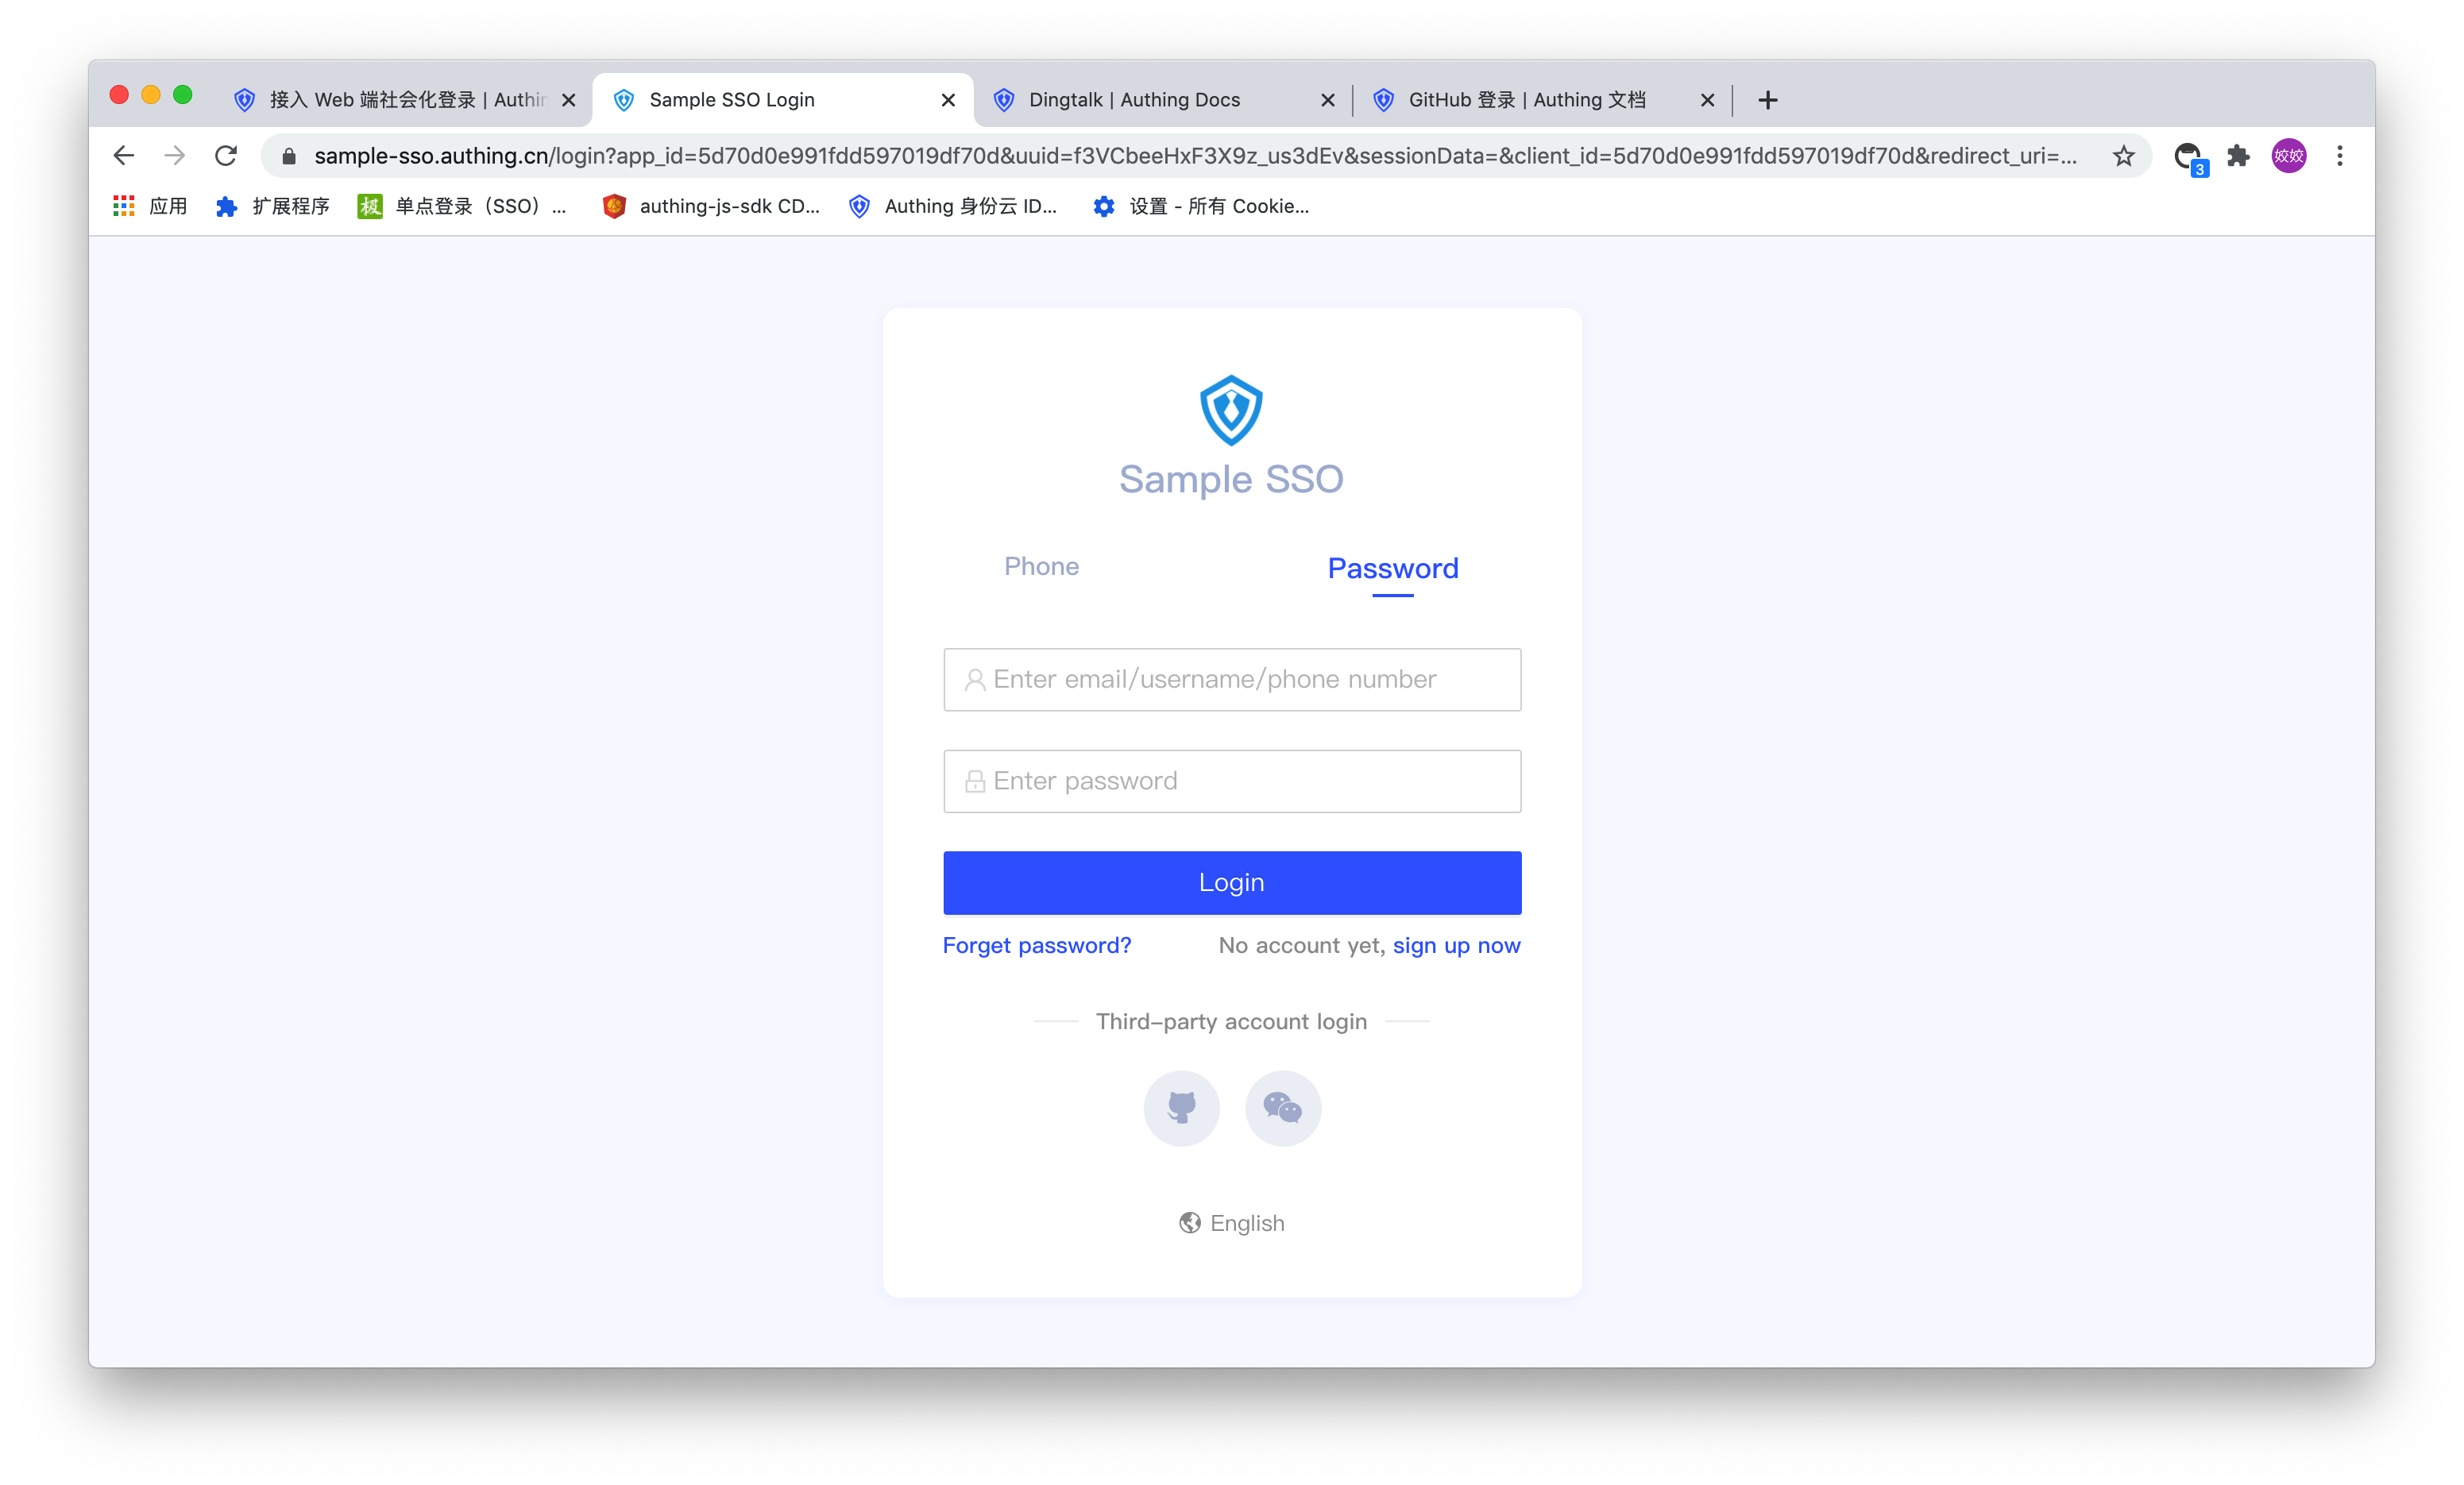
Click the experience button to enter the login page. Click the social login button at the bottom. After the user completes the login at the third-party social login service provider, the user will be prompted to log in successfully, and then jump to the callback link of the application. On this page you can perform operations such as exchanging user information.
# Use in manual mode
The manual mode access process is divided into the following steps:
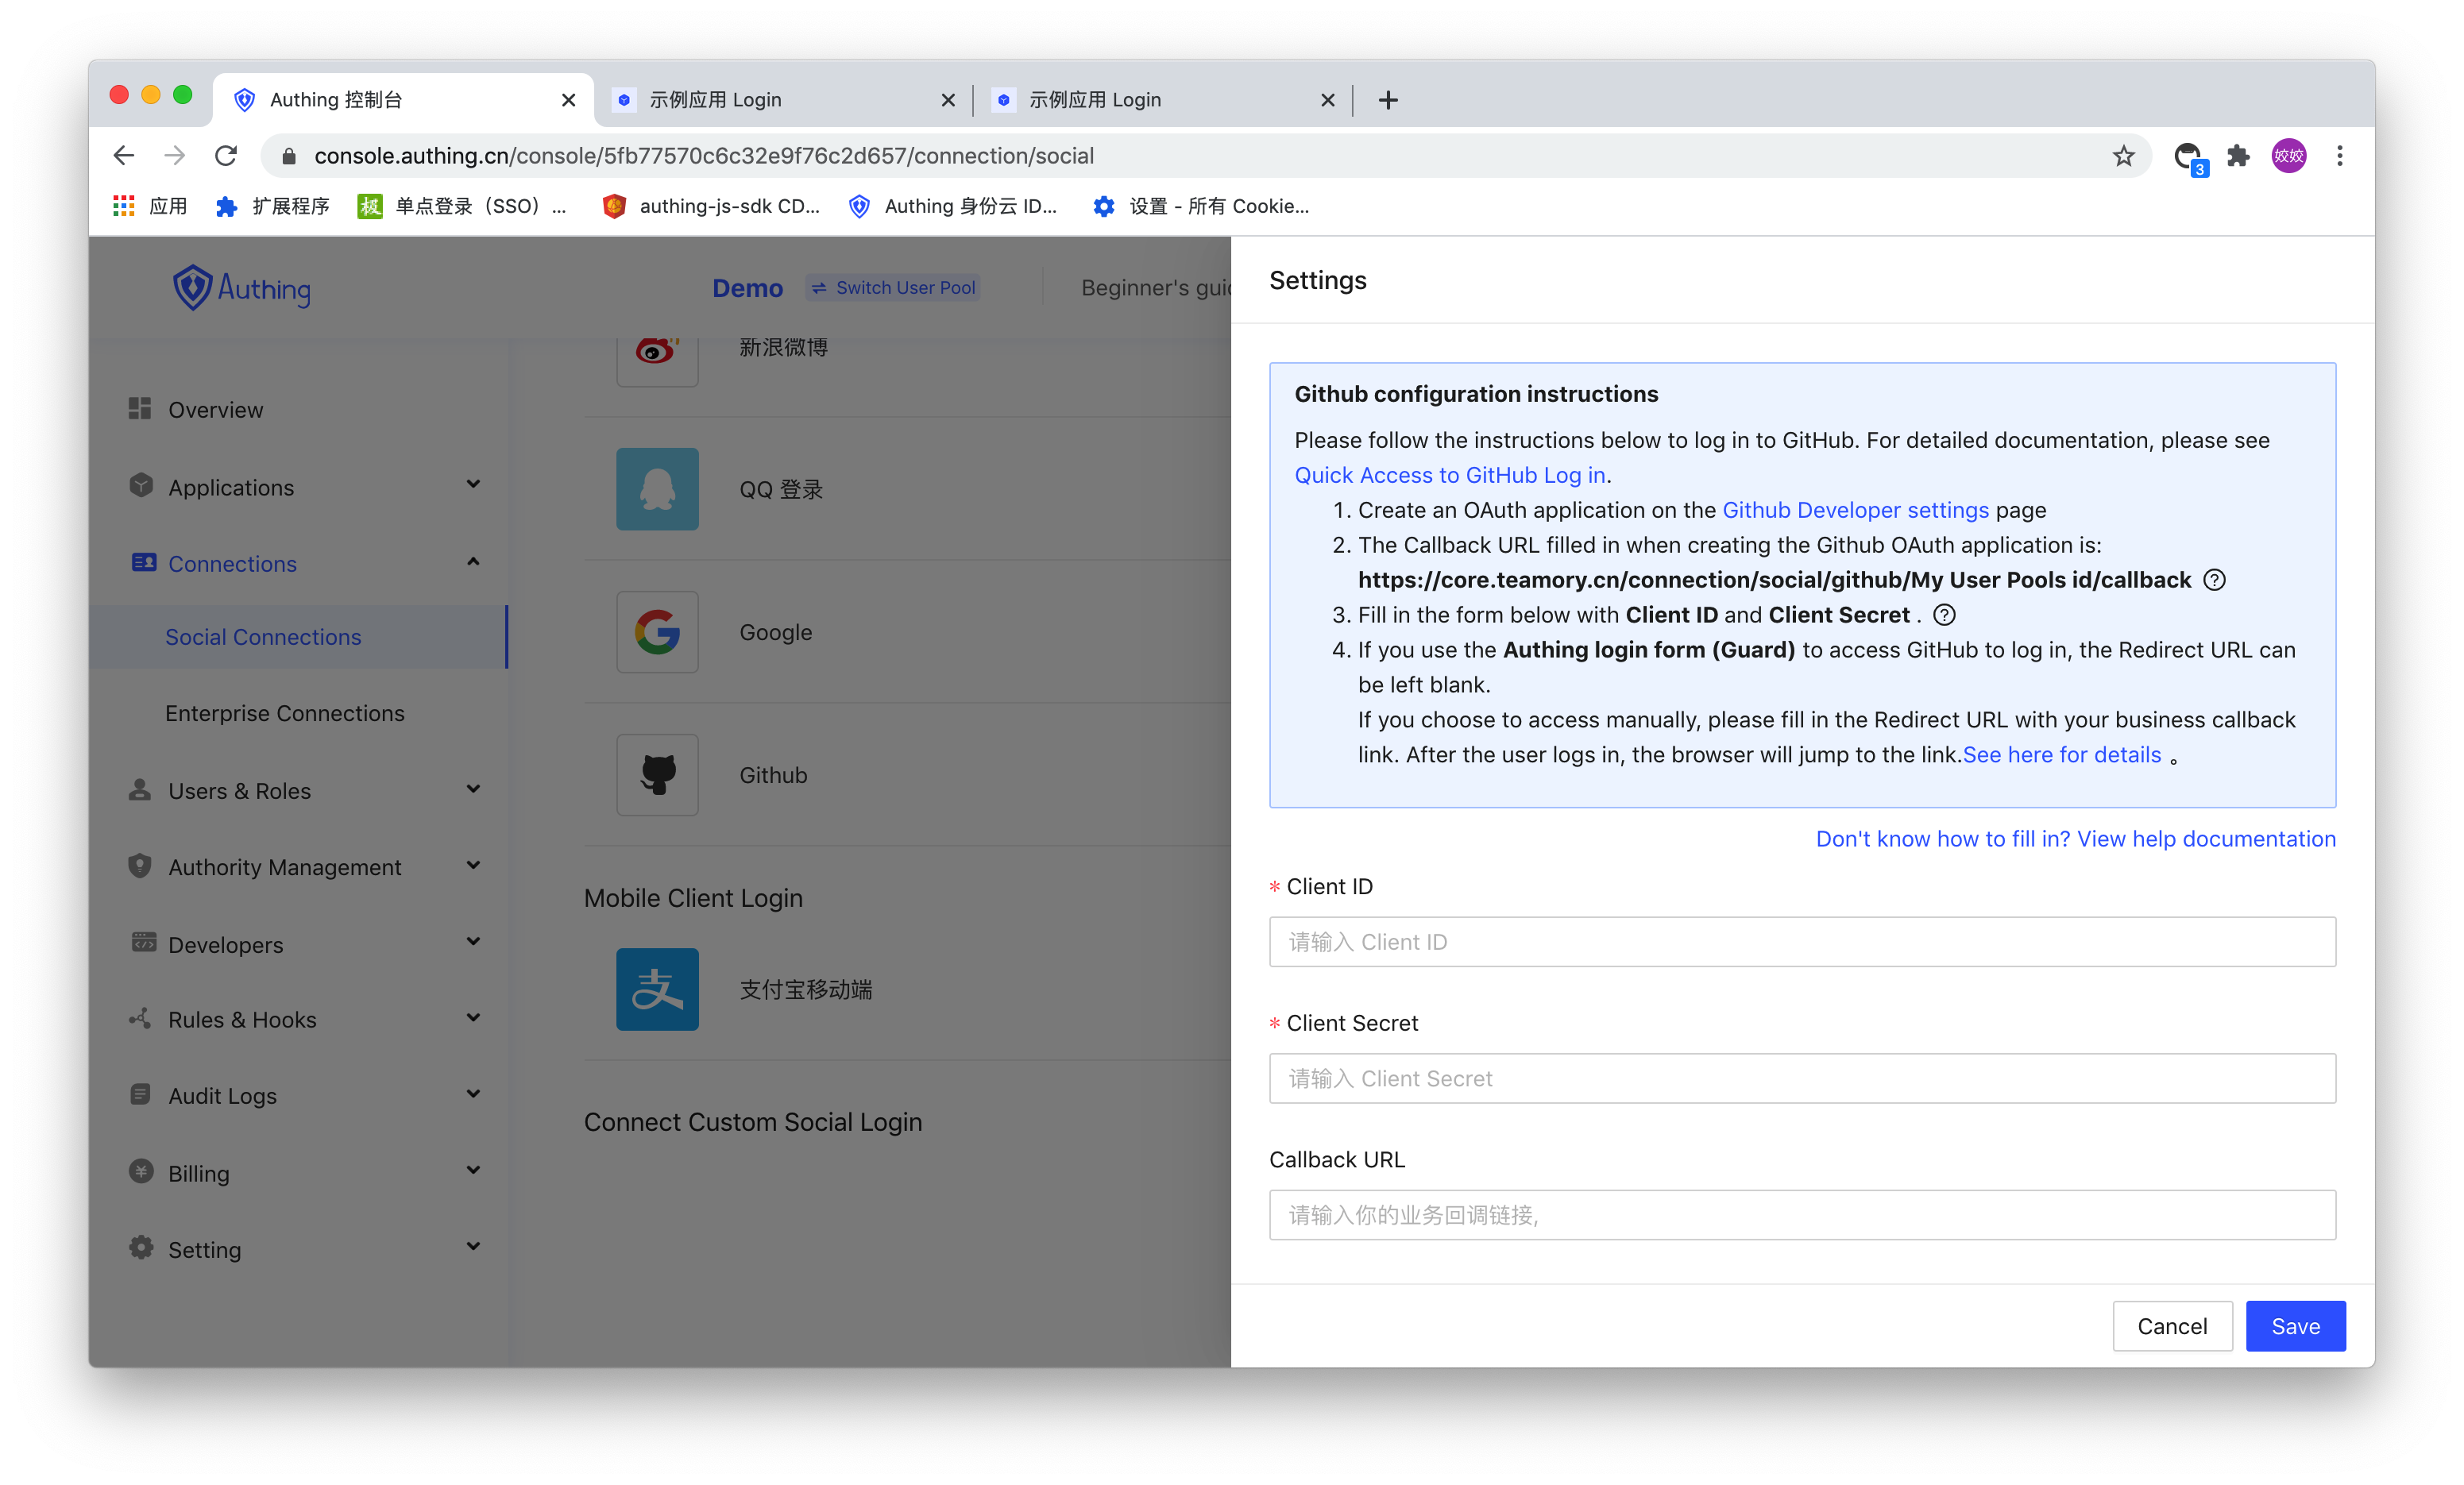
You need to set a callback link (Callback URL) on the configuration page of social login, and the user will be redirected to the callback address after logging in:
# Guide users to jump to the social login authorization page
This operation should be done in the browser. You can place a clickable button or Logo link on the web page to the link above so that users can click to log in.
The following is the authorization page link corresponding to each Web social login:
| Social login method | Social login authorization link |
|---|---|
| GitHub (opens new window) | https://core.authing.cn/connection/social/github/<YOUR_USERPOOL_ID> |
| WeChat PC scan code (opens new window) | https://core.authing.cn/connection/social/wechat:pc/<YOUR_USERPOOL_ID> |
| WeChat Webpage Authorization (opens new window) | https://core.authing.cn/connection/social/wechat:webpage-authorization/<YOUR_USERPOOL_ID> |
| Scan code login for enterprise WeChat internal application (opens new window) | https://core.authing.cn/connection/social/wechatwork:corp:qrconnect/<YOUR_USERPOOL_ID> |
| Scan QR code to log in with enterprise WeChat third-party applications (opens new window) | https://core.authing.cn/connection/social/wechatwork:service-provider:qrconnect/<YOUR_USERPOOL_ID> |
| DingTalk (opens new window) | https://core.authing.cn/connection/social/dingtalk/<YOUR_USERPOOL_ID> |
| Sina Weibo (opens new window) | https://core.authing.cn/connection/social/weibo/<YOUR_USERPOOL_ID> |
| QQ (opens new window) | https://core.authing.cn/connection/social/qq/<YOUR_USERPOOL_ID> |
| Google (opens new window) | https://core.authing.cn/connection/social/google/<YOUR_USERPOOL_ID> |
# Processing Authing callback request
After the user agrees to authorization in the previous step, it will jump to the Authing server first, and then Authing will jump to the business callback link configured by the developer in the Authing console with the user information, with the following Get request parameters:
| Parameter | Description |
|---|---|
| code | Error or success code, 200 means success, non-200 means failure |
| message | Success or error message |
| data | userInfo, this parameter is not returned if the code is not 200 |
Some browsers and Web Servers may have a 404 when the URL is too long, such as ASP.NET. At this time, you need to modify the configuration. For details, please see the StackOverflow answer (opens new window)。
The following is the code to get user data from URL parameters using JavaScript:
// Get URL parameters function getQueryString(name) { var reg = new RegExp("(^|&)" + name + "=([^&]*)(&|$)", "i"); var r = window.location.search.substr(1).match(reg); if (r != null) { return unescape(r[2]); } return null; } // Convert Code to Int type to facilitate judgment const code = parseInt(getQueryString("code")); if (code !== 200) { // error const errorMsg = getQueryString("message"); // Show errorMsg to users or perform other business ... } else { const userInfo = getQueryString("data"); // Store token to localStorage // It is recommended to attach the Token to the subsequent request and verify the validity of the Token by the backend localStorage.setItem("token", userInfo.token); }复制成功
# Next Step
After obtaining the user information, you can get the login credential token. You can carry this token in subsequent API requests, and then distinguish different users based on this token in the back-end interface. For details, please refer to the verification token.